Contents
- DIY drone: Lesson 1. Terminology.
- Do-it-yourself drone: Lesson 2. Frames.
- Do-it-yourself drone: Lesson 3. Power plant.
- Do-it-yourself drone: Lesson 4. Flight controller.
- Do-it-yourself drone: Lesson 5. Assembly.
- Do-it-yourself drone: Lesson 6. Performance check.
- DIY Drone: Lesson 7. FPV and Distance.
- Do-it-yourself drone: Lesson 8. Airplanes.
Introduction
The first six lessons examine the design considerations behind the creation of a dedicated multi-engine UAV / Drone. Lesson 7 does not cover the assembly aspects, but describes a number of additional accessories / devices used to implement first-person flight (FPV) and long-range control. This article is more focused on the use of radio control in the "field"; as opposed to flying indoors or in locations where outlets can provide power. Please note, this tutorial only covers a very small piece of information required to properly understand FPV / Long Range Systems and is mainly intended to introduce the reader to the concepts, terms, products and principles behind FPV and long range drone control.
First Person View (FPV)
First Person View (FPV) is one of the main driving forces behind the rapidly growing popularity of multi-engine UAVs, allowing you to get a completely different perspective ("Bird's-eye view") of our planet and the very sensation of flight. While the addition of a camera to a UAV is nothing new, the relative ease of control, low price and wide range of drones make it easy to buy or build a drone with a camera.
First-person view (FPV) is currently implemented using a tandem pre-installed on the aircraft, consisting of an FPV camera and a video transmitter, which allows real-time video to be sent to the pilot or assistant. Please note that there are ready-made or semi-finished FPV systems on the market, where, in turn, ready-made FPV systems provide the user with confidence that all of its elements are compatible with each other.
Video camera
- Almost any video camera that has the ability to connect to a video transmitter can be used to implement FPV flight, so however, weight is important to consider, as multi-engine UAVs constantly struggle with gravity and lack the advantages of a winged aircraft to provide additional lift.
- Camcorders come in a wide variety of shapes and sizes, and can also have different potential in the quality of shooting, however, at present, very few are adapted specifically for UAVs. Due to these limitations in size, weight and performance, most of the cameras used in multi-motor FPV systems come from "action cameras" as well as CCTV and security applications (eg hidden cameras).
- Large cameras such as DSLR (SLR) or large camcorders are commonly used by professionals, but due to their weight, the drone required tends to be quite large.
- Some camcorders can be powered directly from a 5V power supply (useful since most flight controllers also operate at 5V when powered by a BEC), while others may require 12V or even their own built-in rechargeable battery.
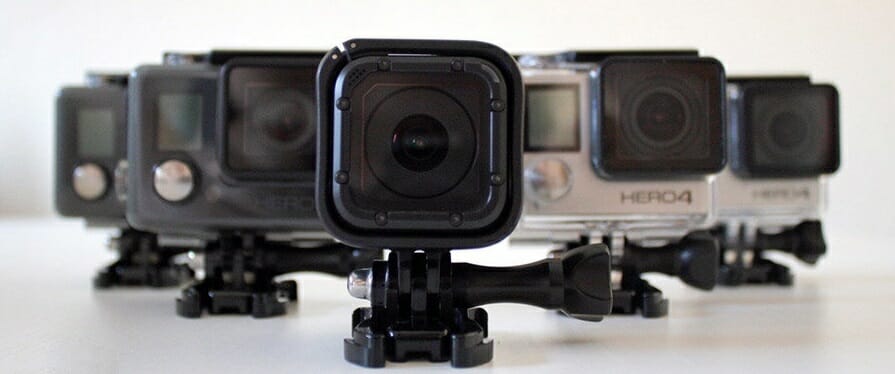
- The most popular camera currently used on multi-engine UAVs is the GoPro. This is due to their durability, small size, high video / photo quality, built-in battery, wide range of accessories and worldwide availability. GoPro cameras also have a USB output that can be used for video transmission, and some even have built-in WiFi for short distance video transmission.
- Given the success of GoPro, many other manufacturers have created their own similar line of sports / action cameras, but the specs, price, and quality vary. Please note that if you require 3D video, you will need two cameras and a VTX capable of transmitting two signals.
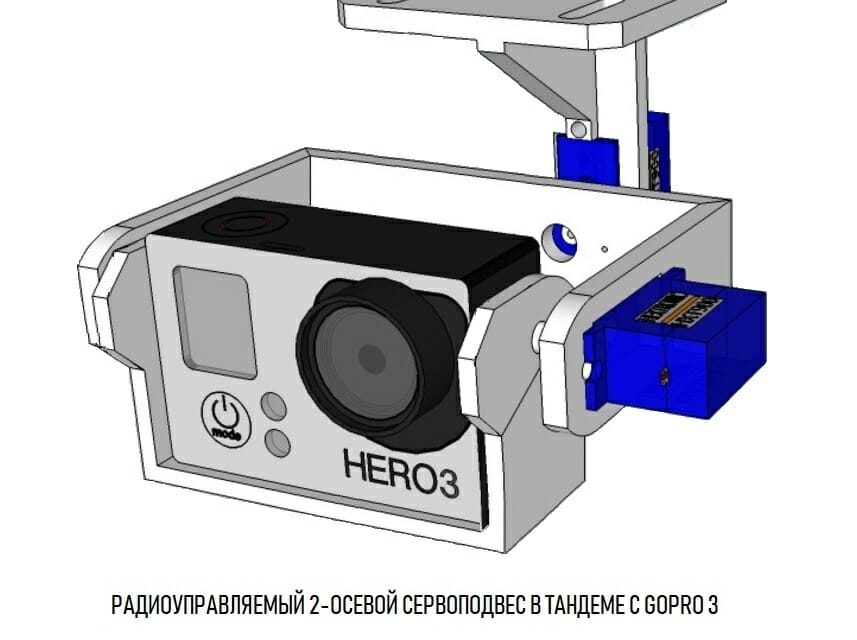
Gimbal
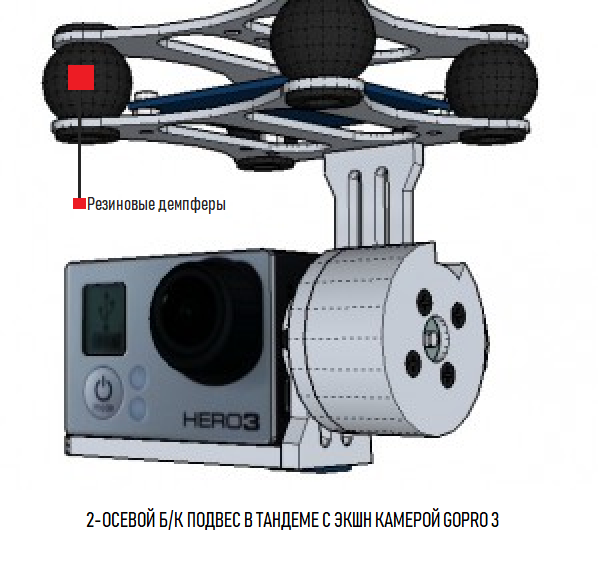
Gimbal includes a mechanical frame, two or more motors (usually up to three for panning, tilt and roll), as well as sensors and electronics. The camera is mounted so that the motors do not have to provide angular force (torque) to keep the camera at a fixed angle ("balanced").
The axes in question allow you to pan, tilt or pan the camera. A 1-axis system that does not have its own sensor can be thought of as a pan or tilt system. The most popular design involves a dual motor setup (usually BLDC motors specially designed for use with gimbals) that controls the tilt and pan of the camera. Consequently, the camera is always facing towards the front of the drone, which also ensures that the pilot is not disoriented if the camera is facing in one direction and the front of the drone in the other.
The 3-axis gimbal adds panning (left and right) and is most useful in tandem with two operators, where one person operates the drone and the other can independently control the camera. In this two-person configuration, a second (fixed) FPV camera for the pilot can also be used. Generally, there are two types of gimbal systems:
Brushless Direct Current Motor (BLDC) or Permanent Magnet Synchronous Motor (PMSM) or (Valve Motors (VD)) - Provides fast response with minimal vibration, but requires a separate (and dedicated) brushless DC controller.
To automatically maintain the level of the camera, an inertial measurement unit (IMU), consisting of an accelerometer and a gyroscope, is installed somewhere around the camera (usually underneath the camera mount) so that the position of the camera (relative to the ground) can be tracked. The readings from the block are sent to a separate DC brushless controller board (often installed directly above the gimbal) that rotates the motors so that the camera stays in a certain orientation despite any movement of the drone. The controller board itself includes an embedded microcontroller. The gimbal's brushless DC controller can usually be connected directly to a channel on the receiver (as opposed to the flight controller), since it responds to changes in camera orientation, not UAV orientation, and therefore does not depend on the flight controller. Please note that since the GoPro is a popular action camera, most brushless gimbals are designed to be used with one or more GoPro models (based on GoPro size, center of gravity, camera location, etc.). You will also notice that BLDC gimbals almost always have damping that minimizes vibration transmitted from the drone to the camera.
RC servo gimbal
- At the heart of RC servo gimbals, servo drives tend to offer slower response times than brushless gimbals, and excessive vibration. At the same time, servo systems are much cheaper than brushless ones, and 3-pin servos in most cases can be connected directly to the flight controller, which allows you to use the built-in IMU in the PC to determine the level relative to the ground, and then move the servos.
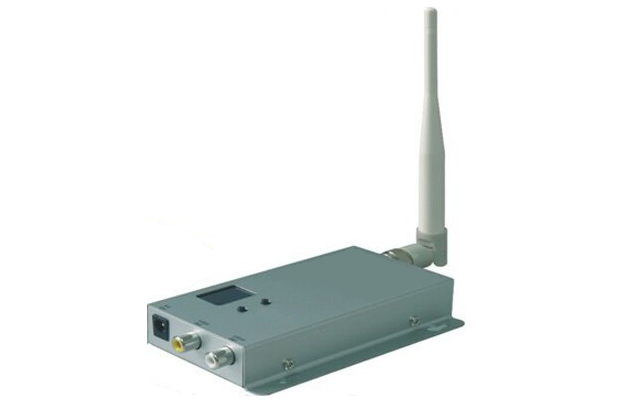
Video transmitter (VTX)
) have a built-in VTX, which means that a separate VTX retrofit is usually required. VTXs used in drone hobby are popular nowadays as they are light and small. Other third-party VTXs can be used, but in this case there are some important power connection considerations to be taken into account (may need to be configured if the device only accepts power from the "Barrel" connector) and the input voltage; If the video device operates at a voltage that is not on board your build, where, you may need additional electronics, such as a voltage regulator. VTXs not affecting the drone hobby are rarely satisfying in terms of weight or size, and are usually enclosed in a protective case (and sometimes unnecessarily heavy).
VTX power
VTX is generally rated for a specific output power, but it should not be assumed that anyone can use any power rating available on the market. Wireless frequencies and power are carefully monitored and regulated, so it is highly recommended that you check the wireless regulations in the country where you are located.
The power consumed by a VTX directly affects the maximum range of its signals. In North America, a wireless transmitter that consumes more than a certain power (in watts) requires an operator to be licensed by an amateur radio operator (HAM) to operate. For example, in Canada, a long-range FPV operator is usually required to pass at least a Basic Amateur Radio Proficiency Test to operate at the power required for long-range wireless applications.
If you are not qualified, it is strongly recommended that you use a video transmitter less than 200 mW to avoid the risk of legal action (authorities may contact you if your signal interferes with other wireless signals).
Power for the VTX is usually supplied by the BEC from one of the ESCs, which also powers the rest of the electronics. If you suspect that all the electronics are drawing more current than one BEC can supply, you can use the BEC from the second ESC to power the VTX. It is not recommended to use a separate battery to power the VTX.
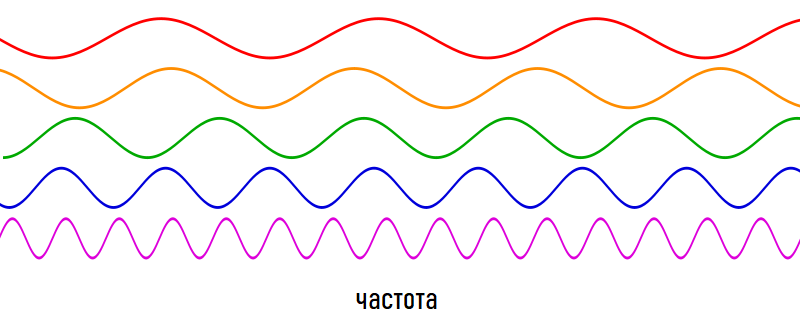
VTX Frequencies / Channels
Most VTXs operate at one of the frequencies listed below. Please note that since you will probably already be using standard control equipment that operates at a specific frequency, it is wise to select the VTX so that the frequencies do not match. For example, if your remote control operates at 2.4GHz, you should look for a VTX with an operating frequency of 900MHz, 1.2GHz, or 5.8GHz.
900MHz (0.9GHz)
- Low frequency signals can more easily penetrate walls and trees
- DIY antennas are easy to make because low frequencies imply larger antennas
- Image quality is not as good as 5.8GHz
- May have a negative impact on GPS receivers
- Considered "old" technology
- Overall best for mid-range
1.2GHz (1.2 to 1.3 GHz)
- Used for long-range FPV flying because it offers good distance
- Many different antennas on the market
- Frequency typically used by many other devices
- Walls and obstacles have more impact than lower frequency
- Medium / Long Range
2.4GHz (2.3 to 2.4GHz)
- Used for FPV over long distances with few obstacles
- One of the most widely used frequencies for For wireless devices
- Many accessories are available (antennas, transmitters, etc.)
- Do not use near parallel RC transmitters or other devices that may cause interference.
- May operate with other frequencies, but will not be covered in this section.
5.8GHz
- Great for short range applications
- Walls and other obstacles have a significant impact on range
- Antennas are small / compact
- Best for FPV in drone racing
As you may have noticed, many common wireless devices operate at 2.4GHz (wireless routers, cordless phones, bluetooth, garage door openers, etc.). This is largely due to the fact that government regulations of the FCC stipulate that the frequency band around this range does not require a license to operate; the same for 900MHz, 1.2GHz and 5.8GHz (within the specified power range). The unlicensed frequency range includes the so-called free ISM range (from the English Industrial, Scientific, Medical: industrial, scientific and medical range), occupies the frequency band: from 2400 to 2483.5 MHz in the USA and Europe and from 2471 to 2497 MHz in Japan. This means that any consumer can purchase a wireless device that operates on one of these frequencies without worrying about regulations or guidelines. More information on amateur radio frequency allocation can be found on Wikipedia.
VTX connectors
Not all VTXs have the same connectors, so it is important to know which connector is installed in the selected camera, and also to see if it is possible to connect and work with the selected VTX. The most popular connectors are composite, mini / micro USB, and 0.1 "(analog) connectors. There are a number of adapters / adapters on the market, for example: 0.1 ″ FPV Tx connector - miniUSB for use with a GoPro camera, which greatly simplifies the use of such products.
Some VTXs may also have an audio input, however in most cases the noise from the powertrain will drown out any sound you hope to record. If you need sound, be sure to position the microphone as far away from the motors as possible (it will take a lot of testing to find the maximum optimal location) and select a compatible receiver.
VTX antenna
VTX antennas used on unmanned aerial vehicles tend to be either "Duck" or "Whip". Duck antennas are the most common and have the advantage of being omnidirectional, compact, inexpensive and remain stationary during flight due to their small profile.
Antenna selection should match the VTX frequency. Higher frequencies require smaller antennas, but transmitted signals have greater difficulty getting through obstacles. Low frequencies are less susceptible to interference, but require large / long antennas. A directional antenna is not very often used for video transmission, as the UAV can actually be in any orientation in three-dimensional space. Ideally, the antenna should be located somewhere on the UAV, where there are no sources of other wireless signals or electrical interference.
Video receiver (VRX)
The video receiver tends to be slightly (physically) larger and heavier than the VTX because the receiver is usually stationary (connected to the screen) while the transmitter is mounted on the drone and, as such, should be small and lightweight. To save space, some LCD display manufacturers include standard frequency wireless receivers in their displays.
Many FPV enthusiasts use Clover Leaf or Pinwheel antennas on their FPV goggles, which allows them to orient their head in the direction of the drone to maximize signal strength. Several FPV goggle manufacturers have also supported this trend and have begun to include a wireless video receiver and antenna in the package of their goggles.
Obviously, the frequency at which the video receiver operates must match the frequency of the transmitter. Some receiver models, however, offer a wide variety of channels (one at a time), making them compatible with a variety of VTXs. The video receiver's output tends to be either composite (most common) or HDMI. What to connect to the output (video display) is up to you, and some of the options are described below. Powering a receiver in the field always involves using a battery that either provides an output voltage that matches the operating voltage of the receiver, or a battery that is connected to a voltage regulator to provide the required voltage. Please note that there are no “long range” video receivers as the signal range depends on the power of the transmitter and the correct antenna.
Video receiver antenna
Antennas used on video receivers can be omnidirectional (capable of receiving a signal from any direction) or directional. The most common antennas that can be found on a video receiver are: Duck antenna, Cloverleaf / Pinwheel or, in rare cases, directional (eg "Yagi"). A directional antenna will be relevant only when the UAV is flying in a certain direction in relation to the operator, and the drone will always be "in front" of the antenna in order not to lose the signal. Situations may include exploring a specific area (such as a field) or an area that is distant from the operator.

Video display
LCD monitor (LCD monitor)
- When considering an LCD monitor, it is important to know the difference between a desktop / computer LCD monitor or LCD TV and one that is intended to be portable. A TV / computer monitor almost always has a power connector that is compatible with a standard computer power cable (draws AC power directly), making it very difficult to use with a battery. The LCD / OLED display, which should be more portable, often draws DC power and requires an external transformer to connect to the mains (A / C).
- The size, refresh rate, and display quality of the display used for FPV applications ranges from small monitors with grainy images that refresh several times per second, to large displays that, when combined with the correct VTX and receiver, display large HD images without any apparent lag. Keep in mind that whatever 2D display you choose must be connected to a power source and installed, either inside the UAV base station (described below) or by attaching the FPV monitor to the control equipment.
FPV goggles
- 2D goggles
- The video quality offered by inexpensive FPV goggles can be quite low, so if budget matters, please note that you can get a better experience from a larger LCD monitor for the same price as FPV goggles....
Head tracking
- Head tracking is essentially the same as motion tracking, namely, measuring the 3D orientation / angles in contrast to linear motion. The sensor complex consists of MEMS chips of an accelerometer, gyroscopes or inertial measurement units (IMU). The sensors are installed (or built into) FPV / VR goggles and send data to the microcontroller to interpret the sensor data as angles, which then sends the data, either through control equipment (for higher-end models) or through a separate wireless transmitter. The ideal head tracking system is compatible with the transmitter, so angles can be sent with the transmitter on two free RC channels.
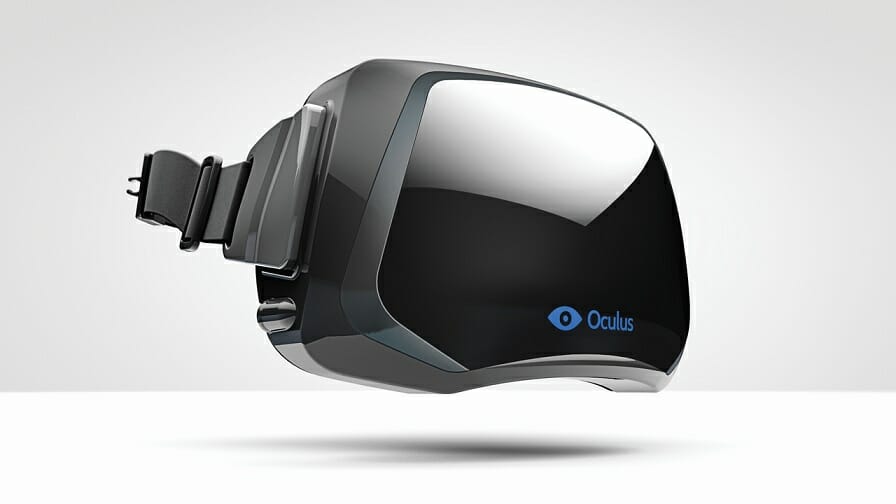
3D / Virtual Reality
- Occulus Rift, Samsung Gear, Morpheus, smartphone-based VR glasses and many other 3D / Head-mounted VR displays can be adapted for use with drones. While these devices are usually built for 3D PC / console gaming or as an alternative to TV, these devices are natively 3D compatible and often have head-tracking sensors built in, becoming more and more interesting for the drone FPV community.
Smart devices
- Smartphones, tablets or laptops can be used to display live video. Their batteries are built-in and the devices themselves are lightweight. The difficulty in using smart devices lies in the fact that most receivers are not designed to receive a video signal from a wireless video receiver (one of the two is wired or wireless). A laptop or tablet with a built-in or USB video card can receive normal composite video. The smartphone currently works best with video sent over Wi-Fi (from the camera's Wi-Fi to the Wi-Fi adapter). Using GoPro's Wi-Fi video signal and mobile app is one of the easiest ways to implement FPV, but it's worth noting that the camera's Wi-Fi signal range is very limited (10-20 meters). Since smartphones are widespread and drones are all the rage, manufacturers regularly release new products that they benefit from, so think carefully before deciding.
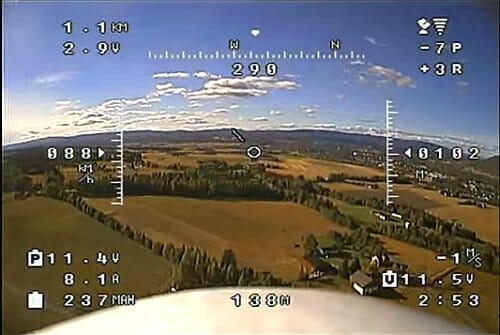
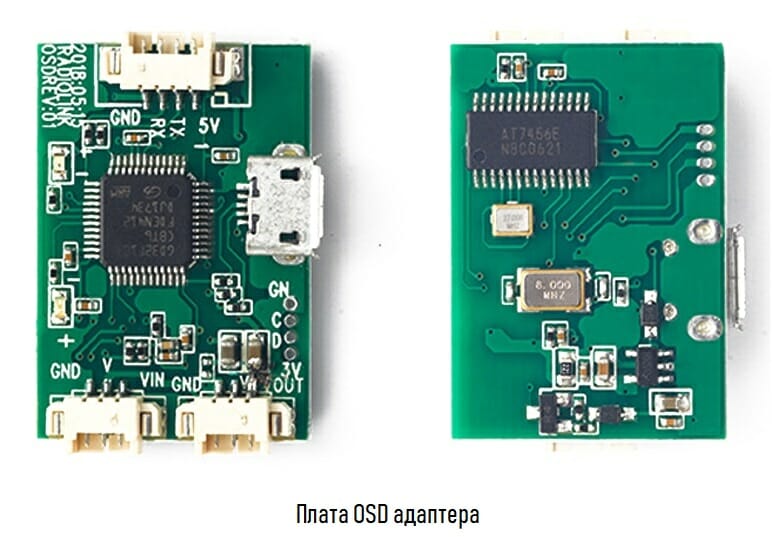
On Screen Display (OSD)
- On Screen Display (OSD) allows the pilot to see various sensor data sent from the aircraft. One of the easiest ways to display data on the screen is to use an analog output camera and place a display board between the camera output and VTX. The OSD adapter board has inputs for various sensors and will overlay data on video, so the pilot will receive a video with telemetry data already overlaid.


Distance Considerations
- on the power of the transmitter (control equipment, as well as video, if applicable). Typically RC transmitters include an RF system consisting of joysticks and switches, electronics and an RF transmitter, and less expensive RC components, this system is almost always a single unit. Higher-end models often have a RF module
Power
UAV / Drone
Your UAV / Drone is made up of many different parts, each requiring a specific voltage. The most common electronics you'll find in an FPV system or long-range drone include:
- Engines: Most mid-sized UAV engines tend to operate at 11.1V or 14.8V.
- Flight controller, receiver, GPS: ideally they should be powered by the BEC from one of the ESCs.
- Head tracking receiver: it will also work from BEC.
- Servo Gimbal: The servo gimbal can be powered from one of the BECs to the ESC and operate at 5V.
- BLDC gimbals: Some BLDC gimbals can be connected to the main battery charging connector, while others may require a certain voltage. Check the specifications of the gimbal you are purchasing.
- Camera: Cameras used for FPV flight tend to operate at 5V (from BEC) or 12V (main battery). Most action cameras have their own built-in battery.
- VTX: Most operate at 5V and can be powered by the BEC.
- Additional electronics (lighting, parachute, etc.): 5V.
It is recommended that the UAV has only one main battery and you should consider using an 11.1V or 14.8V battery on a medium sized drone. If more than one ESC has no BEC, you will need an external 5V voltage regulator to power the electronics, and make sure it can supply enough current for everything.
Pilot
While the average drone user only needs to worry about the performance of the control equipment, the pilot of a full FPV rig may end up carrying large batteries, and a variety of additional equipment.
- Portable control equipment: Most remotes are powered by “AA” batteries (4 × AA or 8 × AA) by default, but FPV may require external battery power to the equipment...
- Optional RF Transmitter: If you are not using the RF Transmitter / Receiver supplied with the remote control, higher-end models usually have a power output to which this module can be connected... Alternatively, you can power it with an external rechargeable battery that powers the remote control.
- Head tracking receiver: Usually this unit can be powered from 5V.
- Video receiver: Most require 12V, but often have a fairly wide input voltage range. Most often, the receiver comes with a power adapter that you will not use in the field. Check the input voltage ranges to see if you can use the same voltage to power the transmitter and receiver (eg 7.4V or 12V).
- Video display: Be sure to select a portable LCD display with a “Barrel” connector so that you can use the battery pack for input. FPV goggles usually also have a Barrel input, but don't forget to check. The most common voltage for portable LCDs is 12V, which may not be the best for other devices.
- Antenna Tracker: Described below. This motorized device often consists of radio controlled servo motors, a microcontroller, and additional sensors / electronics. There are very few commercial systems for the hobby drone market, so if you design and build such a system, you will need to design a power setup.
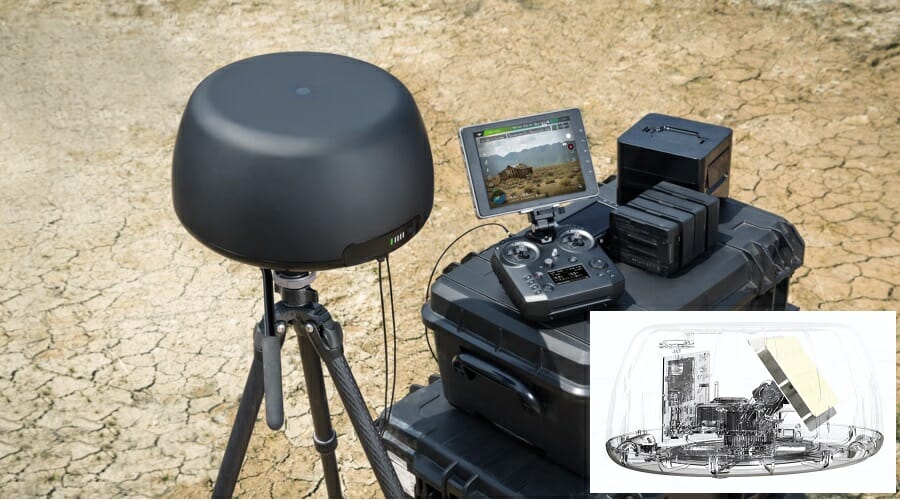
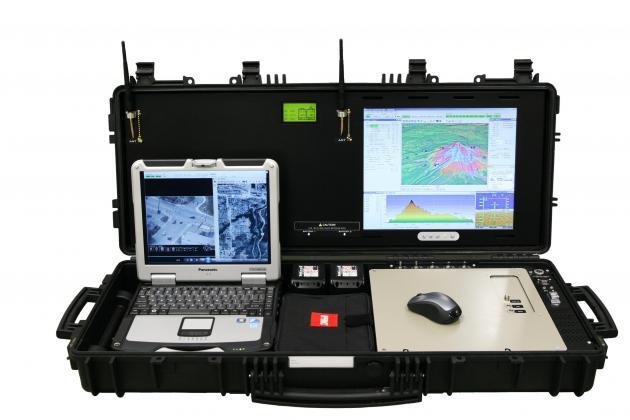
Base station
As stated above, there is a lot of equipment that the pilot needs to carry and power, and that can be very bulky. Base stations are often used to free the operator from this burden / confusion and can consist of any number of different equipment and compartments listed below. It is not difficult to imagine that the outcome of preparation for flight depends on how well the base station is assembled, the wiring harnesses connecting all these devices are laid.
The base station may include:
- The main battery, possibly used to power the LCD monitor and / or FPV goggles and possibly a video receiver.
- Auxiliary battery for transmitter and / or video receiver.
- LCD monitor mount and / or FPV goggle mount.
- Mount for video receiver.
- Storage space for control equipment.
- Long-range antenna mount (or location for a portable directional antenna)
- A location for a charger for the main battery (s).
- Space for spare parts for the drone (propellers, motors, batteries, frame elements).
The "base station" is not necessarily a commercially produced product that can be easily used with any unmanned application, on the contrary, it can be designed and built by an amateur pilot on his own. Typically building a base station starts with choosing a durable carrying case (such as a Pelican or Nanuk), although a rigid backpack can also be used / adapted. Often a tripod is used to mount the antenna higher off the ground.
.Antenna tracker
Antenna tracker is an electromechanical device that tracks the position of a drone in three-dimensional space using GPS coordinates, and, knowing the location of the GPS tracker, directs the antenna to the side drone. Antenna trackers are commonly used in long-range missions and there are not many commercial products on the market. The tracker consists of a GPS receiver, a compass (and sometimes an IMU), a microcontroller, a data receiver (for receiving the drone's GPS coordinates), one rotary and one tilt motor, a mechanical frame, a directional antenna, and a battery. To reduce the negative impact of obstacles, the antenna tracker systems are raised off the ground using a tripod.