- 1 Introduction
- 2 What is the DJI Go App?
- 3 Main flight screen
- 4 Aircraft status
- 4.1 Compass
- 4.2 Remote Controller Mode
- 5 Main Controller Settings
- 5.1 Home Point Settings
- 5.2 Multiple Flight Modes
- 5.3 Return to Home Altitude
- 5.4 Beginner Mode
- 5.5 Max Flight Altitude
- 5.6 Max Distance
- 5.7 Advanced Settings
- 6 Visual Navigation Settings
- 6.1 Enable Obstacle Avoidance
- 6.2 Enable Horizontal Obstacle Avoidance in TapFly
- 6.3 Enable Backward Flying
- 6.4 Enable Obstacle Avoidance in ActiveTrack
- 6.5 Display Radar Chart
- 6.6 Advanced Settings
- 7 Remote Controller Settings
- 7.1 Remote Controller Calibration
- 7.2 Stick Mode
- 7.3 Button Customization
- 7.4 Linking Remote Controller
- 8 Image Transmission Settings
- 9 Aircraft Battery
- 9.1 Critically Low Battery Warning
- 9.2 Low Battery Warning
- 9.3 Smart Return-to-home
- 9.4 Flight time
- 9.5 Advanced Settings
- 10 Gimbal Settings
- 10.1 Gimbal mode
- 10.2 Advanced Settings
- 10.3 Adjust Gimbal Roll
- 10.4 Gimbal Auto Calibration
- 11 General Settings
- 11.1 Units
- 11.2 Camera
- 11.3 Peak Focus Threshold
- 11.4 Long Press Action
- 11.5 Live Streaming
- 11.6 Map
- 11.7 Clear Flight Route
- 11.8 Video Cache
- 11.9 Cache during video shooting
- 11.10 Maximum Video Cache Capacity
- 11.11 Clear Cache Automatically
- 11.12 Record Audio With Video Cache
- 11.13 Clear Video Cache
- 11.14 Warnings
- 11.15 Clear All Warnings
- 11.16 Other
- 12 Right side of main flight screen
- 12.1 Tilt indicator Camera
- 12.2 Photo / Video Switch
- 12.3 Camera Shutter / Video Recording Button
- 12.4 Gallery
- 12.5 Camera Settings
- 13 Left Side of Main Flight Screen
- 13.1 Auto Takeoff
- 13.2 Go Home
- 13.3 Intelligent Flight Modes
- 14 Map
- 14.1 Map Display Modes
- 14.2 Compass
- 14.3 Center Map
- 14.4 NFZ
- 14.5 Telemetry
- 15 Conclusion
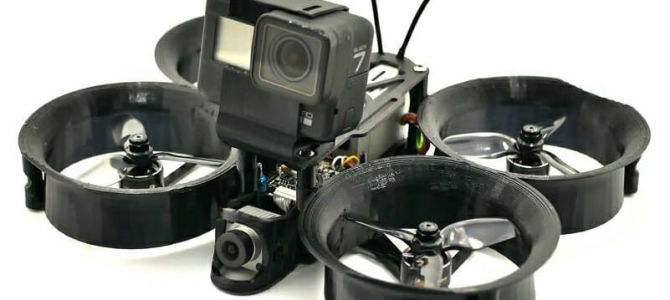
Introduction
In this oral manual, we introduce the reader to the DJI Go 4 mobile app. Let's take a look at each menu, setting, and button to help you better understand this incredibly powerful yet complex application. If you already own such DJI drones as Spark, Mavic Air, Mavic Pro ( PlatinumMavic 2, Phantom 4, Phantom 4 Advanced, Phantom 4 Pro, Phantom 4 Pro V2.0, Inspire 2 then this guide is for you.
For example, after reading the user will know:
- How to change the sensitivity of the control sticks.
- How to fix video stream latency issues.
- Why use configuration settings 1, 2, and 3.
- What is an IMU and why it is important to monitor its status.
- Why the “EV” setting can be useful for adjusting the exposure.
- What the “Video Caption” setting does.
- Why activate "Hardware Decoding".
- What are the C1 and C2 buttons for.
- Why "Cache Map Data" is useful for devices that do not have a cellular connection.
Below, you will find answers to these and other questions. We guarantee that after reading, you will learn a lot and feel even more confident, as well as an advanced drone pilot.
![]()
Note! Depending on which drone model you are using, some of the menus and settings may look slightly different, but rest assured that the basic menu items, functions and concepts will overlap.
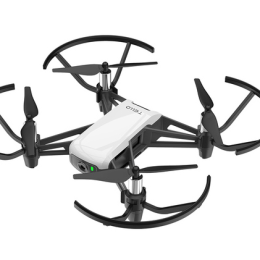
What is the DJI Go app?
The DJI Go app is software that allows you to connect your tablet / smartphone to the remote controllers of the above DJI drones
![]()
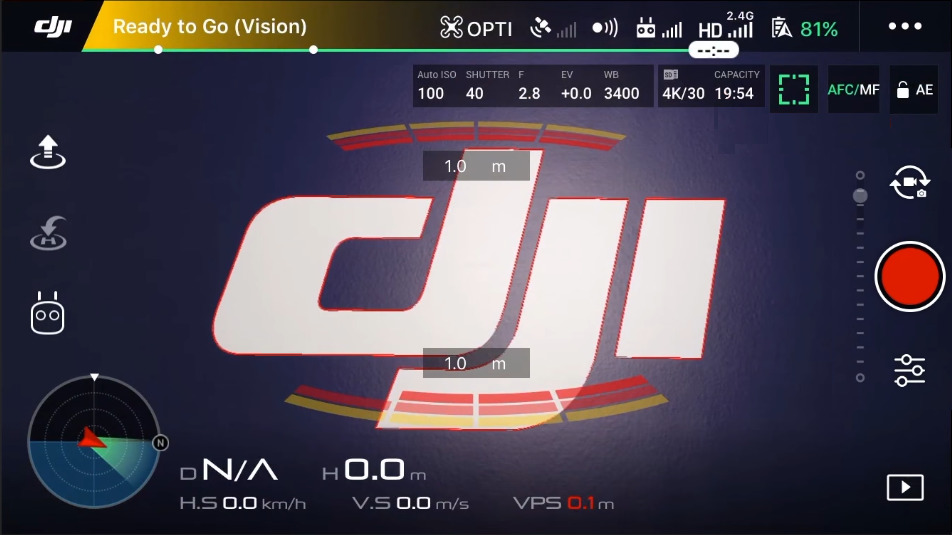
Main flight screen
pilot information for the duration of the flight and shooting, as well as a number of additional virtual buttons / icons for quick access to the main settings / functions of the drone and camera control.

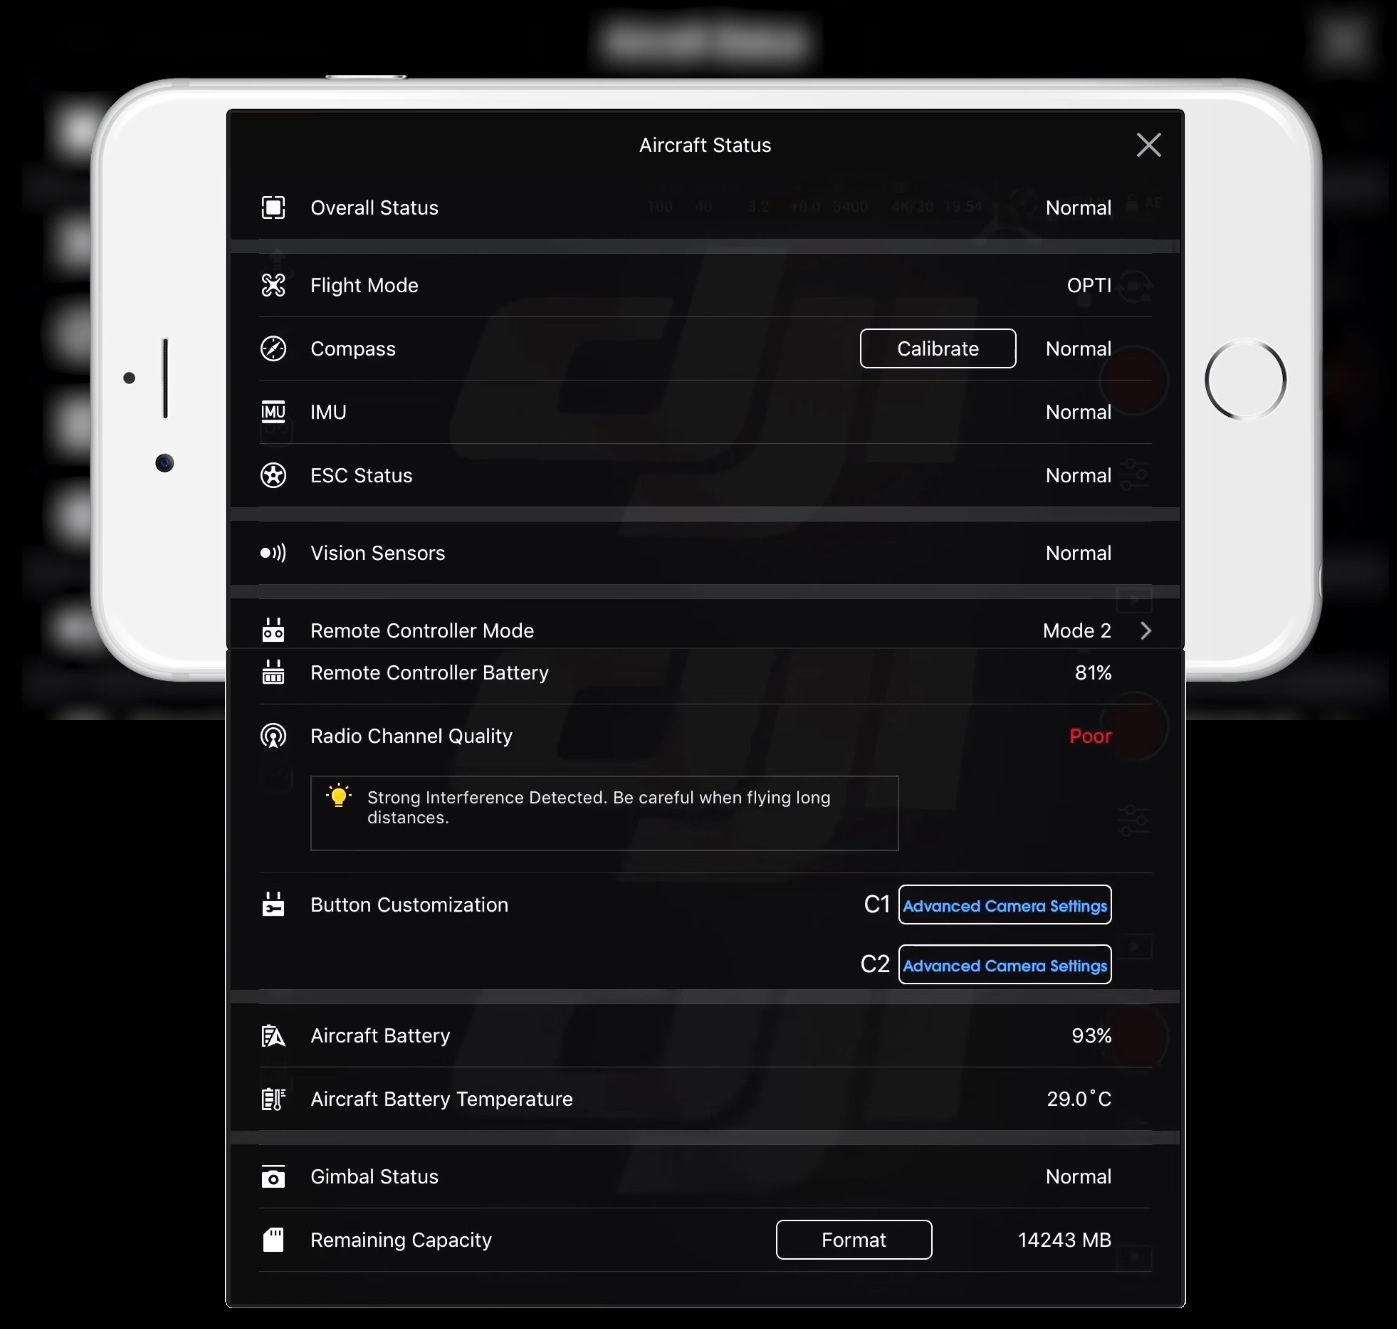
Aircraft status
Aircraft status - this is where it is recommended to enter after a visual pre-flight inspection of the drone. This menu provides an overview of the operability / status of each subsystem of the drone / remote control (current flight mode, status of imaging sensors, compass, IMU, battery, etc.). To enter this menu, tap on the " Ready to Gored,then this most likely means that the drone is functioning normally and ready to fly.
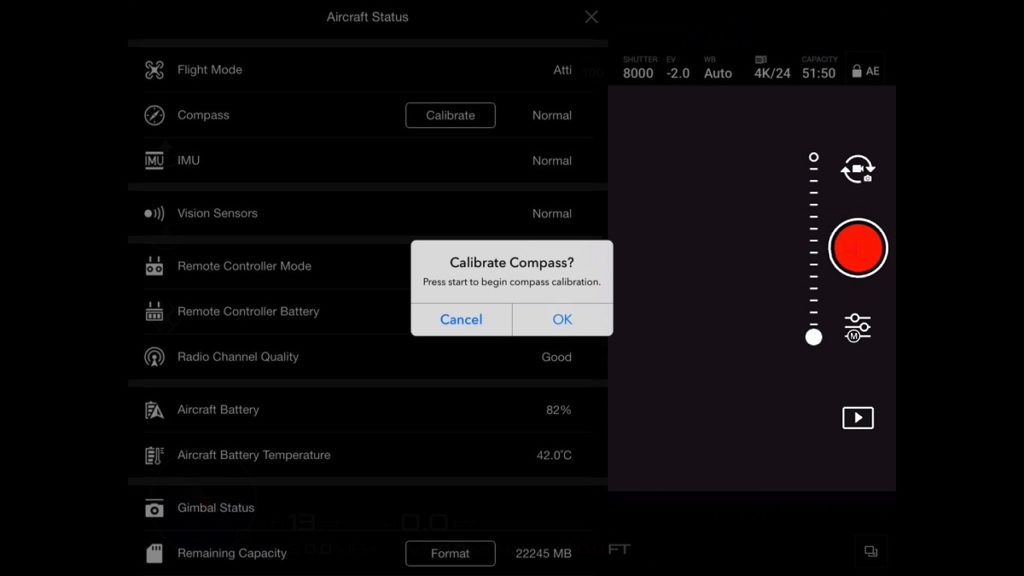
Compass
The compass is one of the most important sensors that you should always check because he is responsible for the orientation of the drone in space. It is highly recommended to always calibrate the drone compass at any new launch location. This is due to the fact that the compass is very sensitive to electromagnetic interference, which can lead to a malfunction of the sensor, which often leads to a deterioration in flight performance or even to a failure in operation. Therefore, regularly calibrating the compass before launching in a new location will maintain optimal drone performance. To calibrate the compass, tap on the “Calibrate” icon and follow the instructions on the screen.
Important Notes:
- Do not calibrate the compass near any strong sources of magnetic interference such as magnetite, underground metal structures, parking lots.
- Do not calibrate the compass near large metal objects / objects.
- Do not calibrate the compass indoors.
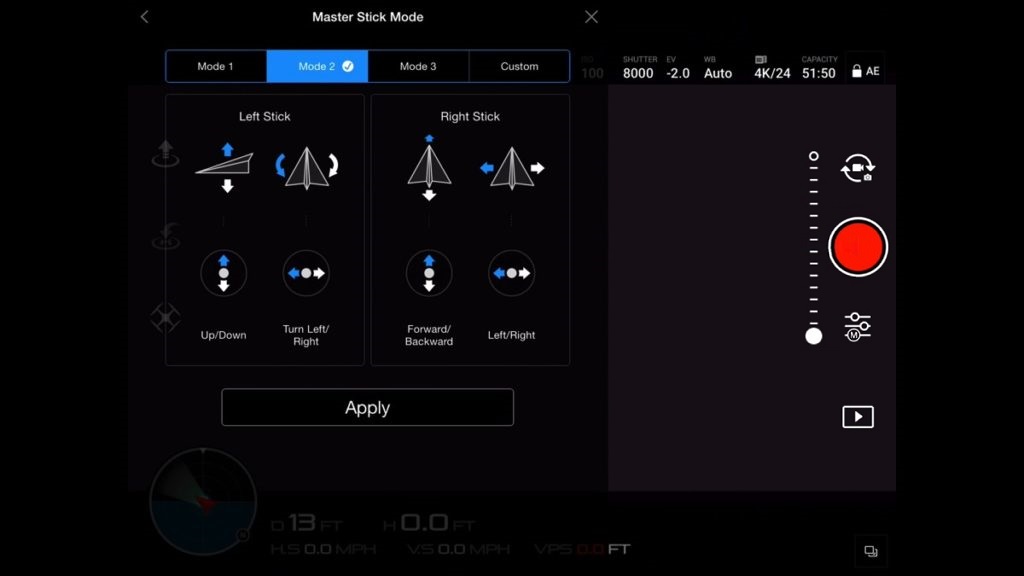
Remote Controller Mode
Remote Controller Mode - Typically set to Mode 2 by default. This means that the left stick (joystick) of the remote control is responsible for taking off, lowering and rotating the drone around its axis, and the right stick (joystick) is responsible for moving forward, backward and left / right. The procedure for changing modes is carried out one-time, and the next time the drone is turned on, it does not require a second change.
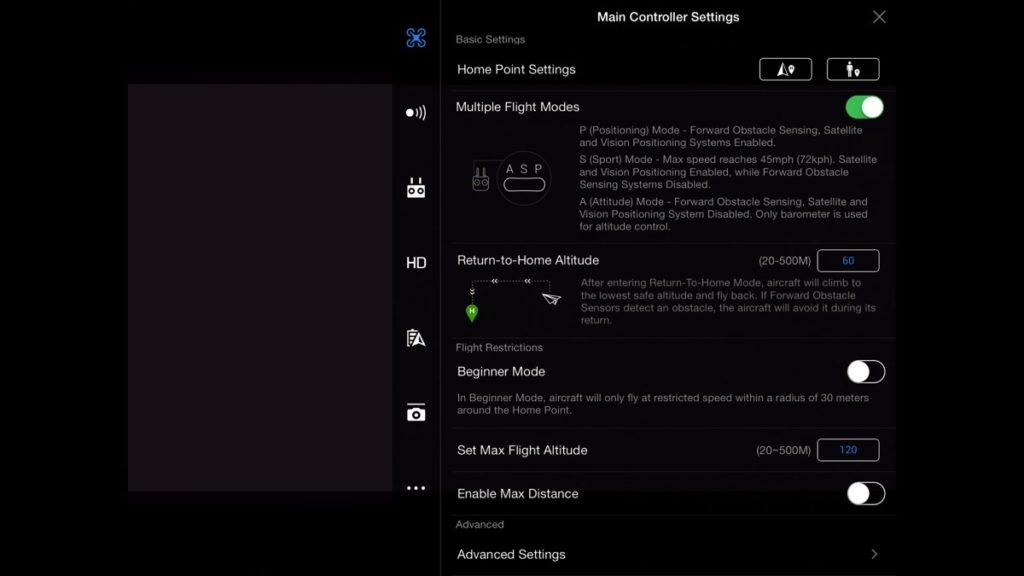
Main Controller Settings
Main Controller Settings Controller Settings) - to enter the menu, tap on the icon in the form of three dots (…)
) on the left side of the menu. Here you can find:
- Home Point Settings
- Enabling / changing flight modes “Multiple Flight Modes”
- Enabling / disabling the Beginner mode mode ”
- Setting the Max Flight Altitude and Max Distance
- Advanced settings
Further details on each setting and submenu:
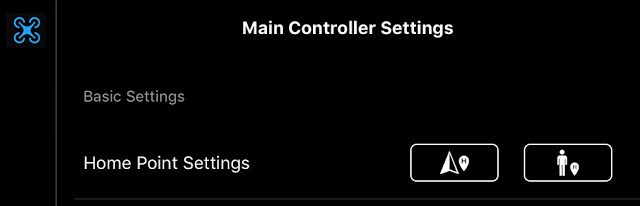
Home Point Settings
Home Point Settings - this item configures the return home point, i.e. where the drone should return (in case of: Loss of communication between the drone and the remote control / Insufficient battery charge / After pressing the RTH button).
Two options are available:
- Arrow icon = if this return method is selected, the current return point will be considered take-off place. When pressed, the drone system will ask: "Set current aircraft position as Home Point?" Click OK.
- Icon with a little man = if you select this return method, the drone will return to the current location of the remote control. This method is relevant if the pilot controls the drone from a moving object, such as a boat or car.
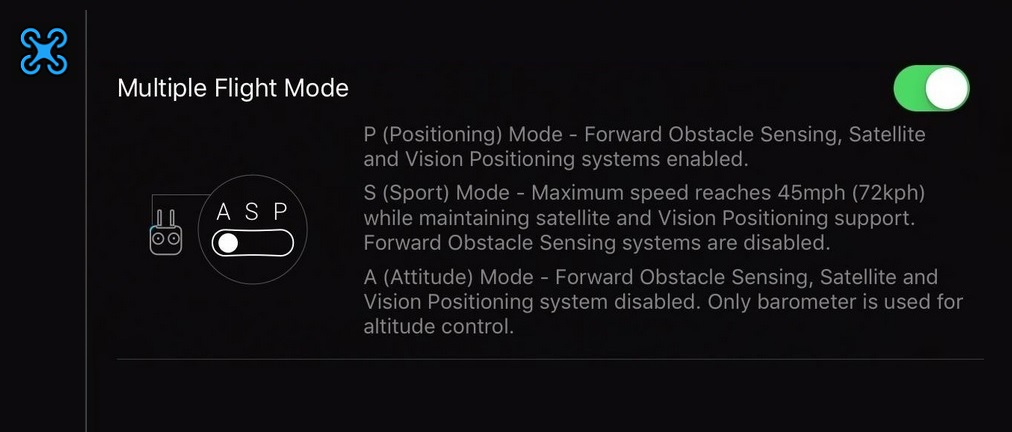
Multiple Flight Modes
Multiple Flight Modes - this setting allows you to switch between three possible flight modes:
- P (Positioning) Mode or Positioning Mode (P Mode) - in this mode, all sensors of the drone are on, which will lead to a more "stalled ", But stable flight. In this mode, if the pilot releases the sticks (control joysticks), the drone will automatically brake and then hover and hold the position thanks to the GPS / GLONASS satellite positioning.
- S (Sport) Mode or Sport Mode - unleashes the full potential of the drone, allowing it to develop max. flight speed, while satellite (GPS / GLONASS) and visual positioning (a set of sensors at the bottom of the drone) remains active. But keep in mind that in this mode the obstacle avoidance and detection system will be disabled!
- A (Attitude / ATTI) Mode - in A-Mode, all aircraft sensors are disabled, only the barometer is active (used to control and maintain altitude), which leads to more unstable flight / drifting hovering, as the wind and its air currents will affect the drone. In other words, there is no "automatic brake". To stop the drone and hold its position, the pilot will need to independently control the drone by moving the control sticks.
Information
A-Mode is useful for experienced pilots, for example when:
- The drone is launched in places with poor reception, or where there is no satellite coverage at all
- To ensure smooth maneuvering / braking during aerial surveys
- As a fail-safe mode to stop the drone if something goes wrong.
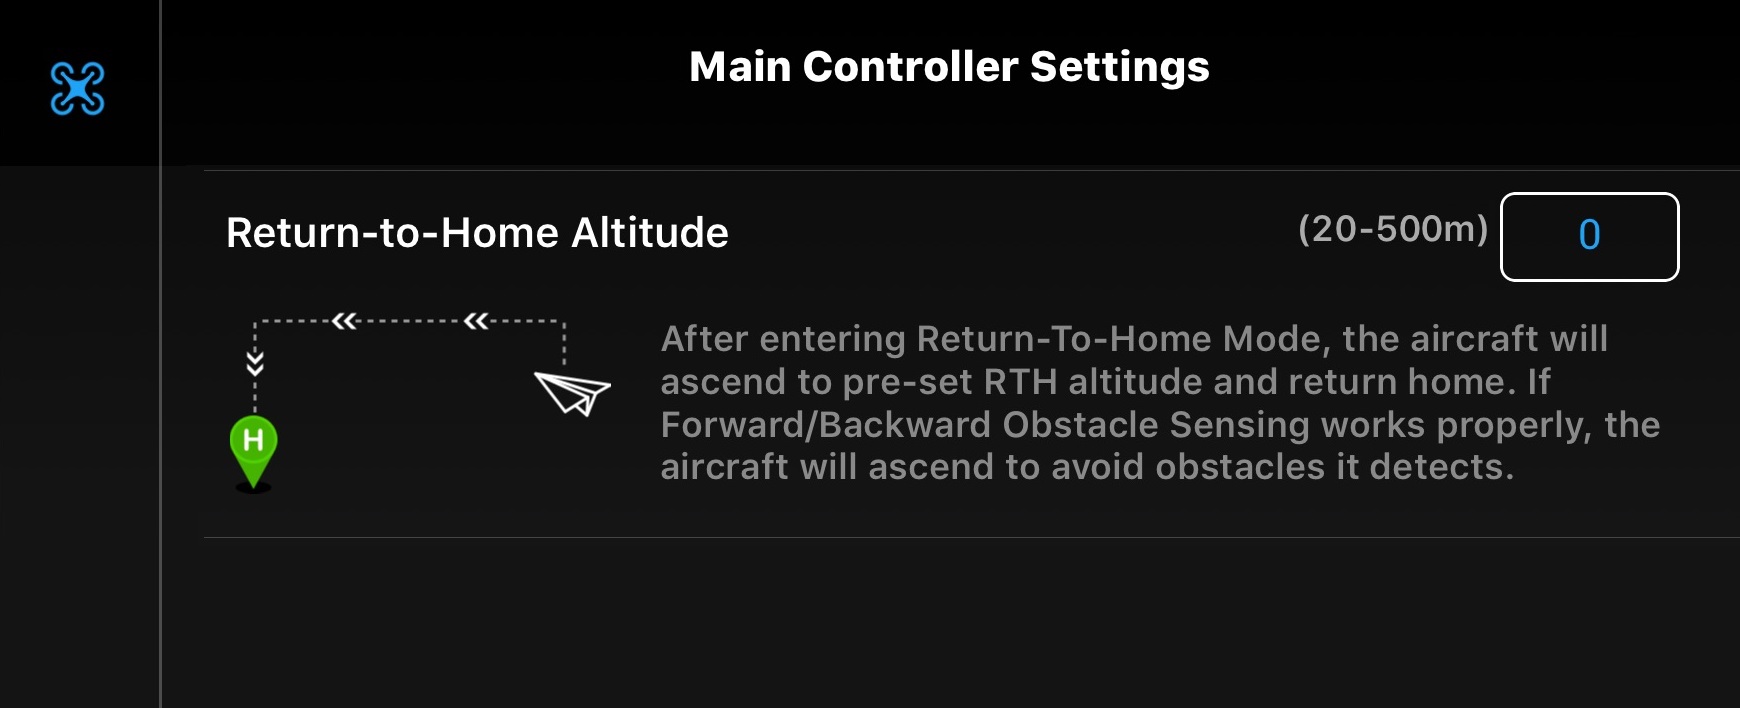
Return to Home Altitude
Return to Home Altitude - The setting sets the altitude at which the drone will perform automatic return (in case of: Loss of communication between the drone and the remote control / Insufficient battery charge / After pressing the RTH button).
For example, if the connection is lost, no matter at what altitude the flight was carried out, the drone will automatically switch to the return mode, go to the specified altitude and only then perform the auto return.
Tips
- The height can be set to 60 meters. In most cases, this height is much higher than the average tree or building. But in any case, at each new place, before starting, you should check the height of trees, buildings and possible obstacles, and if it is required to change the current settings of "Return to Home Altitude".
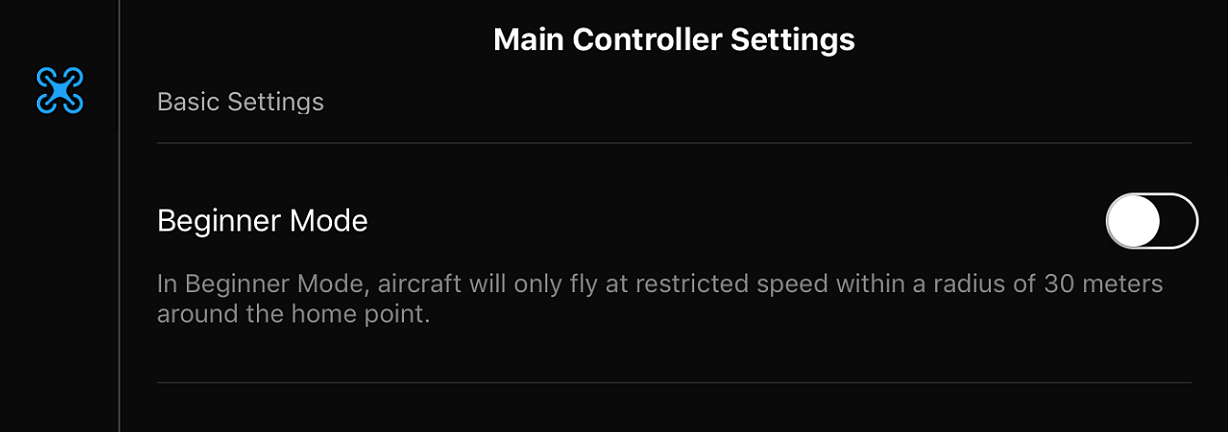
Beginner Mode
Beginner Mode - Recommended to enable if user pilots a drone for the first time. In fact, the mode disables many advanced features, and also automatically limits the altitude (up to 30 meters), distance (up to 30 meters) and the speed of your drone, so if you are flying in a large open area, you have nothing to worry about flying in the mode. Beginner. The mode is also great for training, as it allows you to smoothly transition from a simple and comfortable flight to more complex settings.
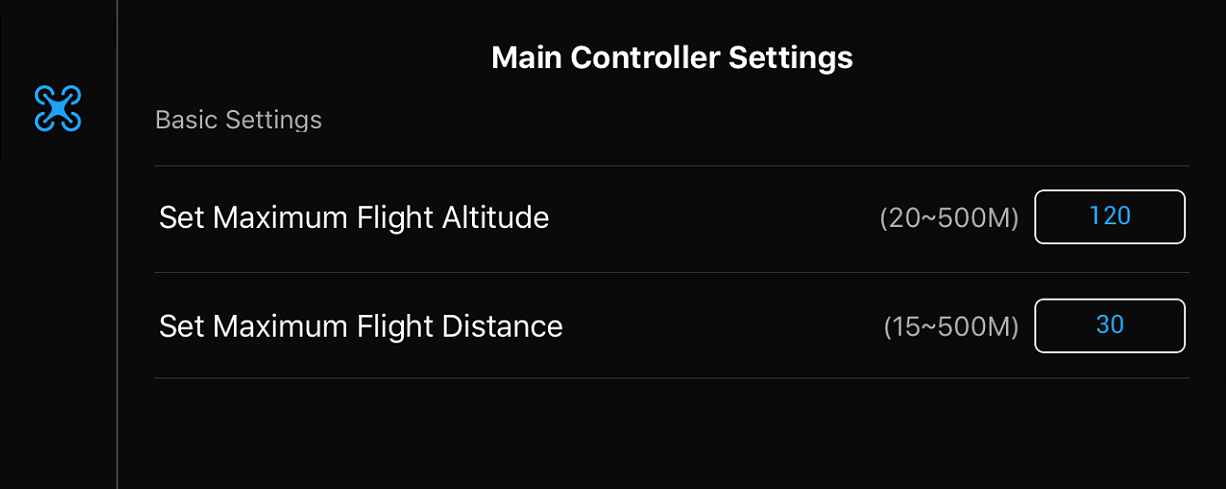
Max Flight Altitude
Max Flight Altitude - this setting sets the maximum ceiling height that the drone can climb. Possible range in meters is indicated in brackets (eg 20-500 m). In many countries, this height is limited by law at 120 meters. It is worth considering this before takeoff and familiarizing yourself with local legislation in advance.
Max Distance
Max Distance - This setting sets the max. the distance the drone can move away from the control panel. Possible range in meters is indicated in brackets (eg 15-500 m). In many countries, this parameter may also be limited by law. For example, in the United States, UAV users are required to fly the drone within the line of sight, in other words, while piloting, the operator (pilot) must be able to see his drone.
Advanced Settings
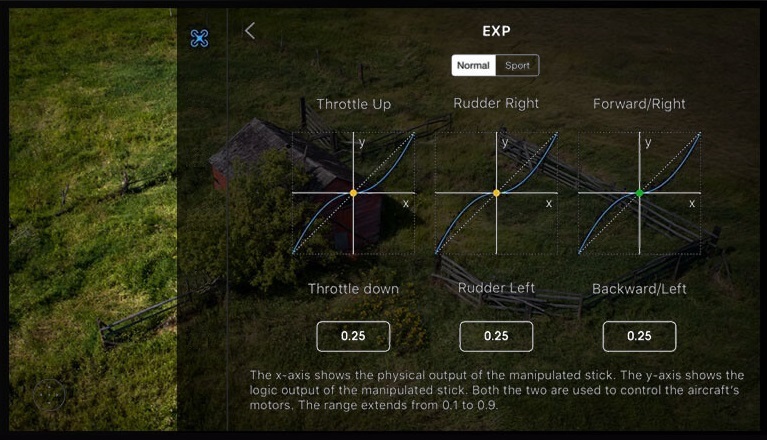
Advanced Settings - The options in this menu are for advanced users. For example, here you can fine tune the drone's response to the movement of the control sticks / joysticks (it can be sharper or softer). It can be compared to tuning a guitar, where each guitarist has a different preference. Further, for each setting separately.
Gain
Entering the smallest value, will increase the amplitude of movement of the sticks / joysticks before the drone begins to respond (which corresponds to a smoother / graceful movement of the drone, and will be most relevant for shooting)... Entering the maximum value will result in an instant response of the drone to the slightest movement of the sticks (which corresponds to a more aggressive movement of the drone, and will be most relevant for high-speed FPV flights).
If the sticks have not been changed by the user, then:
- Throttle Up / Throttle down curve affects the response of the motors to moving the left stick forward / backward, which corresponds to the rise / fall of the drone.
- The Rudder Right / Rudder Left curve affects the response of the motors to moving the left stick to the right / left, which corresponds to the rotation of the drone around its axis to the right / left.
- The “(Forward / Right) / (Backward / Left)” curve affects the response of the motors to the movement of the right stick (Forward / Right) / (Back / Left), which corresponds to the movement of the drone forward / right and backward / left).
Gain
Information
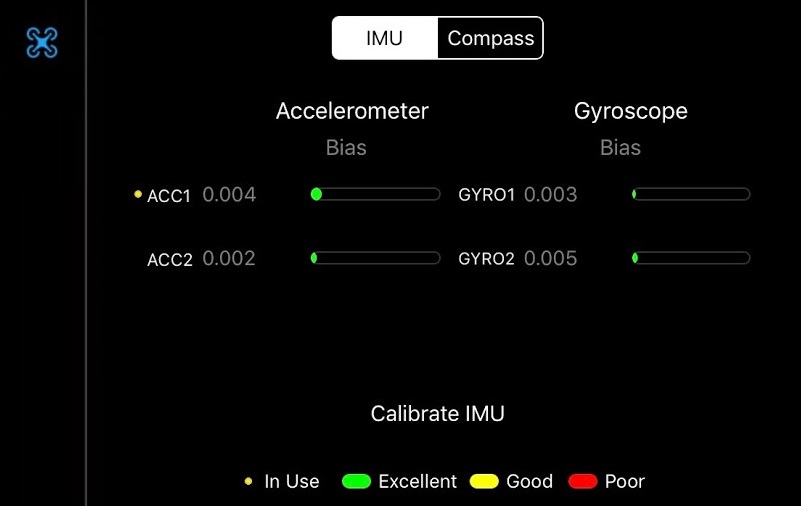
- If during the operation of the drone there are problems in the form of incorrect flight, drift, or errors appear in the compass, try to fix them by calibrating the IMU by tapping on the icon below "Calibrate IMU". The current state of the IMU is indicated by the color palette located below, where: Green - excellent; Yellow is good; Red is bad.
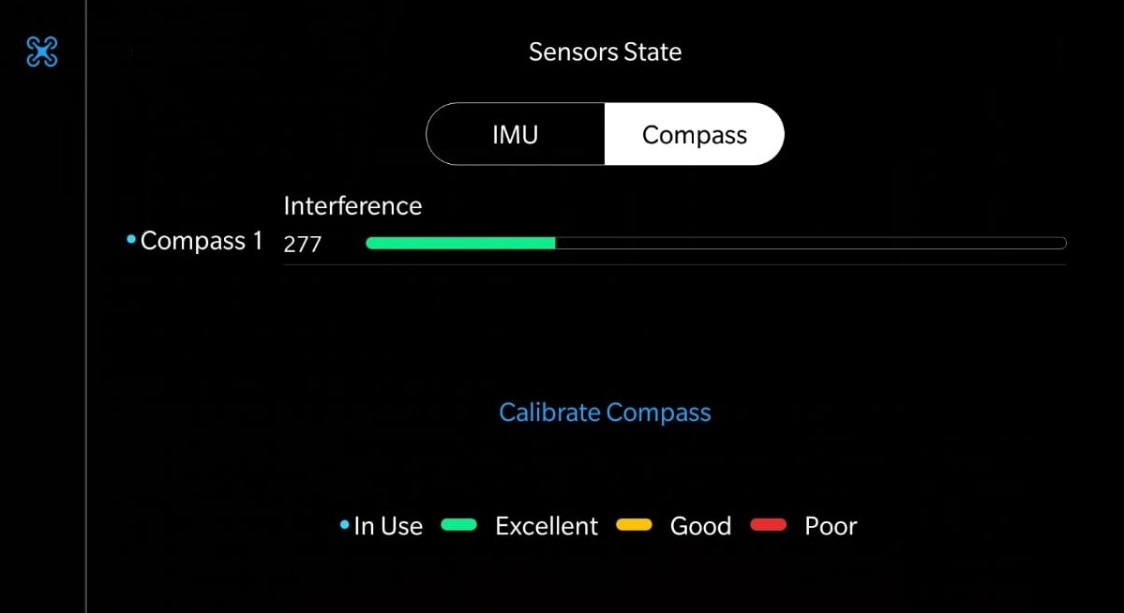
Sensors: Compass
This section checks for compass problems or noise. If necessary, you can also calibrate it by tapping on the icon below "Calibrate Compass". The current state of the compass is indicated by the color palette located below, where: Green - excellent; Yellow is good; Red is bad.
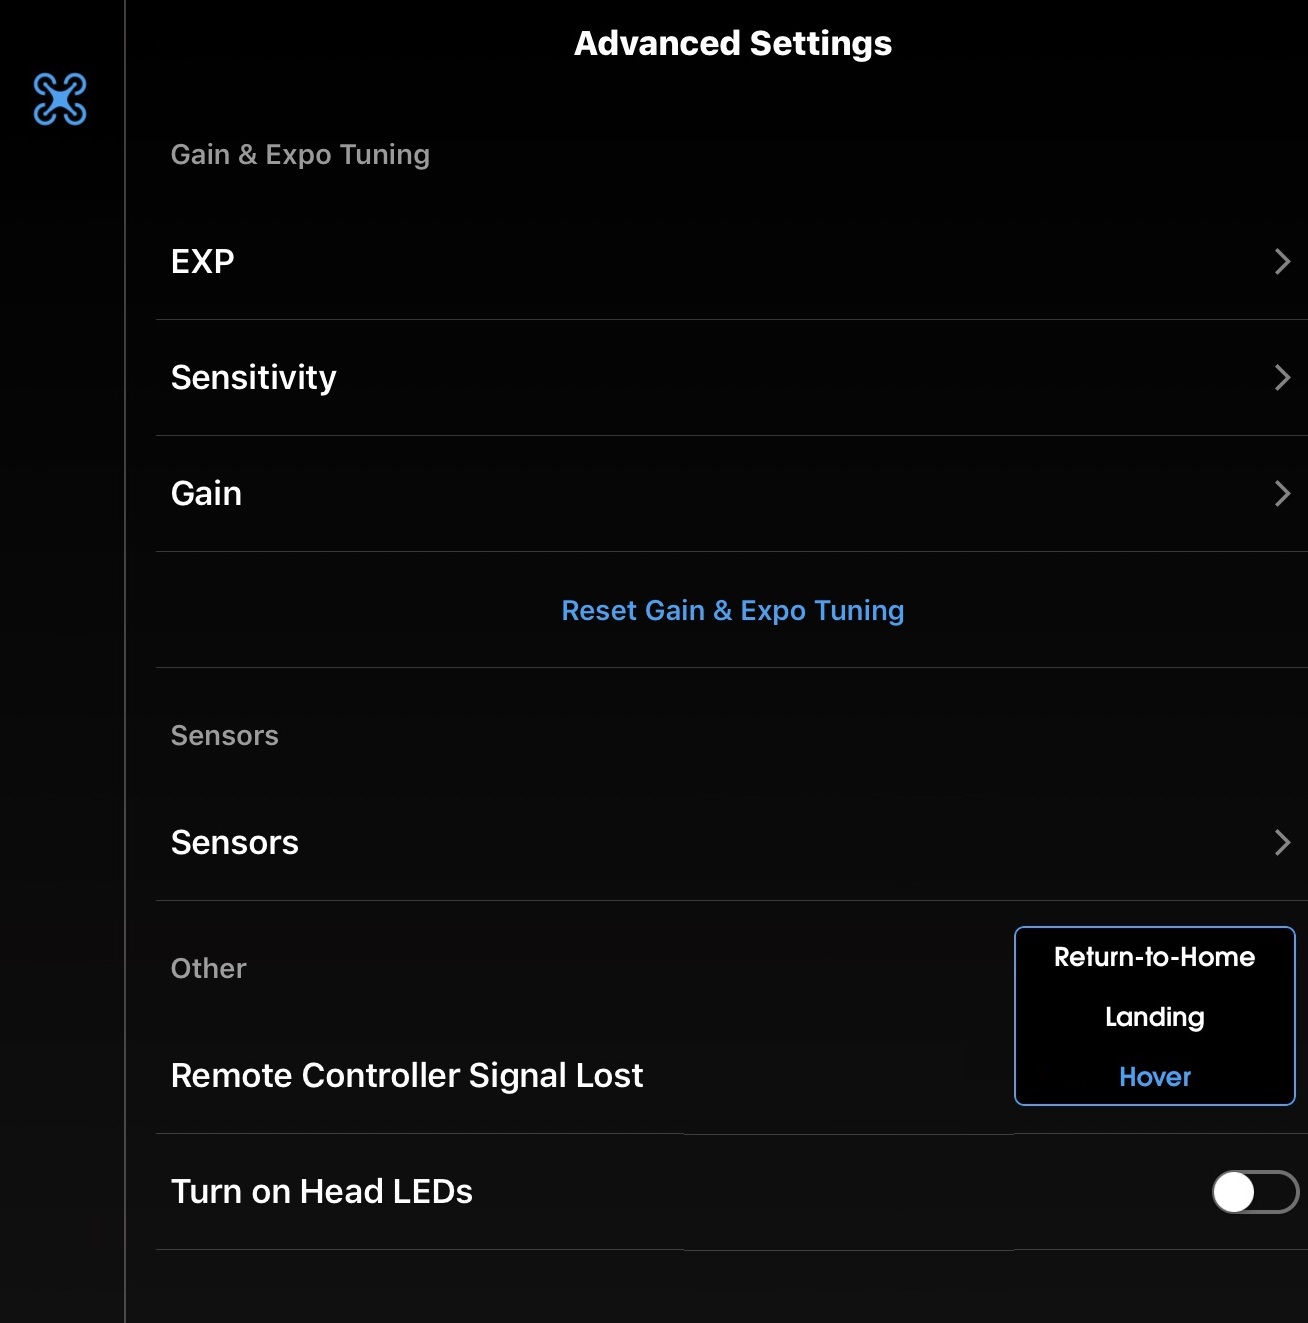
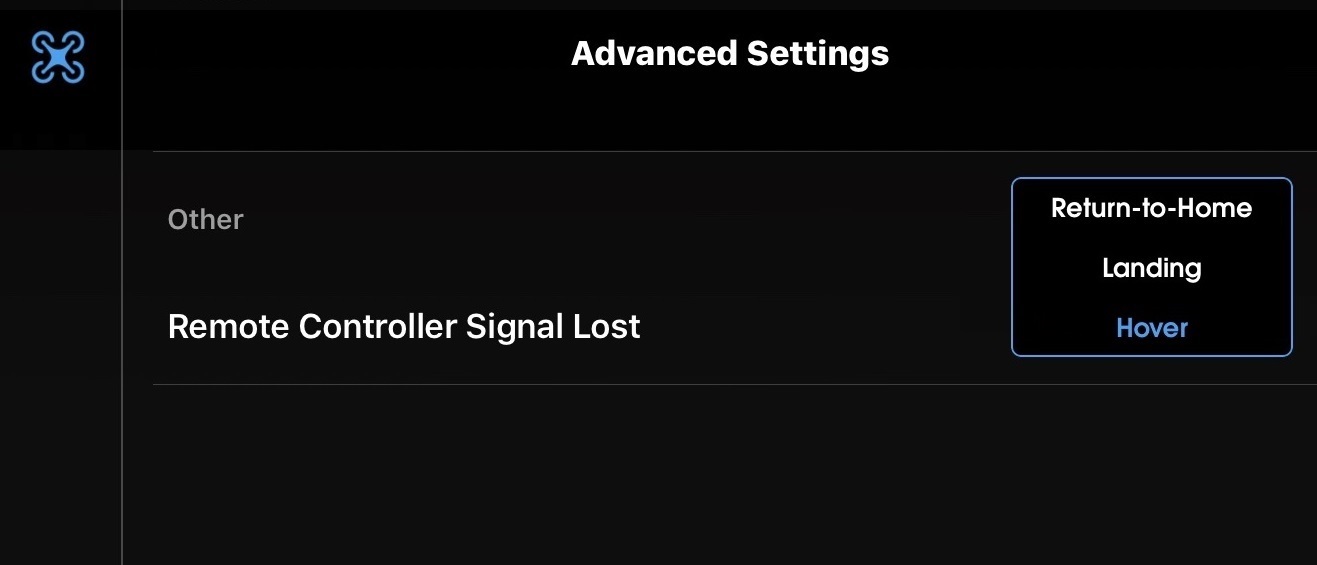
Remote Controller Signal Lost
This section configures the so-called “Failsafe” function, thanks to which the drone always knows that it to do when communication between him and the control panel is lost.
There are three scenarios available in case of disconnection:
- Return-to-Home: in this case, the drone will perform a return to the take-off point (set by default).
- Landing: in this case, the drone will land at the point of disconnection.
- Hover: In this case, the drone will hover at the point of loss of communication.
Tips
- Remember that signal loss can occur for various reasons, such as when the drone flies too far, the remote control is not powered, or when the signal is blocked...
- It is recommended to leave the default setting selected by the developer: Return-to-Home. And before takeoff, duplicate the actions in the section: Home Point Settings by tapping on the arrow icon, thereby confirming the current takeoff location.
- Hover is recommended to be selected when flying the aircraft indoors.
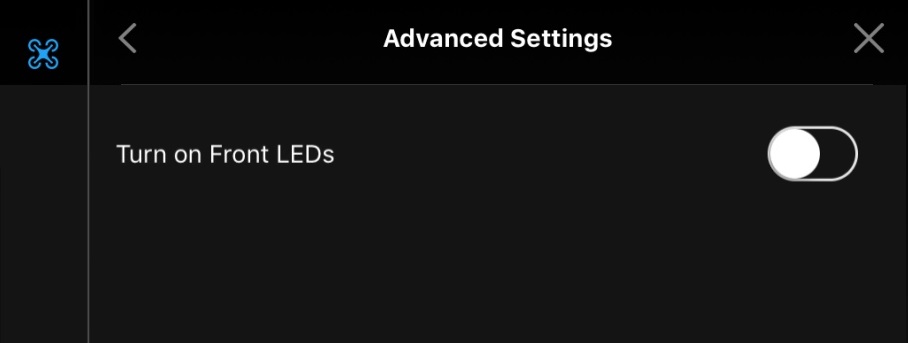
Turn on Front LEDs
This option turns on and off the front LEDs (solid red). This can be useful when flying in low light as red lights can easily enter the camera's field of view.
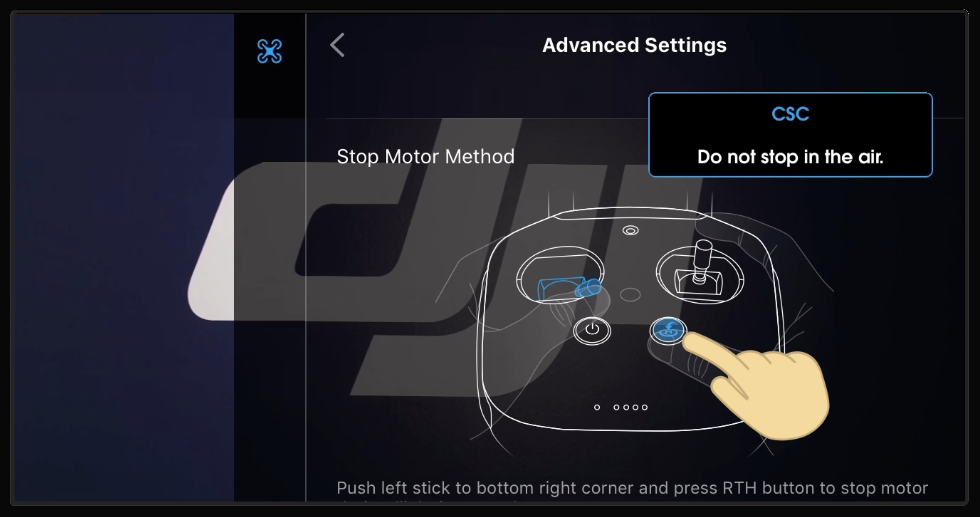
Stop Motor Method
Here the user can activate the emergency stop of motors, or exclude it altogether (for each model, these methods are different).
There are two settings available for this:
- CSC: stops the motors by simultaneously moving the left control stick to the lower right angle and pressing the RTH / Return to Home button (this is the default setting).
- Do not stop in the air: prevents the emergency shutdown of motors while the drone is in the air.
Information
- An emergency stop of the motors can be relevant in various cases, for example, when a drone, through carelessness / carelessness of the pilot, touches the crown of a tree, which will inevitably lead to an uncontrolled fall followed by the drone getting stuck in the branches of a tree. And in order to ensure the safety of the elements of the power plant, it would be best to quickly turn off the motors.
Visual Navigation Settings
The aircraft's visual navigation settings are changed here. In other words, in this section, you can enable and disable the sensors responsible for visualizing the surrounding world, including for individual auto-flight modes, which directly interact with these sensors. To go, tap on the corresponding icon in the form of "emitted point
" on the left side of the "Main Controller Settings" menu. Further, for each setting separately.
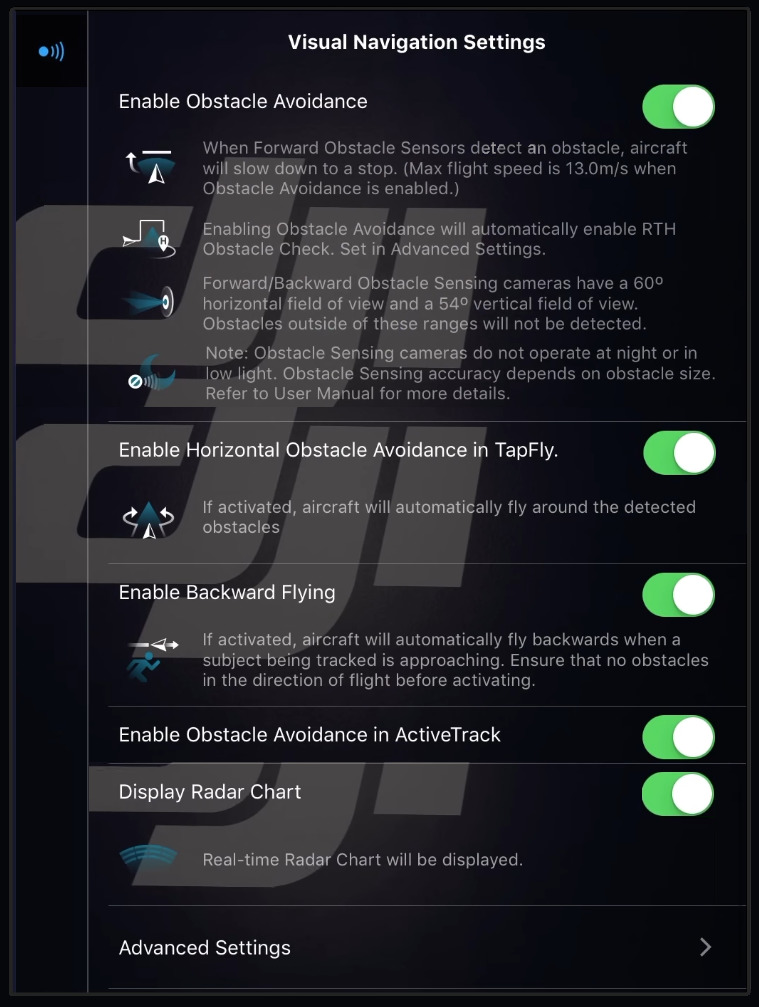
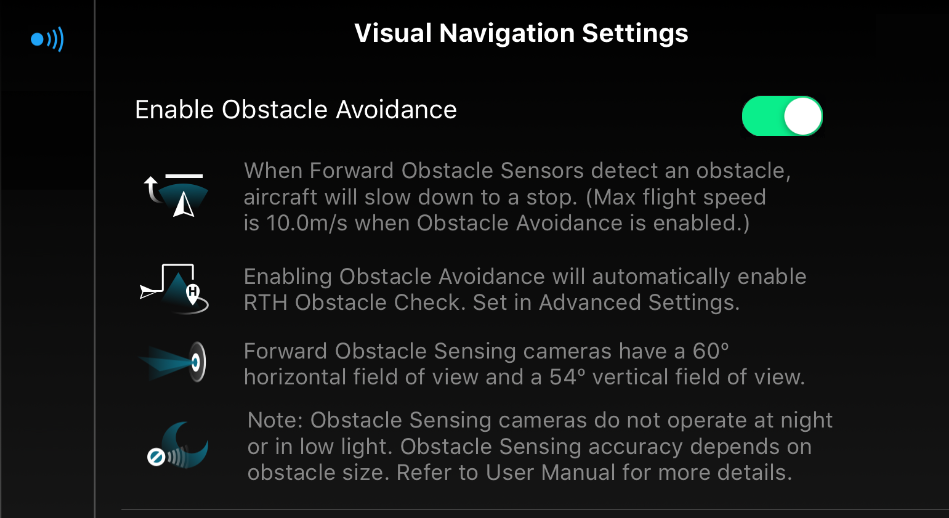
Enable Obstacle Avoidance
This setting enables or disables the touch-sensitive obstacle avoidance system. A general switch, so to speak. After turning it off, the drone will no longer recognize obstacles. It is recommended to always set aside active.
Information
- When an obstacle enters the field of view of the front sensors, the drone will slow down and stop.
- If obstacle avoidance is enabled, the maximum level flight speed will not exceed 46 km / h.
- By activating the Obstacle Avoidance System, Obstacle Avoidance is automatically activated when the RTH Obstacle Check is executed. Configurable in advanced settings ( see below
- Front and rear obstacle sensors have a horizontal field of view of 60 ° and a vertical field of view of 54 °. Obstacles outside these ranges will not be detected by the system.
- Obstacle detection sensors cannot work at night or in low light.
- Obstacle detection accuracy depends on the size of these obstacles. Please refer to the user manual for more details.
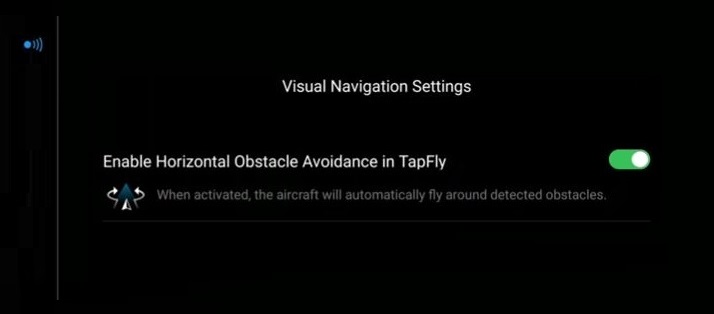
Enable Horizontal Obstacle Avoidance in TapFly
This setting enables or disables horizontal obstacle avoidance in TapFly auto-fly mode. When activated, the drone will automatically fly around obstacles on the way to the left or right of them.
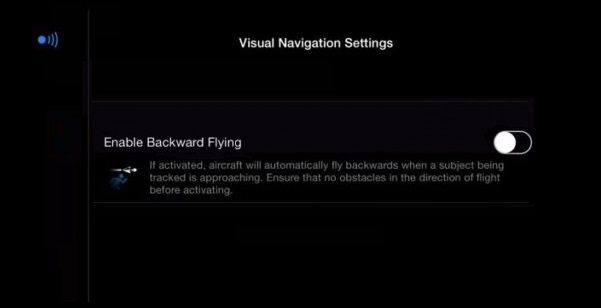
Enable Backward Flying
the object moves towards the drone), the drone will not turn around, but will automatically fly backwards tracking the object. Before activating, make sure there are no obstacles in the direction of flight.
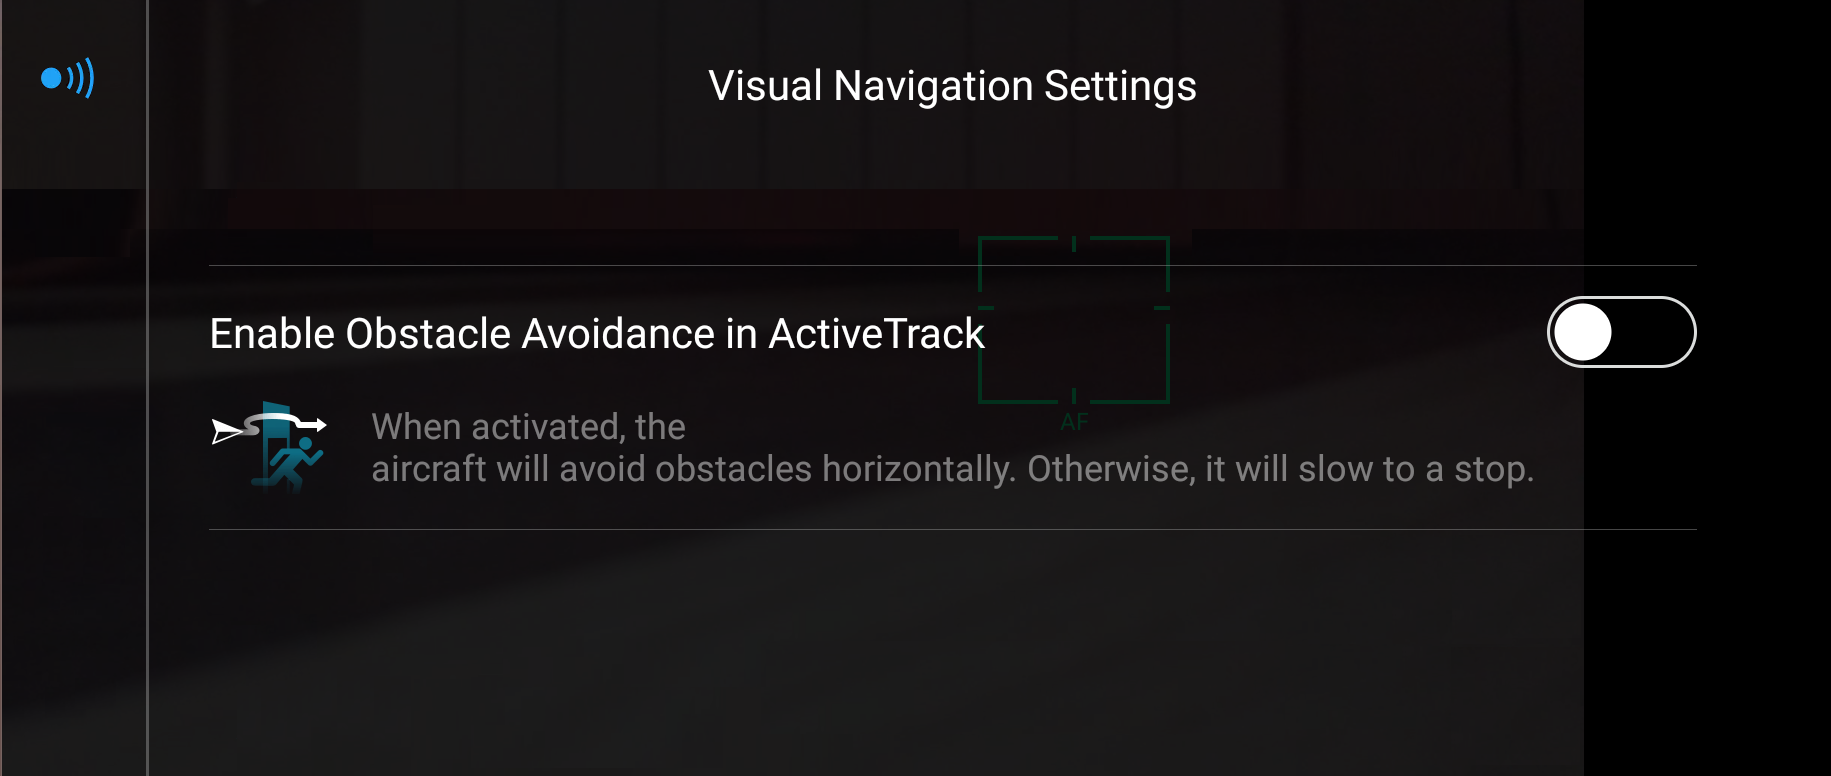
Enable Obstacle Avoidance in ActiveTrack
This setting enables or disables horizontal obstacle avoidance in ActiveTrack auto-fly mode. If disabled, then when obstacles are detected during the auto flight, the drone will slow down and stop in front of the obstacle, waiting for the next commands from the pilot.
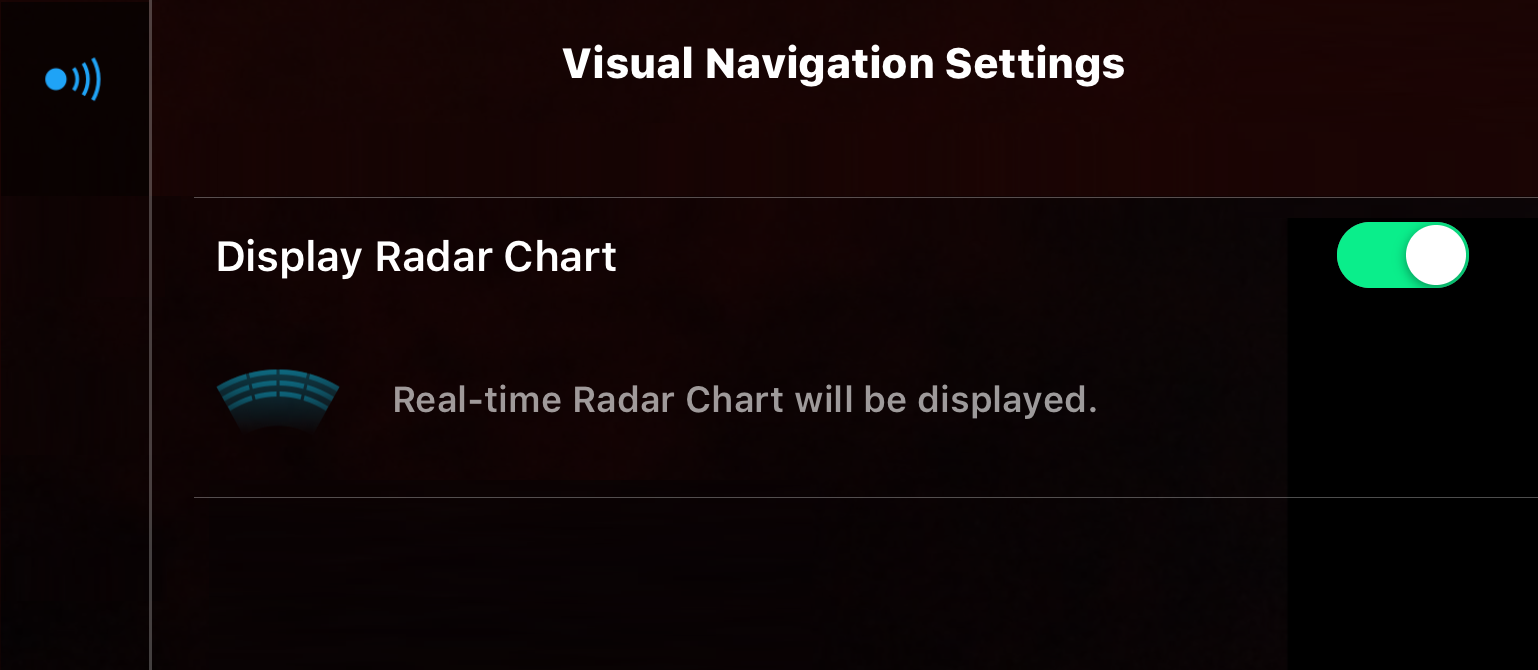
Display Radar Chart
This setting enables or disables the display of obstacle proximity indicators on the main flight screen.
Advanced Settings
Advanced settings for the visual positioning system. Further, for each setting separately.
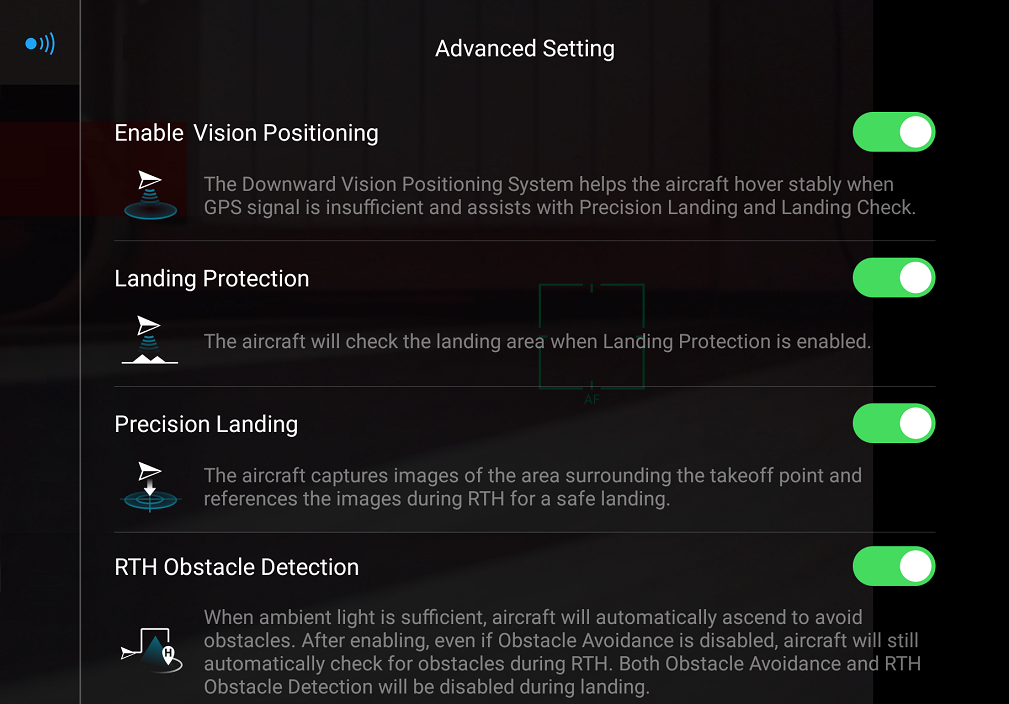
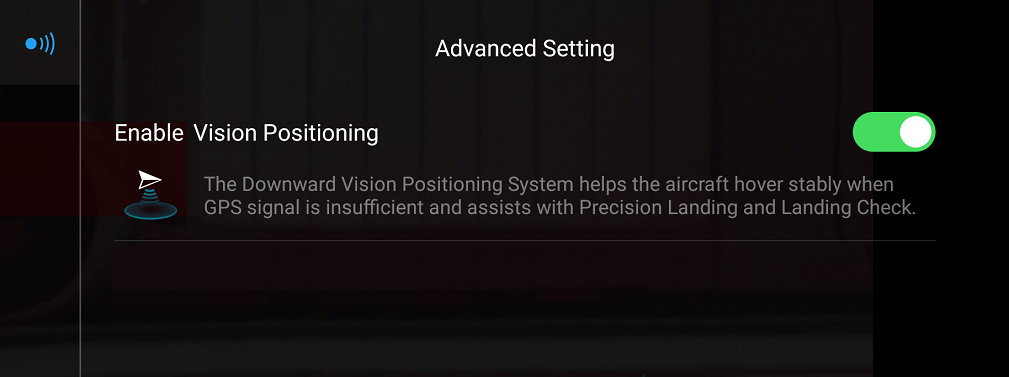
Enable Vision Positioning
Enable Vision Positioning - this setting enables or disables the lower positioning sensors (located at the bottom drone parts), which are responsible for ensuring accurate and stable hovering when satellite positioning is not available, as well as for the operability of Landing Protection and other systems. When disabled, the system will ask the user "Disable Vision Position?" and will offer to confirm "OK", or to cancel "Cancel".
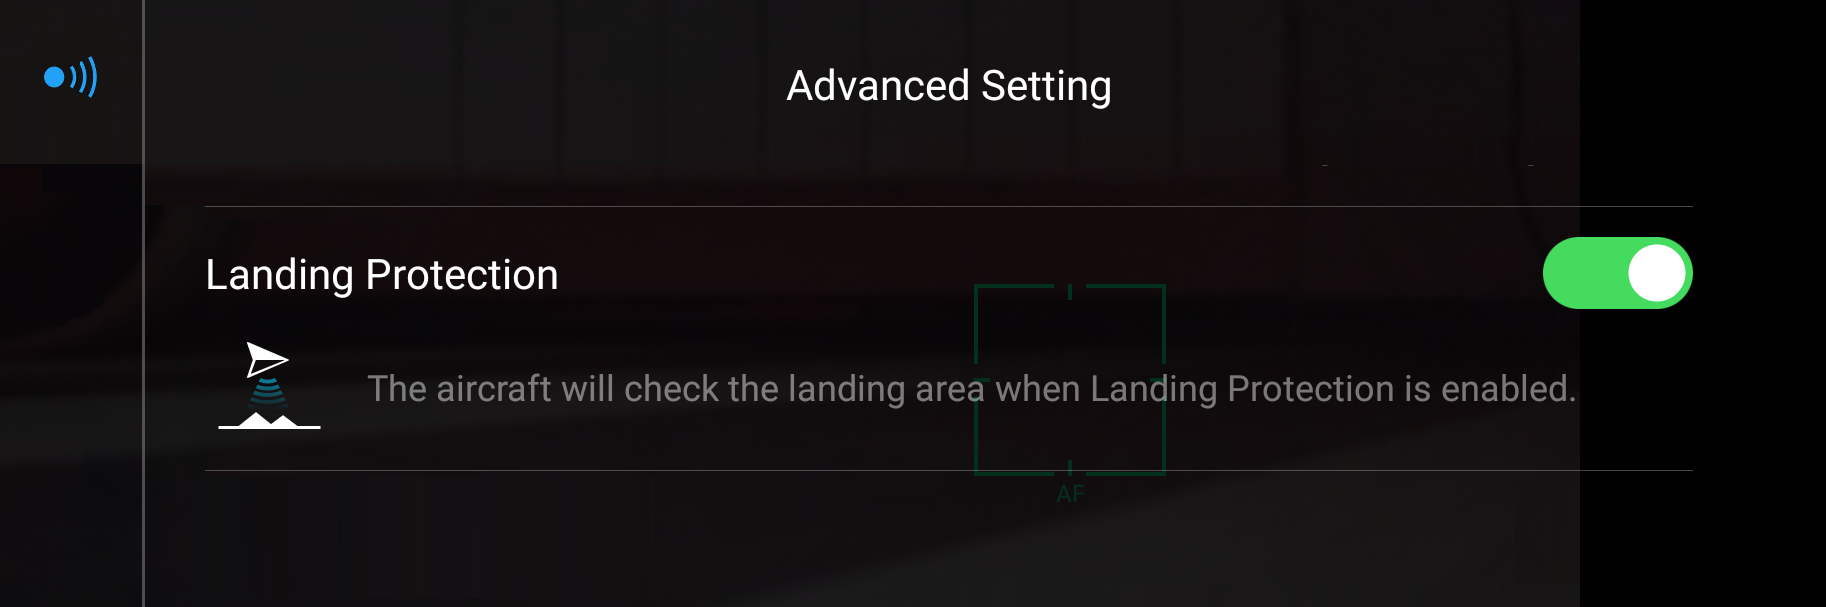
Landing Protection
Landing Protection - when active, the aircraft will check the surface for obstacles before landing, and if there are any, a warning about probable obstacles will be displayed on the main screen, after which the pilot will need to either confirm the landing or cancel it. When disabled, the system will ask the user: "Disable Landing Protection?" and will offer to confirm "OK", or to cancel "Cancel".
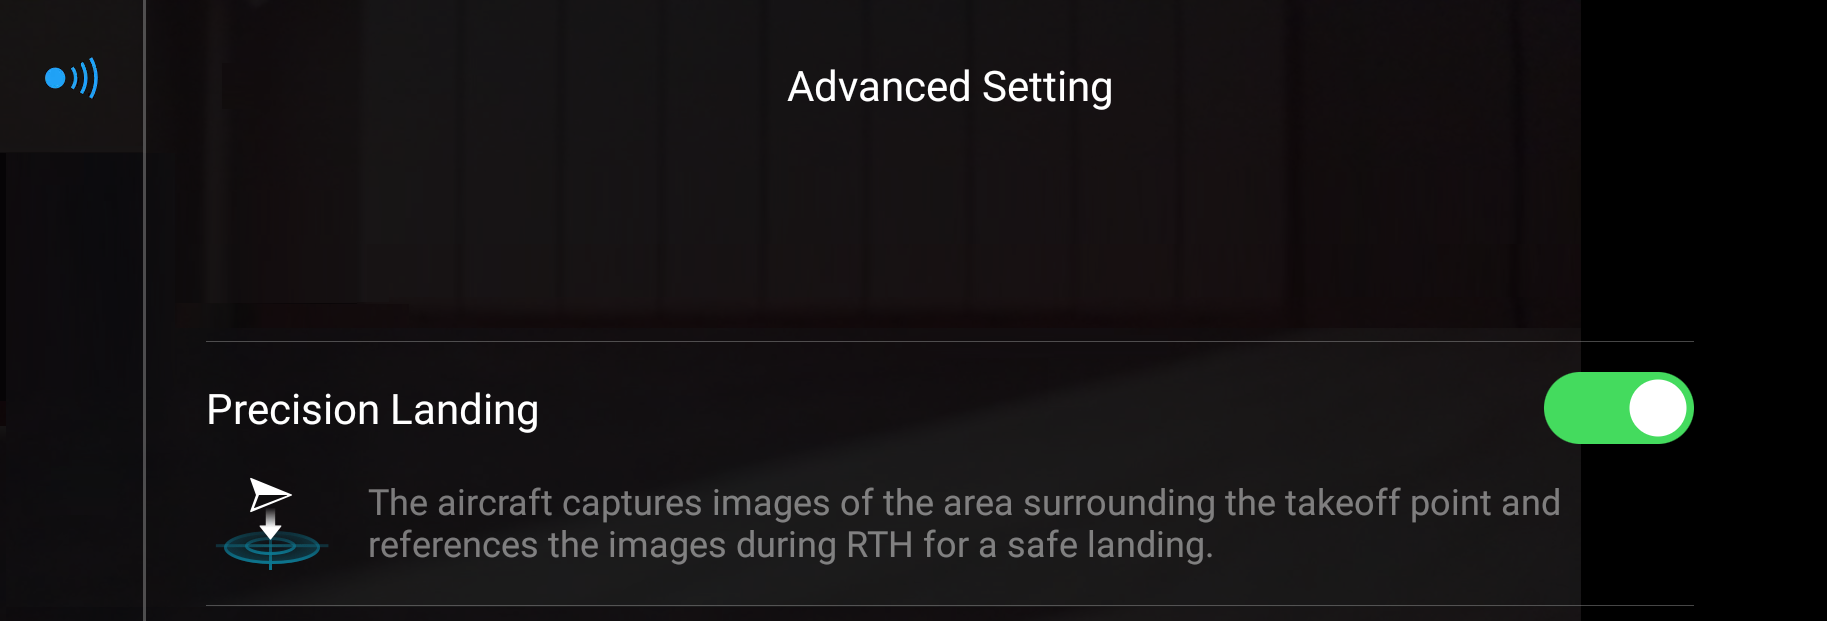
Precision Landing
Precision Landing - When enabled, the drone will attempt to land while performing an Auto Return (RTH) as close as possible to the take-off site.
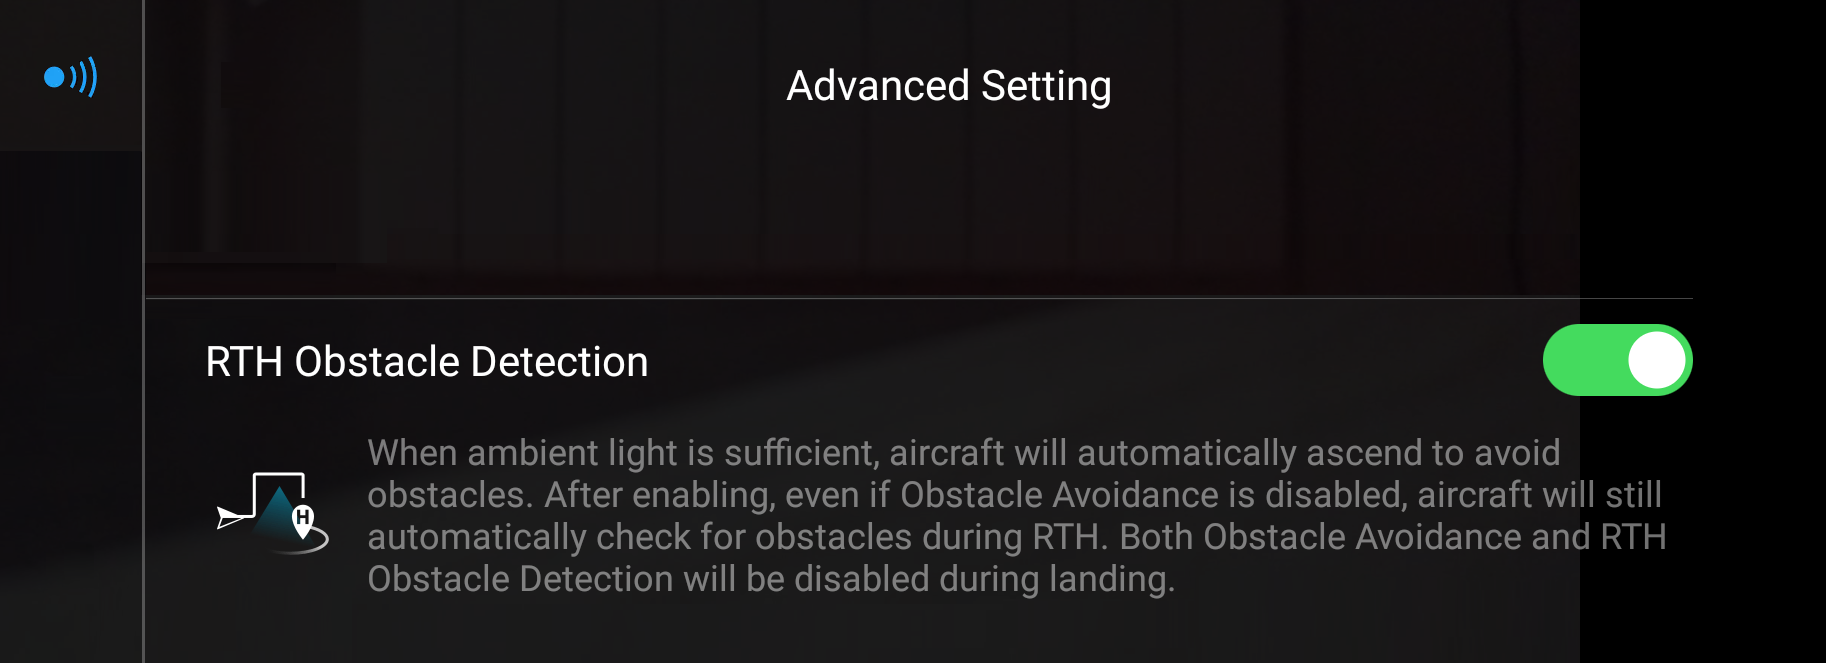
RTH Obstacle Check (Detection)
RTH Obstacle Check - when the setting is active, when performing auto return, the aircraft will automatically gain altitude when obstacles are detected, even if the Obstacle Avoidance setting is disabled. When disabled, the system will ask the user: "Disable RTH Obstacle Check? / Disable obstacle control when performing RTH?" and will offer to confirm "OK", or to cancel "Cancel".
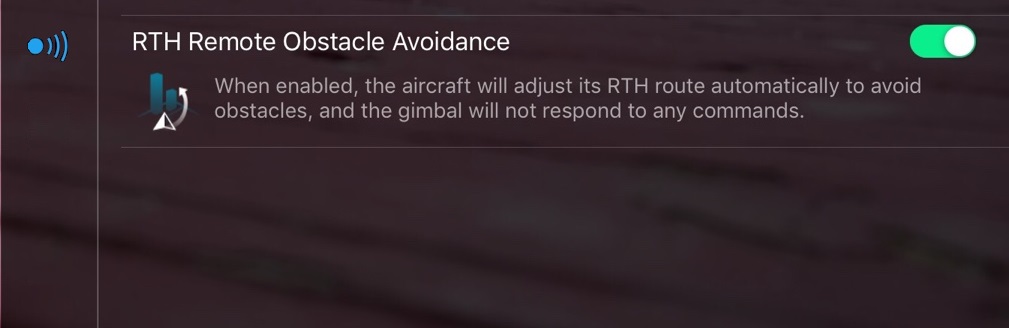
RTH Remote Obstacle Avoidance
RTH Remote Obstacle Avoidance - When the setting is active, the drone will automatically adjust its return route to avoid obstacles along the entire route, while the gimbal will not respond to any commands from the control panel.
Remote Controller Settings
Here the user makes changes to the controller settings. To go, tap on the corresponding icon in the form of "remote control
" on the left side of the "Main Controller Settings" menu. Further details on each setting.
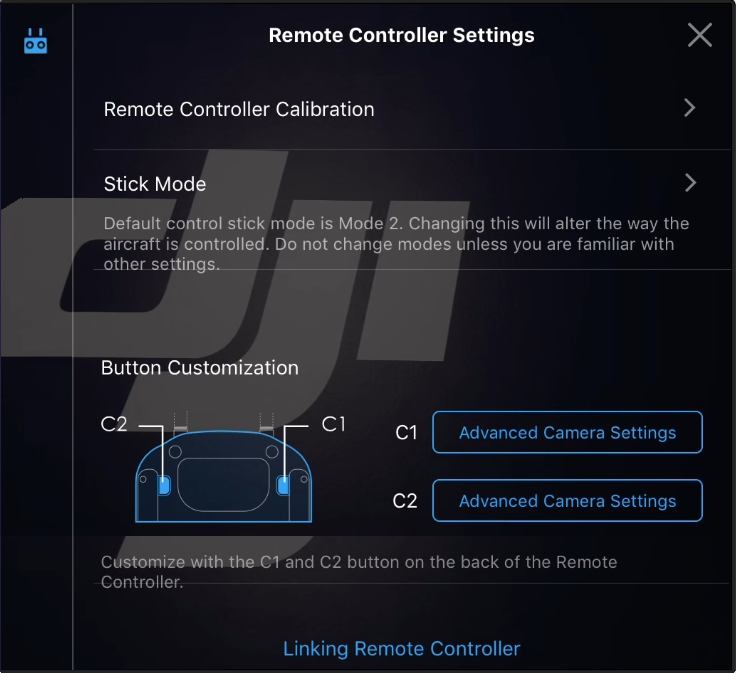
Remote Controller Calibration
If the controls (sticks / joysticks; pan / tilt wheels) work incorrectly / not exactly, then in this menu you can calibrate them. The procedure is performed with the drone turned off. To start the calibration procedure, tap on the “Calibrate” icon, then set the sticks / joysticks to the center position. Then tap on the "Start" icon and move the sticks and wheels from zero to extreme (100%) until the "Finish" icon becomes active. Tap on the "Finish" icon. Calibration complete.

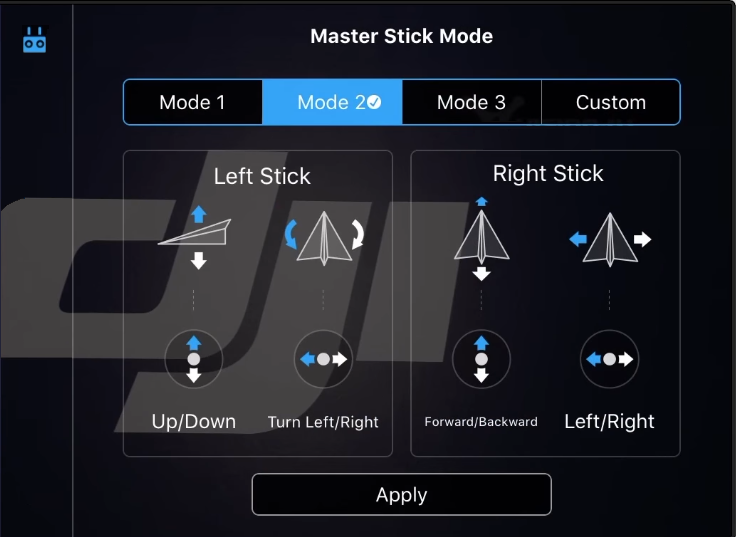
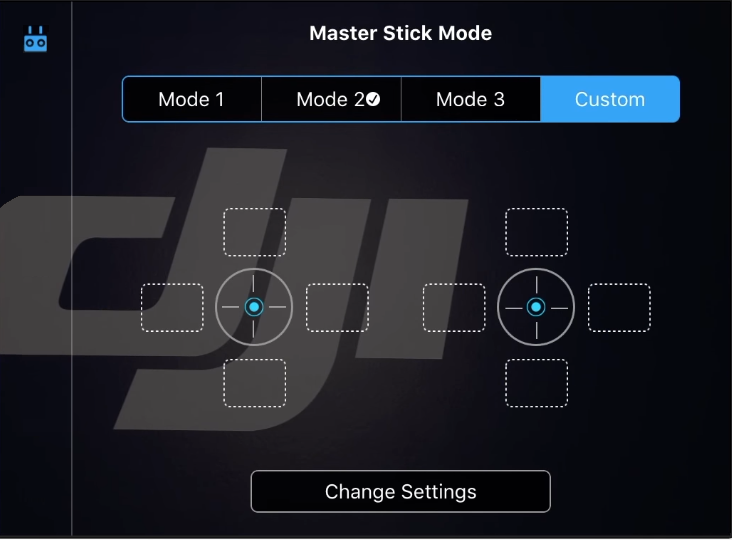
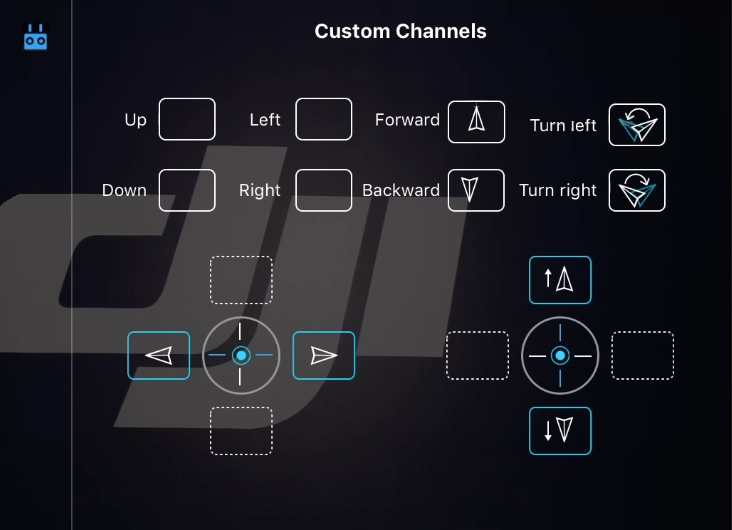
Stick Mode
) control of the drone: Mode 1 / Mode 2 (default) / Mode 3.
Also available is a manual setting of the operation of the sticks - "Custom", which allows the user to assign the actions of the drone for each movement of the sticks. To manually configure the operation of the sticks, tap on the "Custom" section, and then on the "Change settings" icon. Drag each icon to indicate the direction of the aircraft: Up / Down / Left / Right / Forward / Backward / Turn left / Turn right) on the axis of each stick. Upon completion of the placement, confirm the installation by tapping on the "Save" icon.
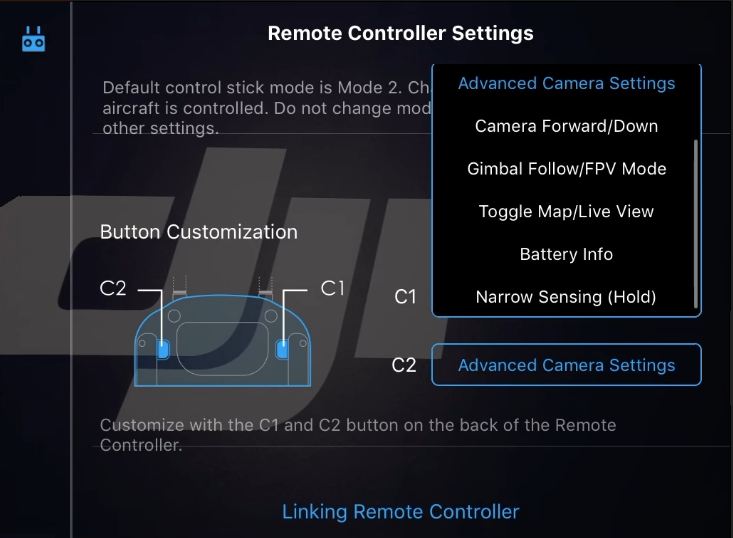
Button Customization
As you may have noticed, on there are two C1 / C2 buttons on the back of the control panel. These buttons are customizable, in other words, the user decides for himself what each of them will be responsible for. Accordingly, this menu allows you to assign one of the available commands to these buttons. To do this, select any command from the drop-down menu opposite C1 / C2. By default, both buttons open the Advanced Camera Settings, but you can also set, for example, that when you press C1 / C2, all information about the battery (Battery Info) is displayed on the screen, or you can force the drone's camera to quickly switch from horizontal positions forward to vertical bottom and back (Camera Forward / Down), change the gimbal mode (Gimbal Follow / FPV mode), display the map, and then switch back to the first person mode (Toggle Map / Live View). Experiment with each one and choose what you need.
Linking Remote Controller
If for any reason the remote controller cannot communicate with the aircraft or the user bought a new remote and needs to pair it with the drone, this menu will allow you to easily pair them together. In order to link / bind the remote control and the drone, you need to turn on the drone and the remote control, tap on the “Linking Remote Controller” icon and press the special “link” button located on board the drone for two seconds (the location of the button can be found in the instruction manual in the section “ General view of the copter ").
Image Transmission Settings
To go, tap on the corresponding icon “
” on the left side of the “Main Controller Settings” menu. This menu determines the quality and range of the video transmission. To ensure reliable FPV transmission, the default settings are set to “Auto” (the system itself monitors and switches to free channels for transmission).
Manual selection of a free channel “Custom” is also available in the menu. To manually select a channel, tap on the "Custom" icon and select the most free one in the "Select Channel" section (where, based on the color palette: Current Chanel - current channel; Stable - stable channel; Unstable - unstable channel). The Transmission Quality setting determines how sharp and clear the FPV image will be. However, keep in mind that the higher the FPV image quality, the shorter the distance the signal will travel.
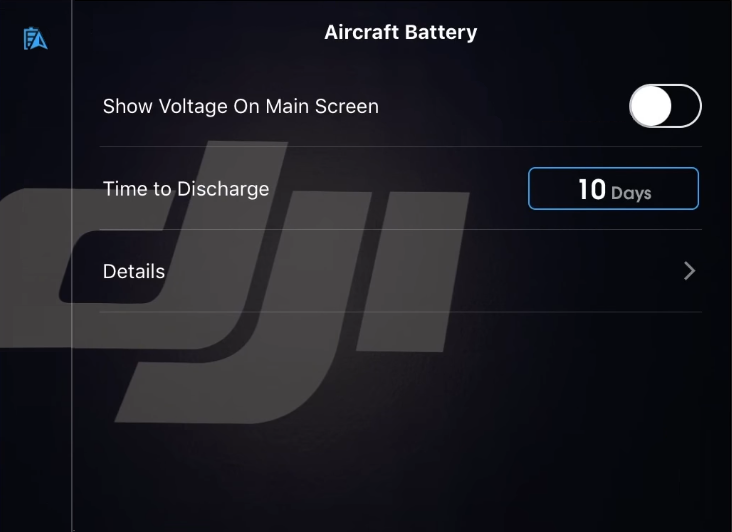
Aircraft Battery
This section concerns information and settings of the battery installed in the drone. Here the user can find out about the current state of the battery: voltage, capacity (full / residual), temperature, you can see the flight time on the current charge of this battery and how many times it was charged. To go, tap on the corresponding icon “
” on the left side of the “Main Controller Settings” menu. Further details on each setting.
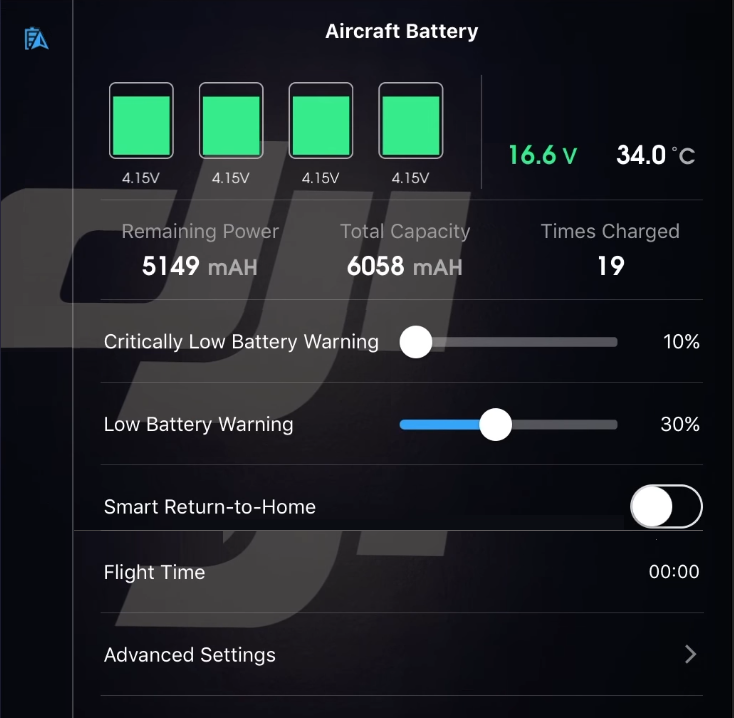
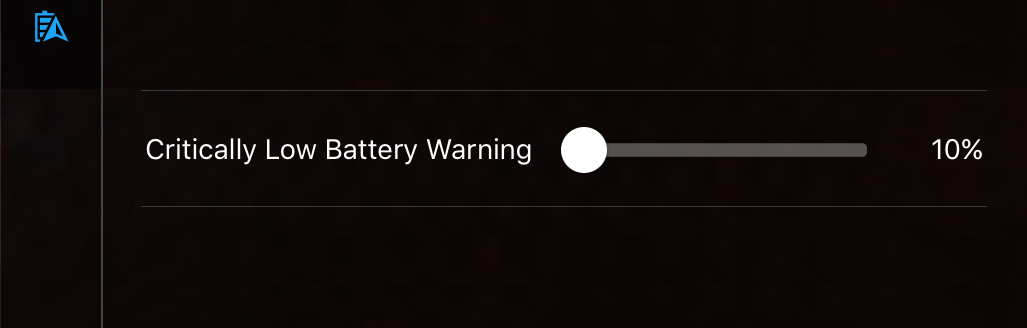
Critically Low Battery Warning
This setting sets the residual battery charge, which will be considered critical by the system. upon reaching which the return to home function will be automatically activated.
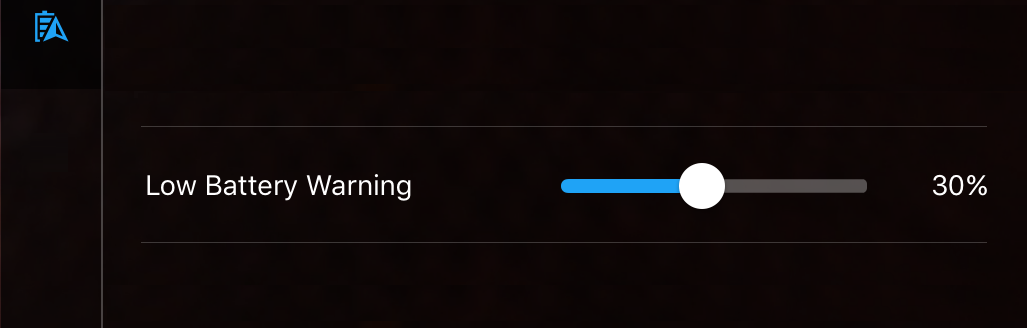
Low Battery Warning
This setting sets the residual charge at which the system will notify the user about its low value...
Smart Return-to-home
the same trajectory along which the manned flight was carried out, which in itself predetermines the safest return of the drone to the take-off site.
Flight time
The timer reflects the time of the current flight.
Advanced Settings
self-discharge of the battery and learn about its current status. Further details on each setting.
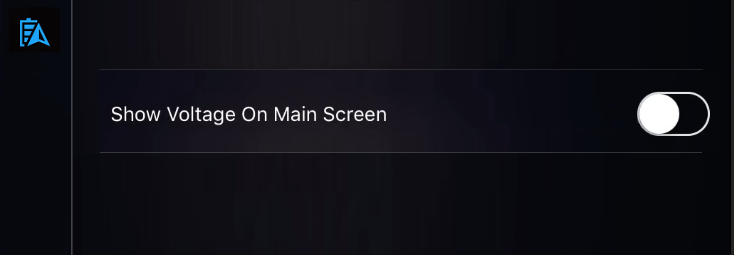
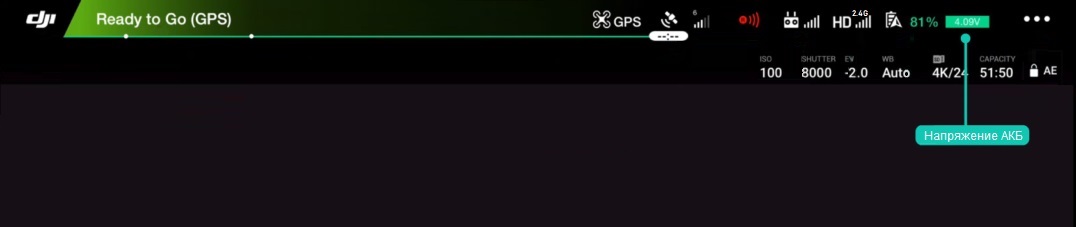
Show Voltage On Main Screen
When the setting is active, the battery voltage indicator will be displayed in the upper right corner of the main flight screen.
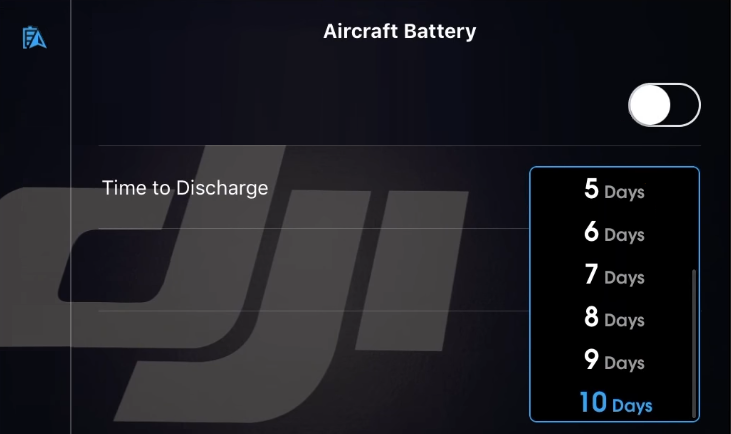
Time to Discharge
The setting sets the period after which the battery will self-discharge. This setting ensures correct operation of the LiPo battery and prevents it from being stored in a charged state.
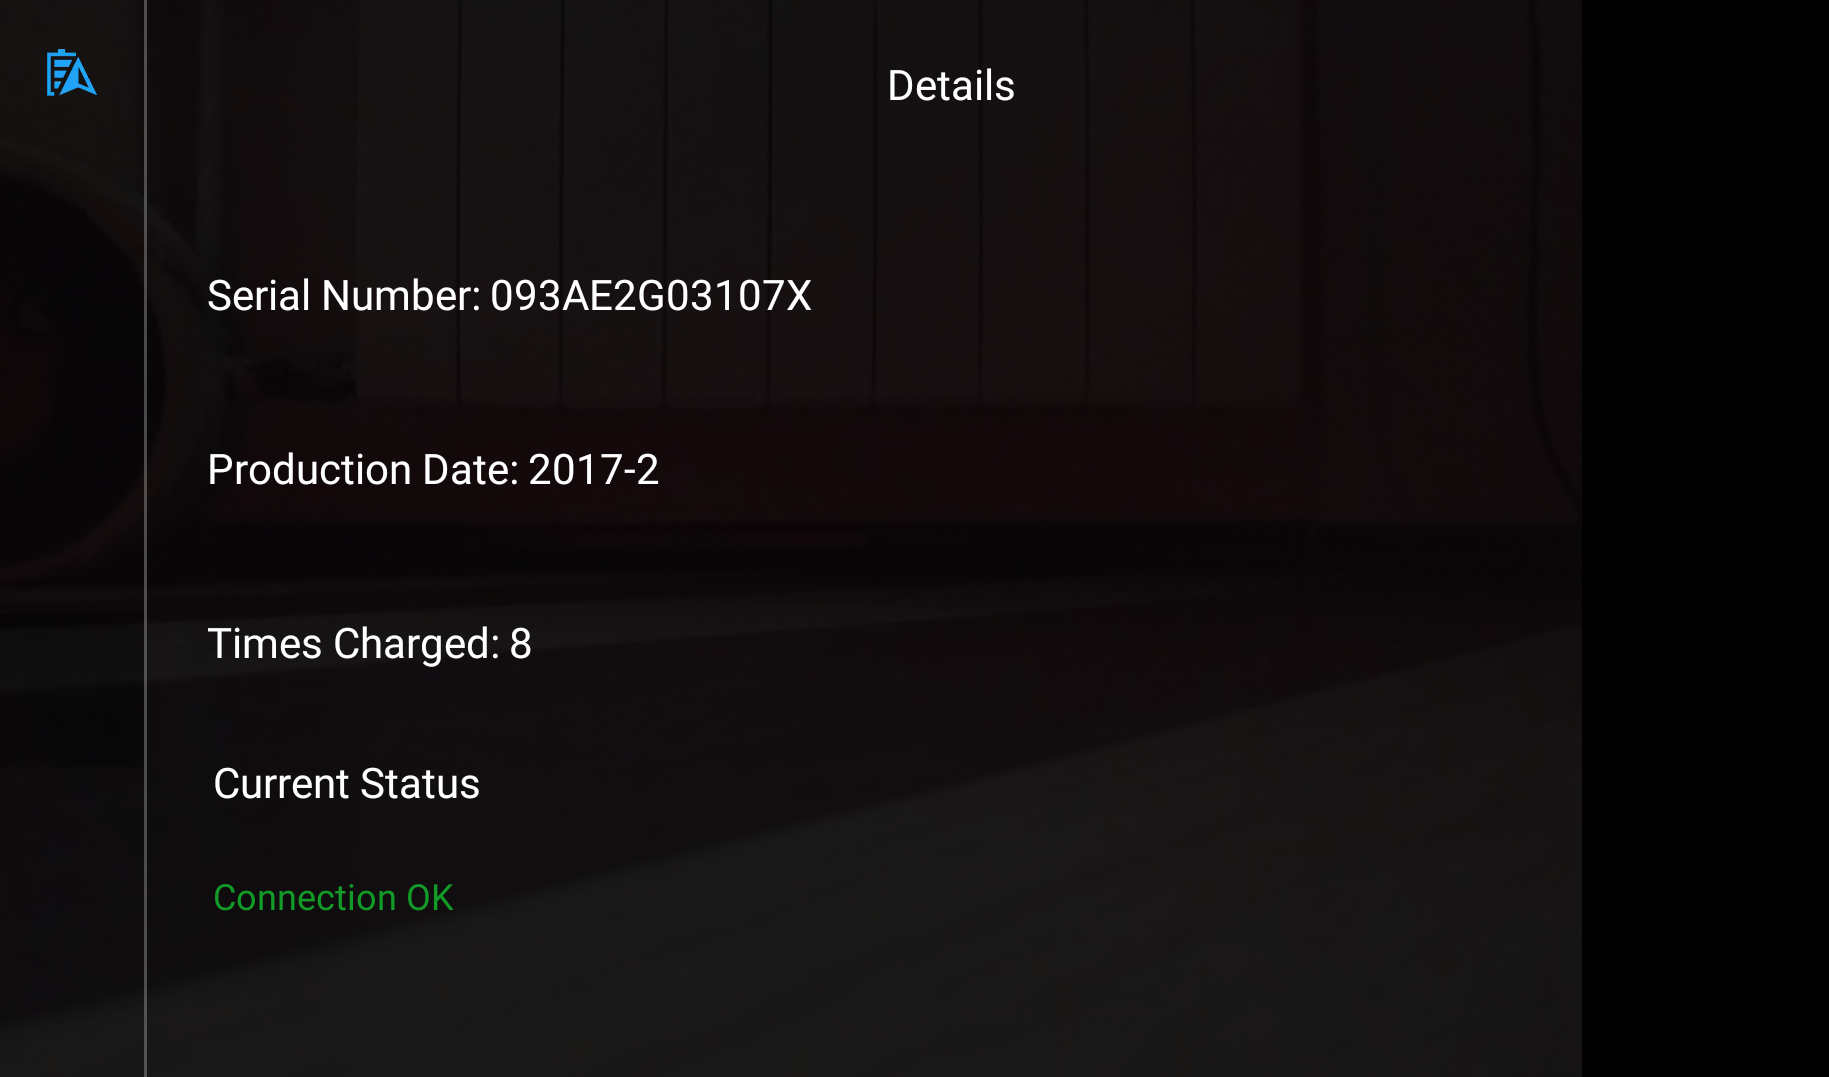
Ditails
This section displays the serial number of the battery, the date of manufacture, how many times it was charged and the status of the current state.
Gimbal Settings
In this menu, the user can change the operation modes of the gimbal of the camera. To go, tap on the corresponding icon in the form of "camera
" on the left side of the "Main Controller Settings" menu. Further details on each setting.
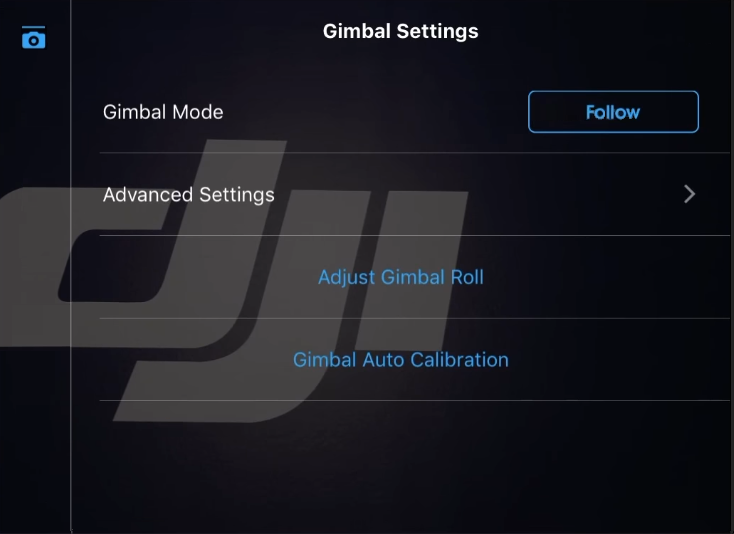
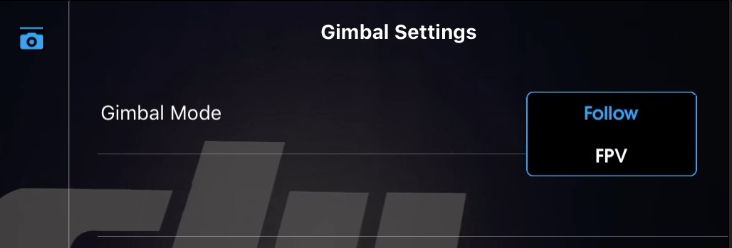
Gimbal mode
Gimbal mode - two gimbal modes are available:
- Follow = the camera always stabilizes and keeps the horizon (standard operating mode).
- FPV (First Person View) = simulates the flight of a racing drone / flight of a bird, ie. in this mode, the drone's camera is fixed, and when the drone pan / tilt, the first person view will also be displayed with rolls. This mode is relevant for flying with DJI FPV goggles.
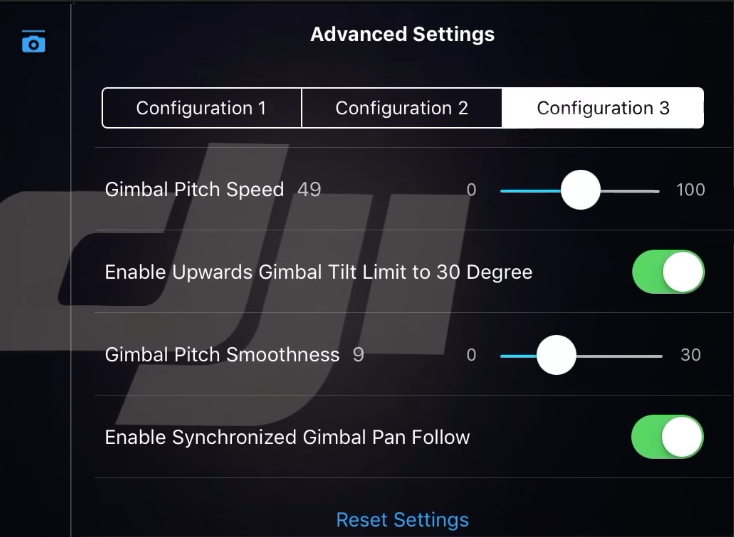
Advanced Settings
This menu allows you to set 3 different configurations that determine the operation of the gimbal. It is recommended that you play around with each setting to fully understand how they work. For example, you can set the settings for each configuration on the basis of fast, normal and slow:
- Configuration 1 = default gimbal travel speed.
- Configuration 2 = Gimbal works fast. It can be useful when taking photos, so that you can quickly expose the camera without missing a single unique frame.
- Configuration 3 = Gimbal travels slower. It will be relevant for shooting perfect panoramas.
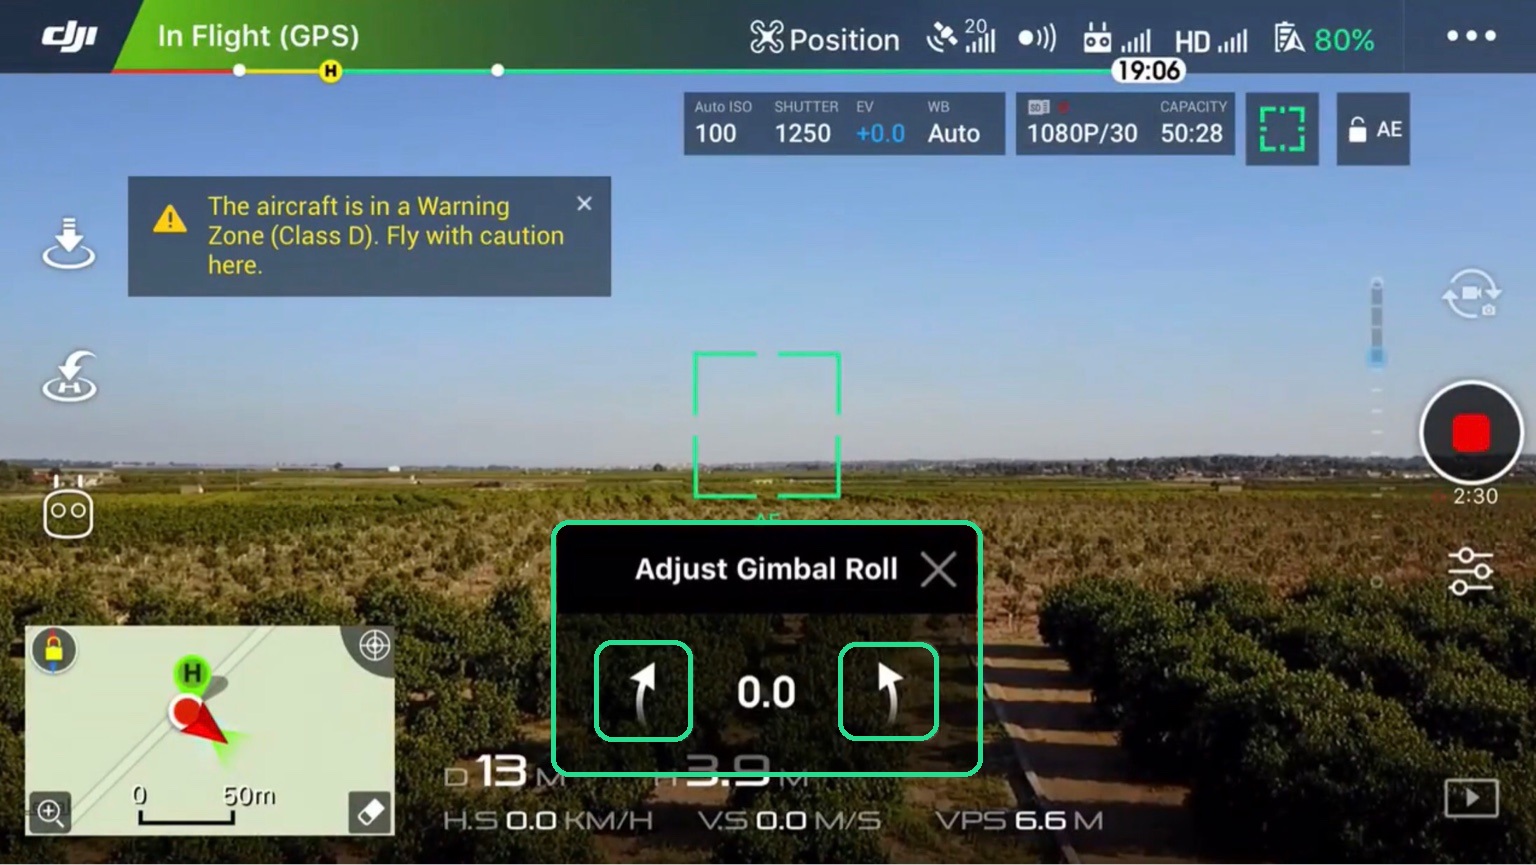
Adjust Gimbal Roll
This adjustment allows you to manually correct the horizontal position of the camera if you notice that the horizon is not ideal.
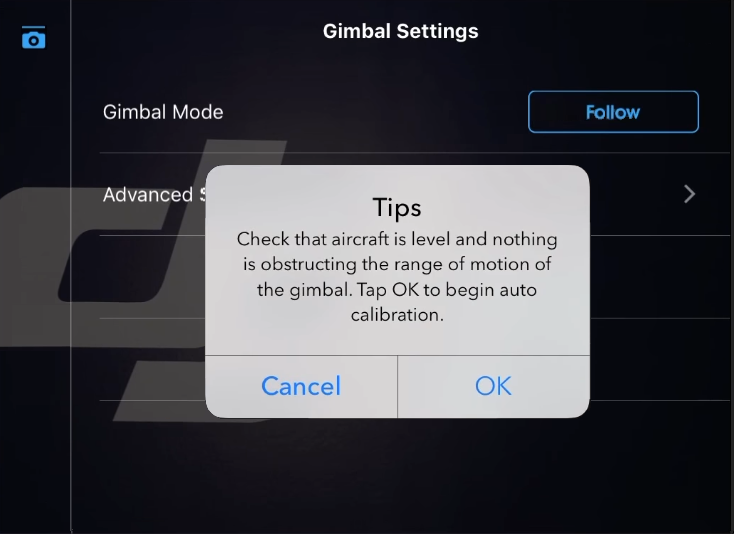
Gimbal Auto Calibration
This setting automatically aligns the horizontal position of the camera. Tap on "Gimbal Auto Calibration" before starting auto calibration, the system will ask the user to make sure that the drone is in a horizontal position and nothing interferes with the gimbal movement (for example, if the gimbal's transport lock is removed). If everything is ok, then tap OK to start automatic calibration. To cancel, tap “Cancel”.
General Settings
focus peak limit, cache settings, live streaming, as well as key information about the drone, remote control, mobile application. To go, tap on the corresponding icon in the form of "three dots
" on the left side of the "Main Controller Settings" menu. Further details about each section, subsection and setting.
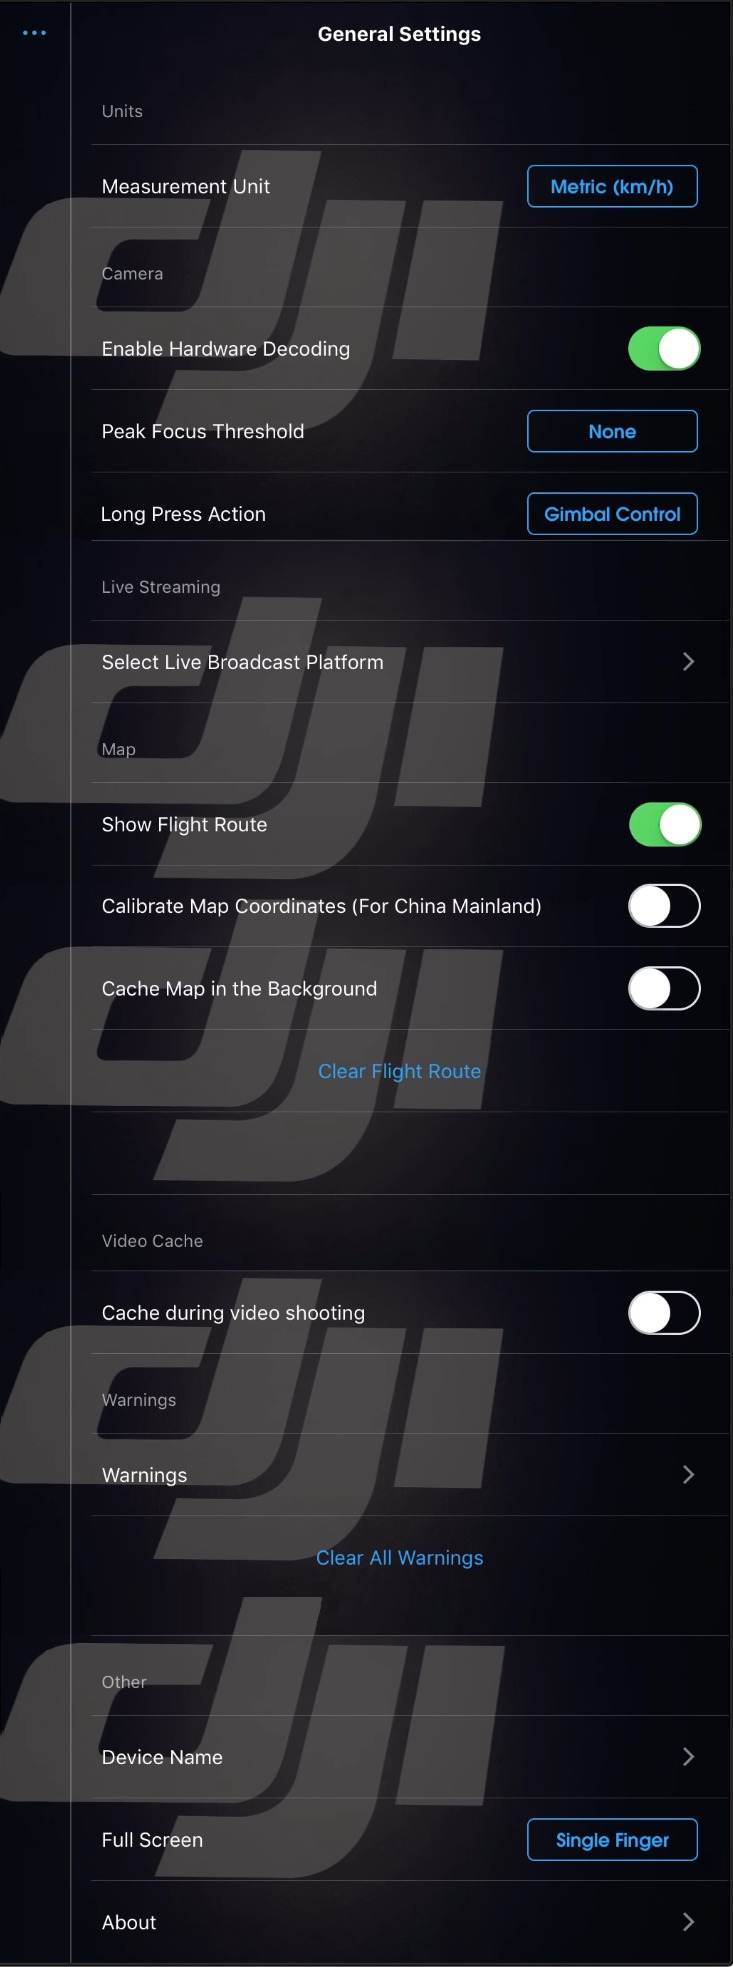
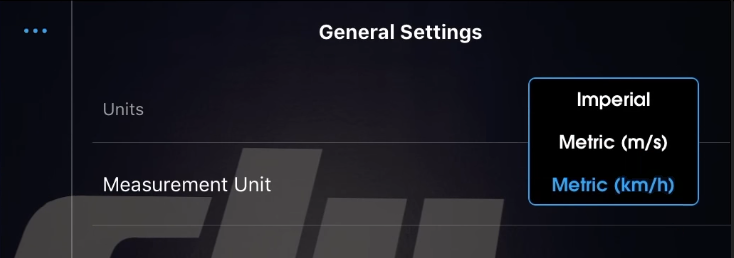
Units
Measurement Unit - allows you to select the system of measures:
- Imperial
- Metric m / s or km / h (Metric m / s or km / h)
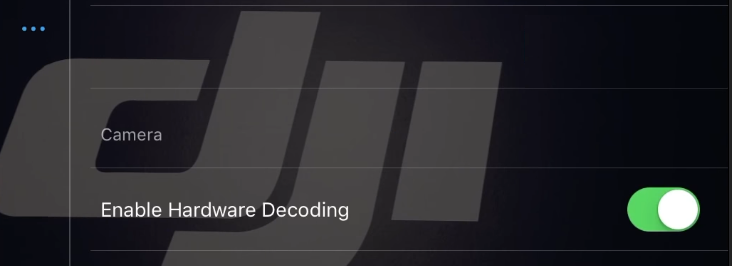
Camera
Enable Hardware Decoding
Enable Hardware Decoding - Disables or enables hardware decoding.
Tip
- If you experience delays or freezes while streaming a live video stream (FPV), try enabling hardware decoding. as this can contribute to better image transmission.
- Hardware decoding helps with the processing power required to decode live video. Therefore, if you are using an older or slower smartphone / tablet, enable hardware decoding as it can also help reduce overheating of the device as it does not need to work hard to decode the live video stream coming from the drone.
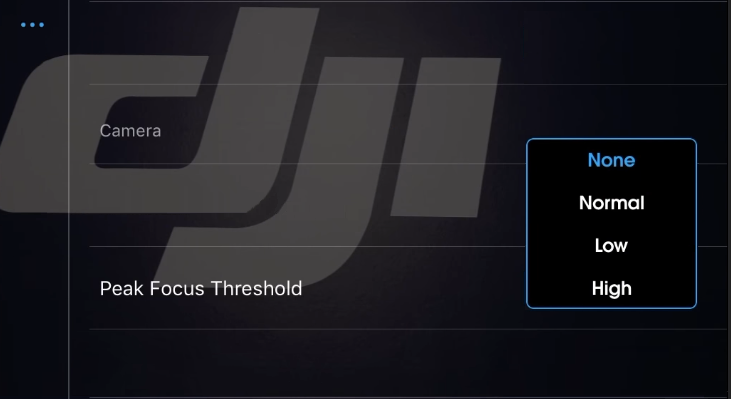
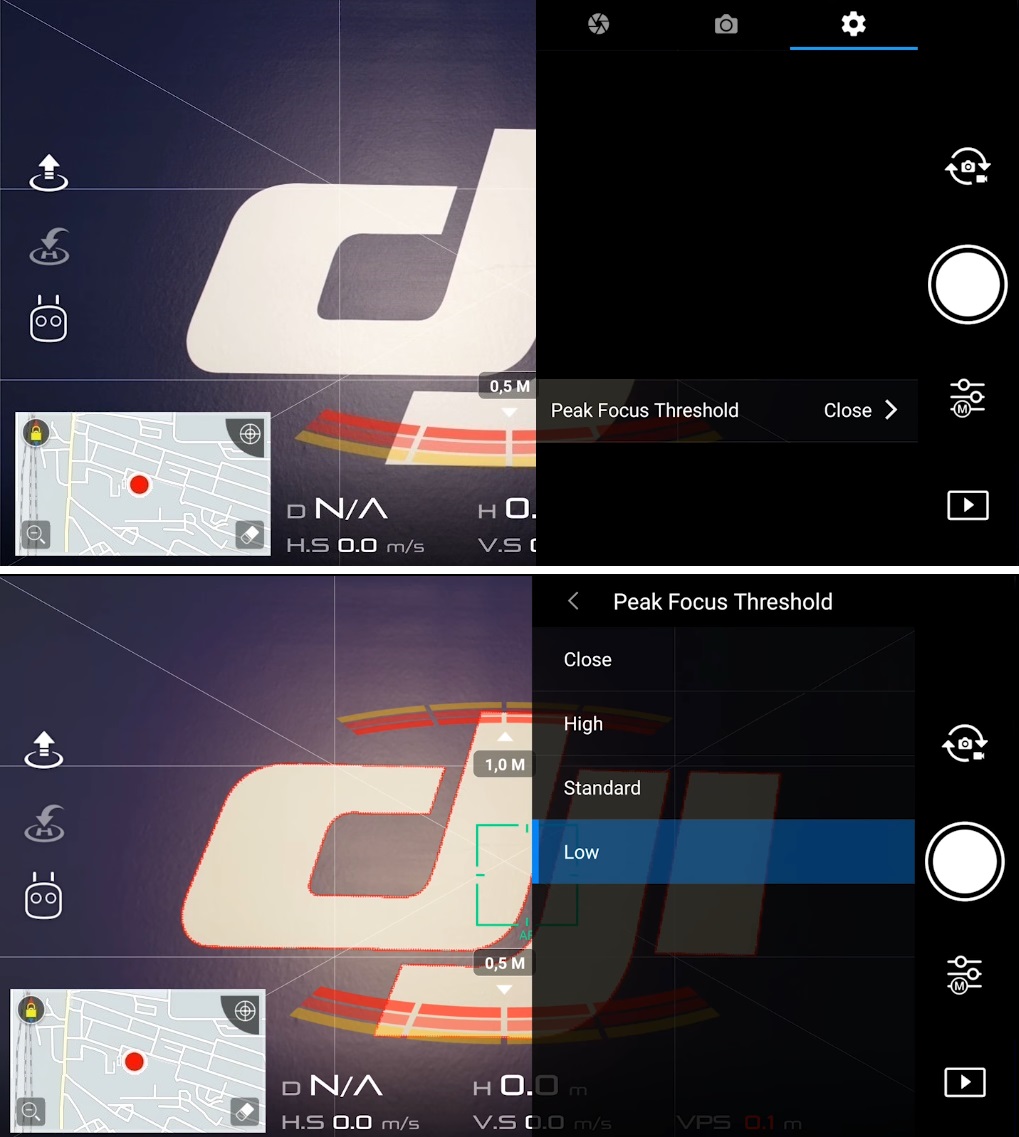
Peak Focus Threshold
Peak Focus Threshold — Highlights all subjects in the focus area in red on the monitor. You can select the backlight mode: Normal, Low, High.
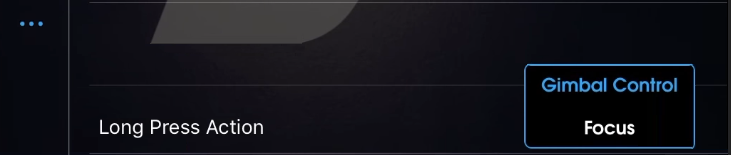
Long Press Action
Long Press Action - the setting sets the action that will be performed when the main flight screen is touched for a long time. There are two actions available: Gimbal Control and Focus.
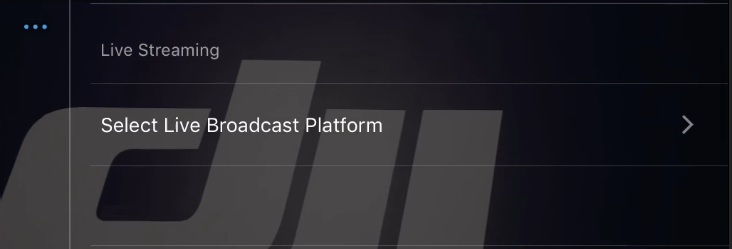
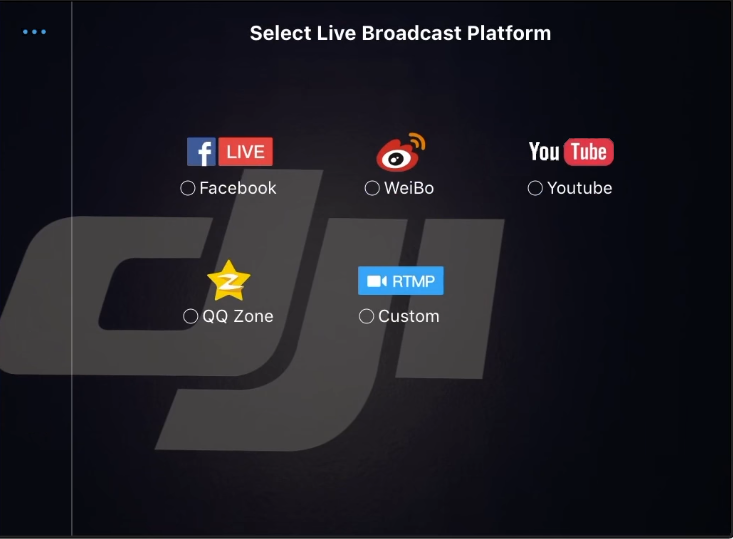
Live Streaming
Select Live Broadcast Platform - here the user can choose one of the five available platforms (Facebook / YouTube / WeiBo / QQ Zone / RTMP Custom) to display live video from the drone camera to share what you see with everyone.
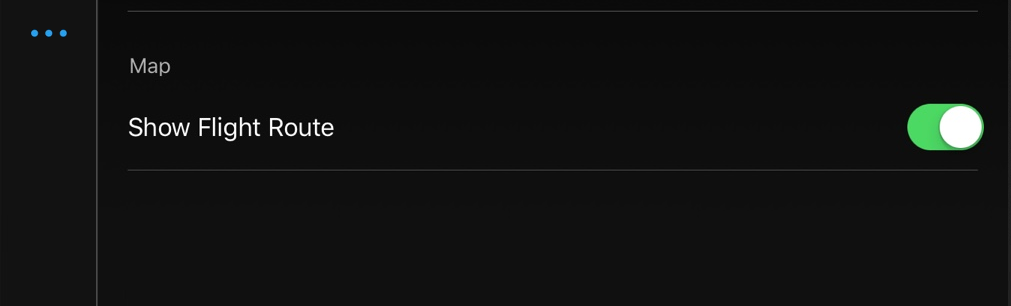
Map
Show Flight Route
Show Flight Route - enables or disables the display of the flight route on the map.
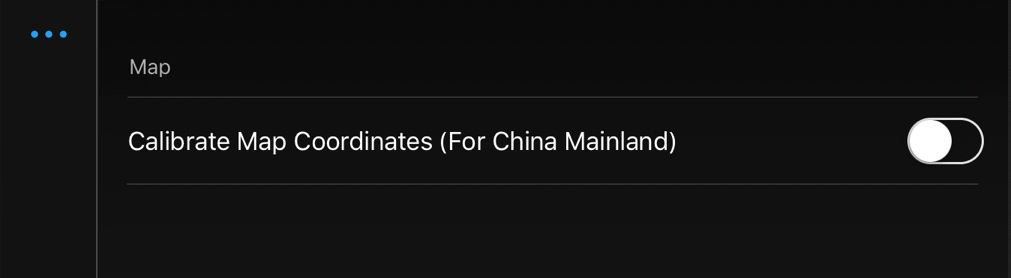
Calibrate Map Coordinates
Calibrate Map Coordinates (for China Mainland) - the setting is relevant only for China.
Cache Map in the Background
Cache Map in the Background - this option is relevant if in the place where you are going fly no internet connectivity. Turn it on and download the map over WiFi before leaving the house. The DJI Go 4 app will save the map so you can use it when you get to your flight location.
Clear Flight Route
Clear Flight Route - this option allows you to delete the data of loaded maps.
Video Cache
The settings in this menu affect the handling of cached files. For previewing footage, the DJI Go 4 app saves low-resolution photos and videos (proxy files) inside the app. Of course, this takes up space on the paired smartphone / tablet, so you can control this process. Further details about each section, subsection and setting.
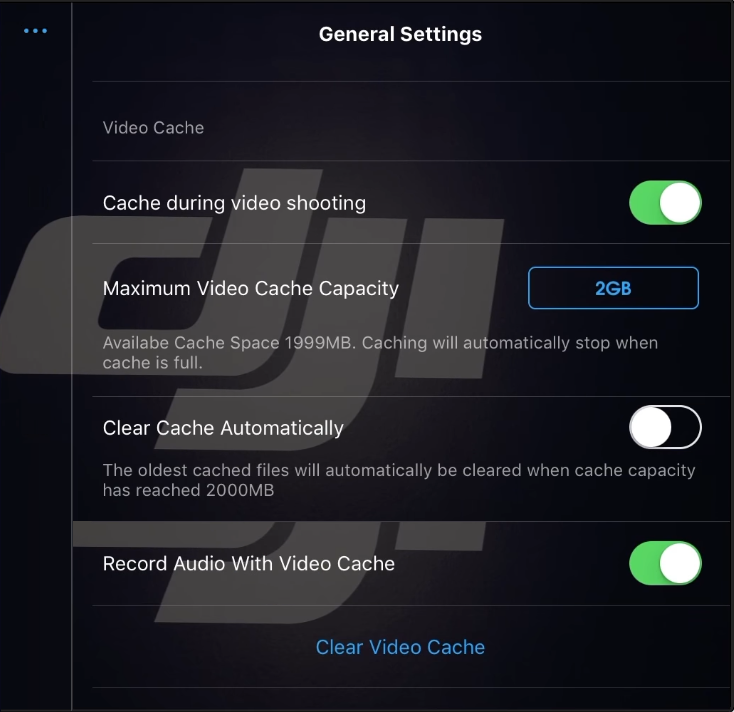
Cache during video shooting
Cache during video shooting - when option active, the process of caching the recorded files will be carried out during shooting.
Tips
- If the video stream is unstable or if you are using an outdated smart device that does not have enough free space, try disabling the Cache during video shooting »To improve the quality of video communication.
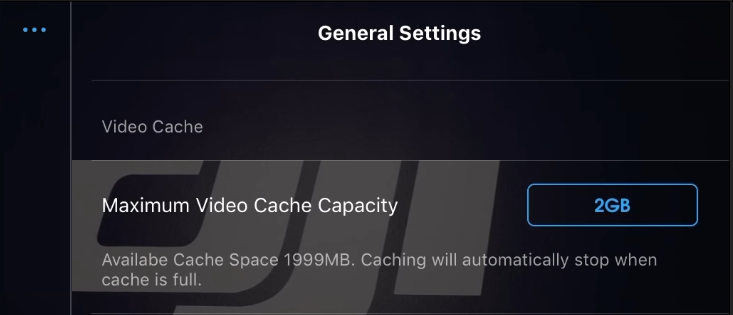
Maximum Video Cache Capacity
Maximum Video Cache Capacity - this option allows you to set the maximum space for saving the cache. 2GB / 4GB / 8GB / 16GB available. As soon as the volume is full, saving the cache will automatically stop.
Clear Cache Automatically
Clear Cache Automatically - this option automates the process of deleting the cache... As soon as the space allocated for the cache is full, the system will automatically free it up by deleting it.
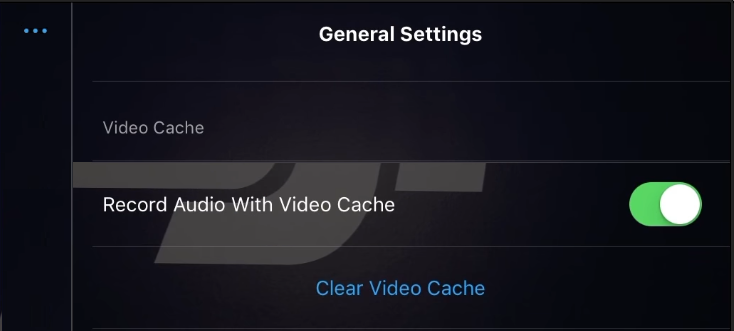
Record Audio With Video Cache
Record Audio With Video Cache) - the option activates / deactivates the recording of the audio cache together with the video cache (when recording sound through the microphone of a paired smartphone / tablet).
Clear Video Cache
Clear Video Cache - allows you to delete all accumulated cache in one tap.
Warnings
Warnings - here you can view all the messages ever issued by the drone system.
Clear All Warnings
Clear All Warnings - allows you to one tap to delete all saved system warnings.
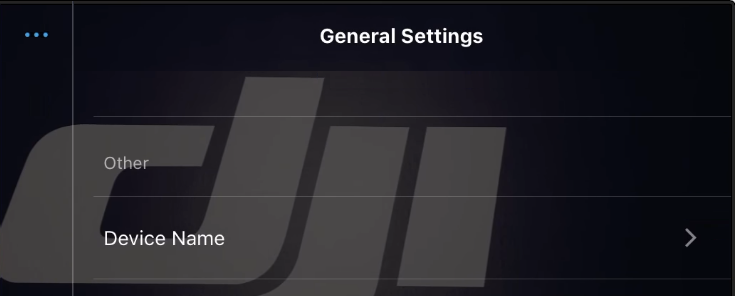
Other
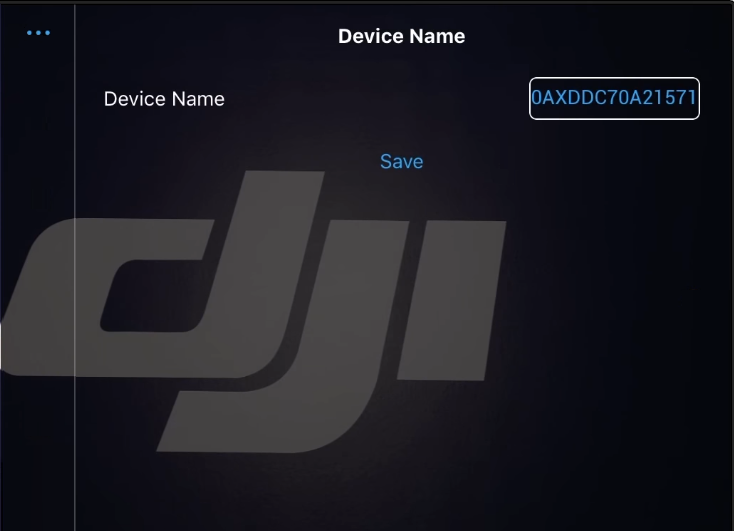
Device Name
Device Name - here the user can set a name for his drone.
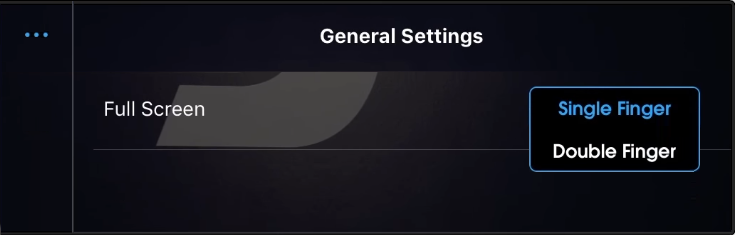
Full Screen
Full Screen - this option allows the user to set the display method for the full screen mode (hides the entire interface from the main flight screen). You can show / hide the interface with one finger (Single Finger) or two fingers (Double Finger). To clear the main flight screen of virtual interface elements, swipe down with one finger / two fingers on the screen to return everything to its original state, repeat the reverse movement from bottom to top.
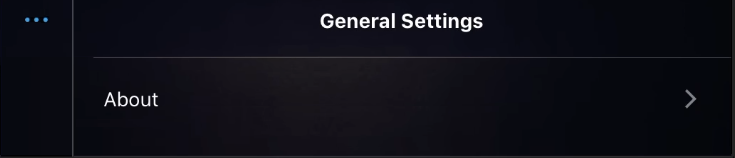
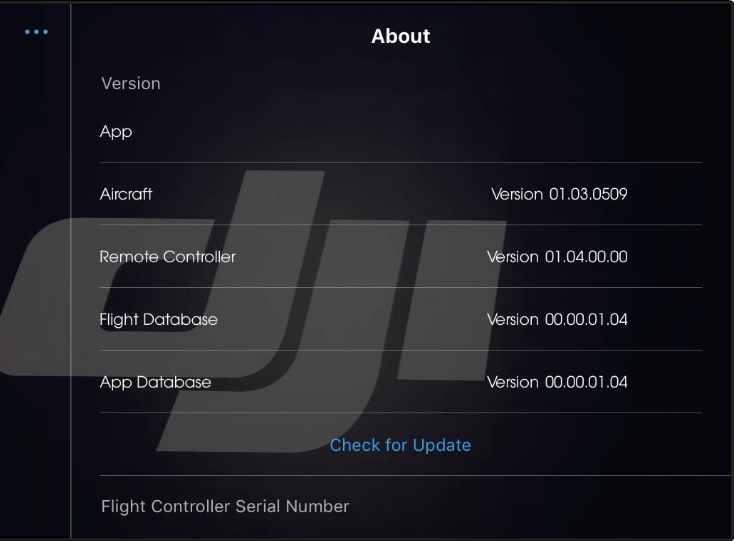
About
About - in this submenu the user can specify information about the device, such as the firmware version of the mobile application / drone / remote control control, the version of the flight database and the application database, as well as check the need to update them by tapping on the "Check for Update" icon.
Flight Controller Serial Number
Flight Controller Serial Number - in this submenu the user can check the serial number of the drone's flight controller.
Right side of the main flight screen
Right side of the main screen - provides access to settings and control of the camera. Here the user will be able to control the camera and adjust the quality of photo / video shooting, as well as choose the format in which the material will be recorded. Further, for each setting separately.
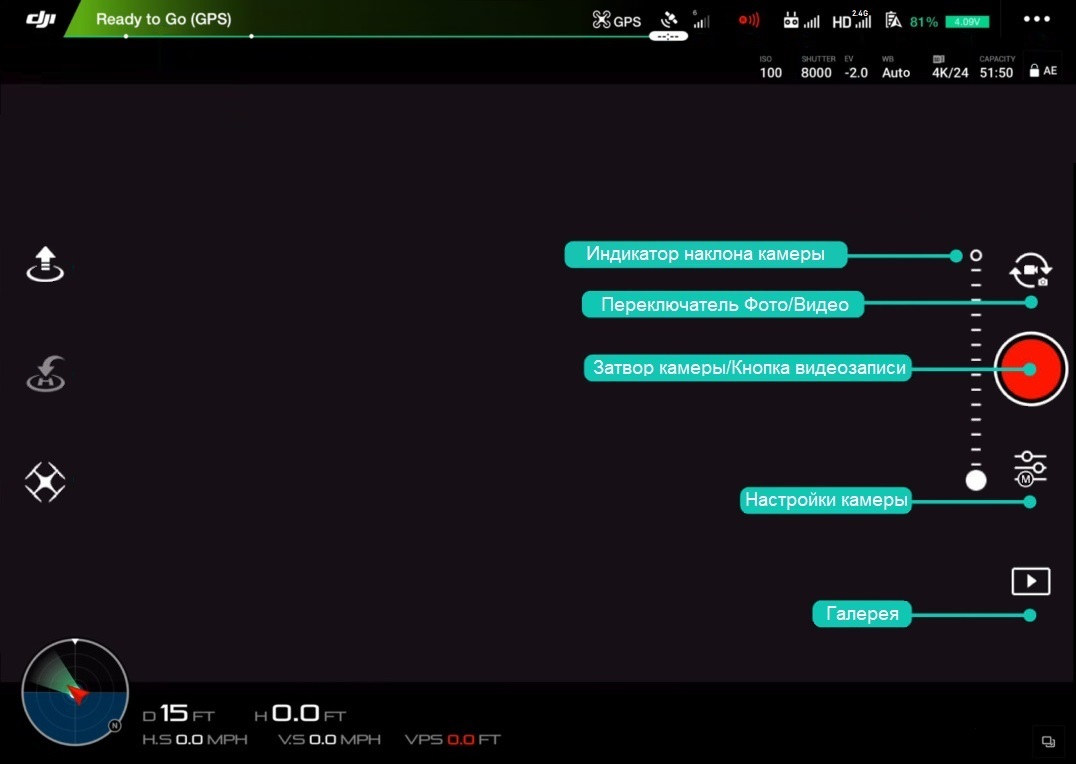
Camera tilt indicator
Camera tilt indicator - informs the pilot about the current position of the onboard camera relative to the horizon.
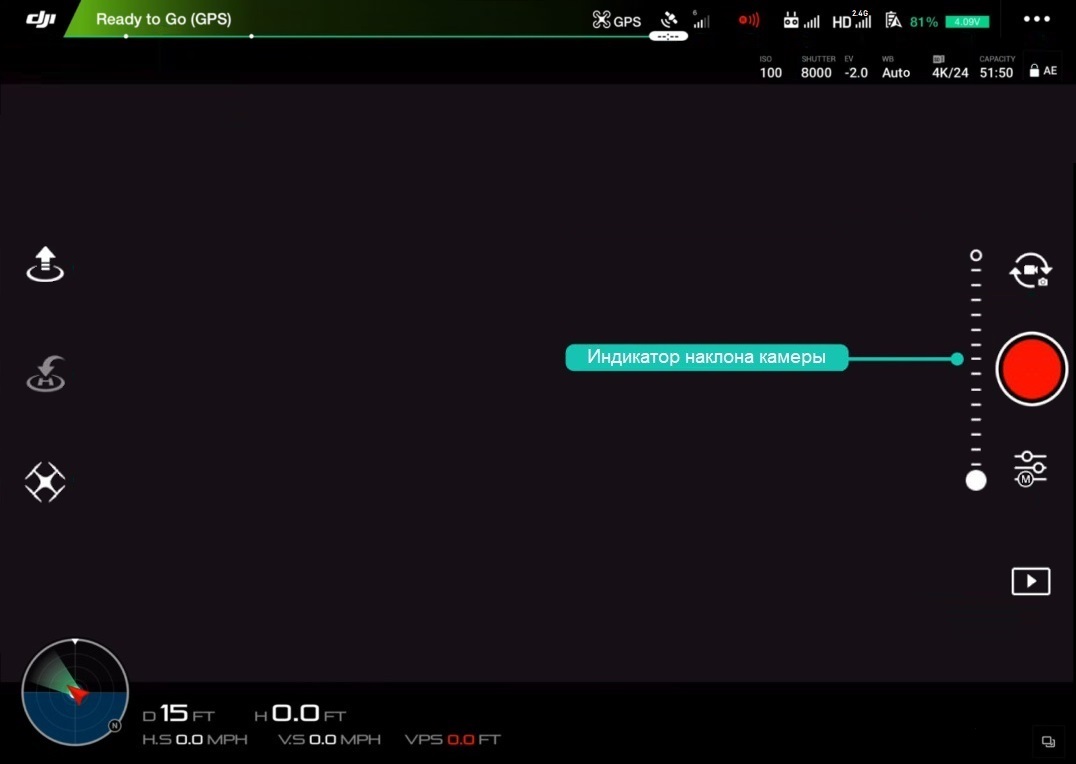
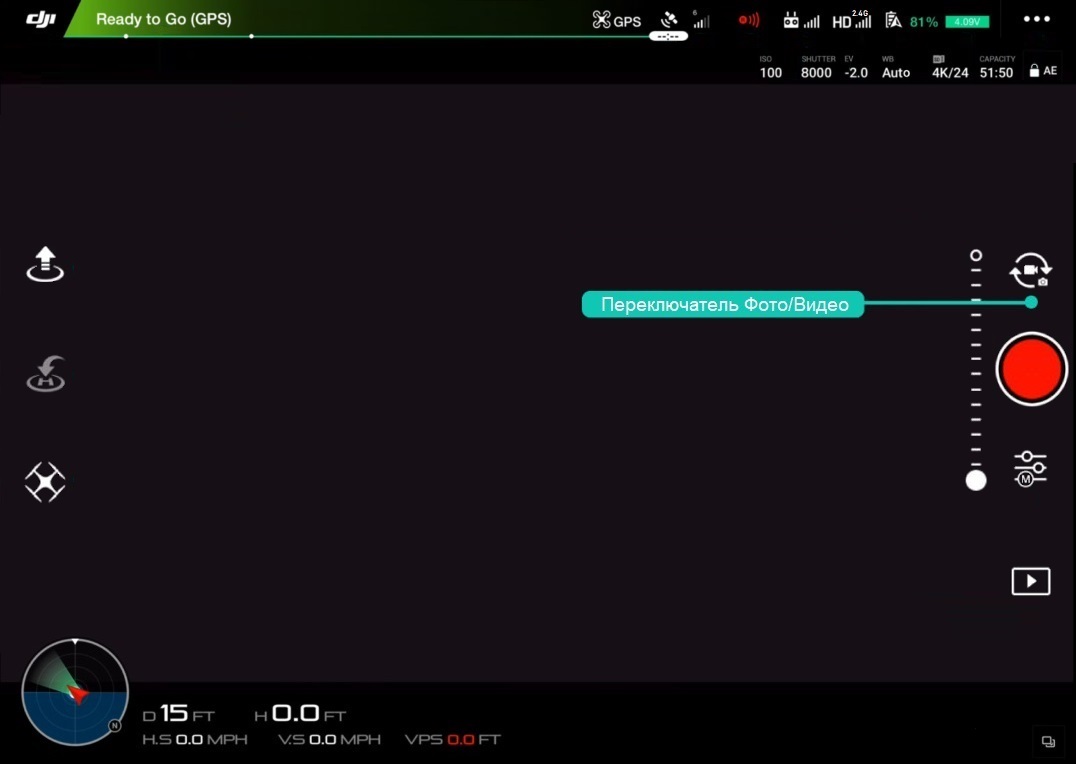
Photo / Video Selector
Photo / Video Mode Selector - Switches between photo and video modes shooting. The current mode will be indicated by the icon in the center of the switch, if "video camera" - the mode of video recording, if "camera" - the mode of photography.
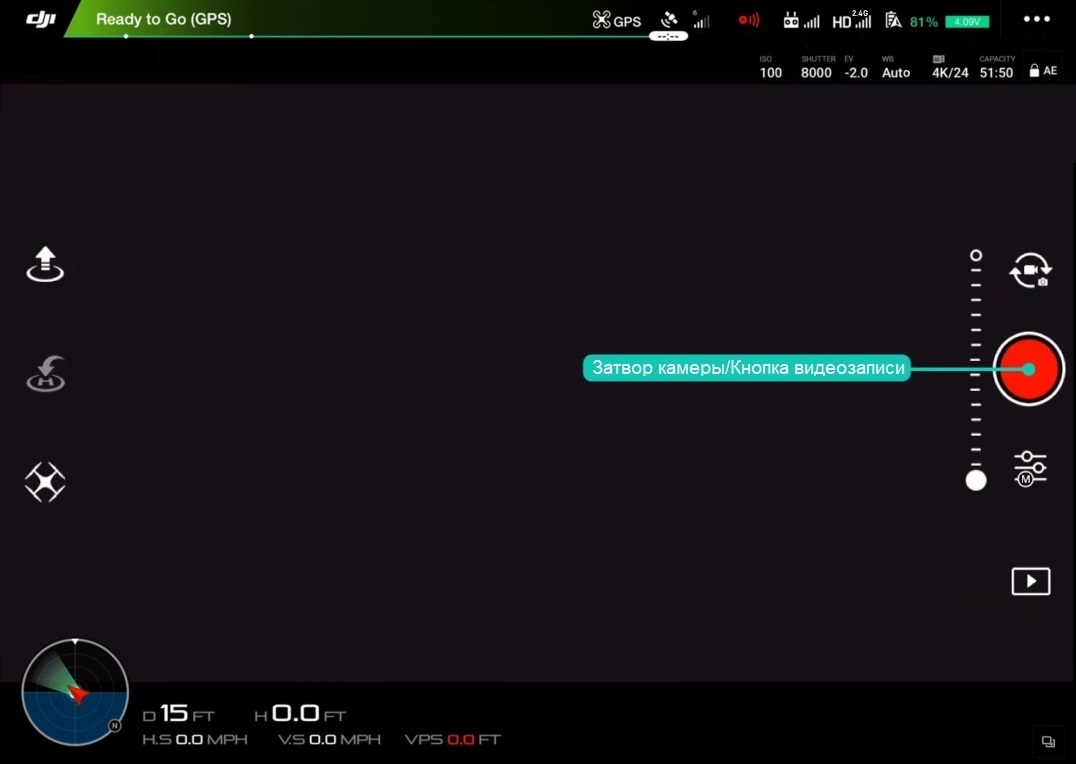
Camera shutter / Movie recording button
Camera shutter / Movie recording button - a virtual button that photo (white button) or starts / stops video recording (red button).
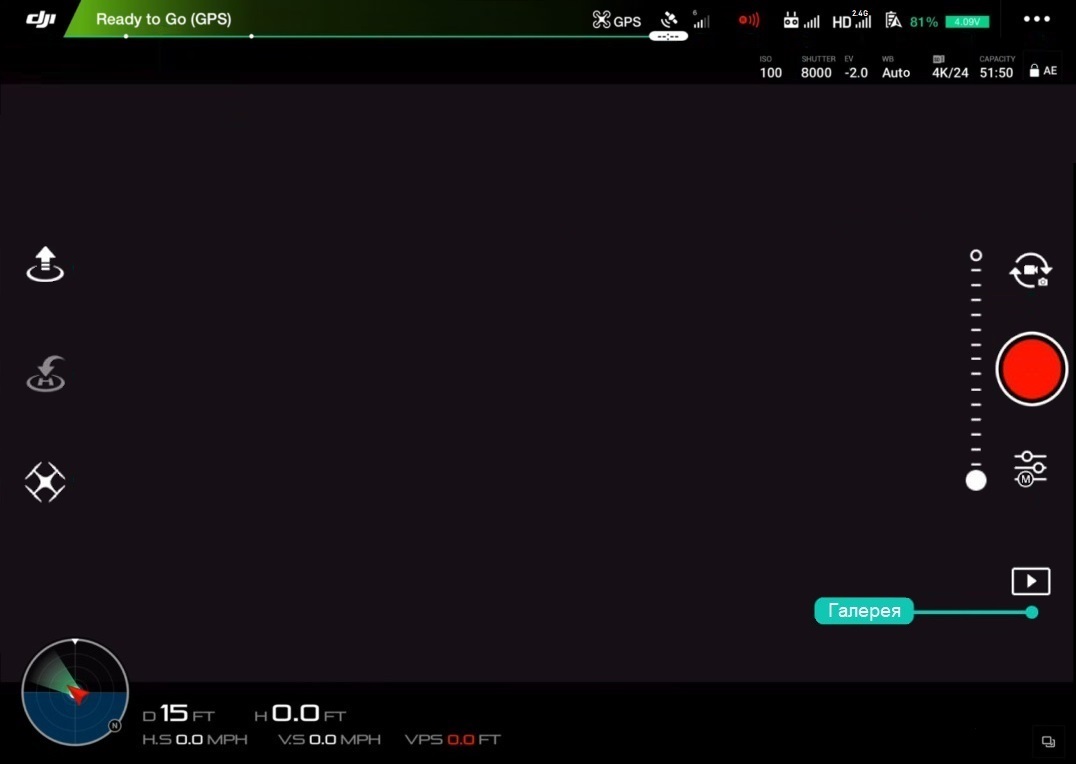
Gallery
A virtual button that allows you to go to the gallery with previously filmed material.
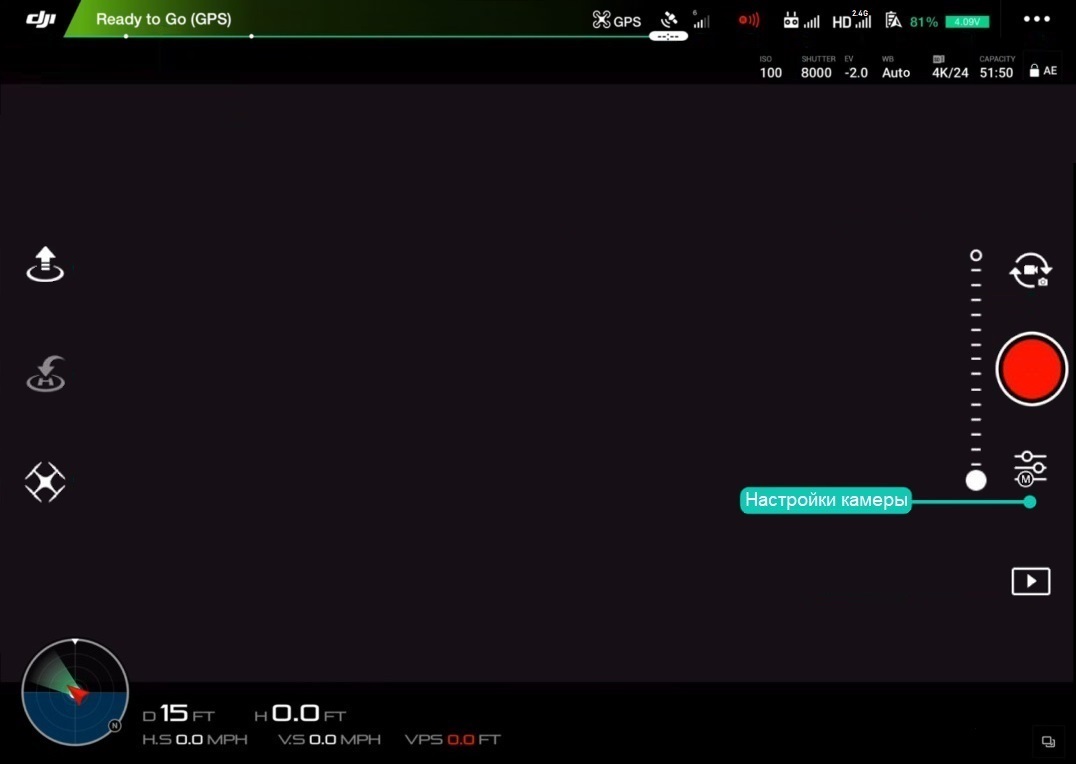
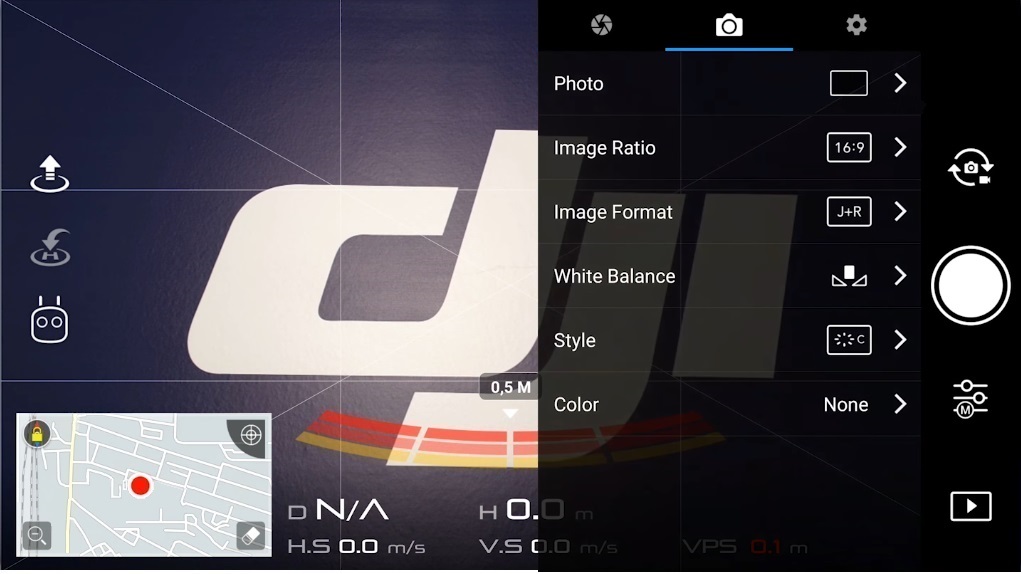
Camera Settings
Provides quick access to camera settings. The menu consists of three sections of settings: Photo / Video / Additional settings (gear icon). Further details on each section and settings.
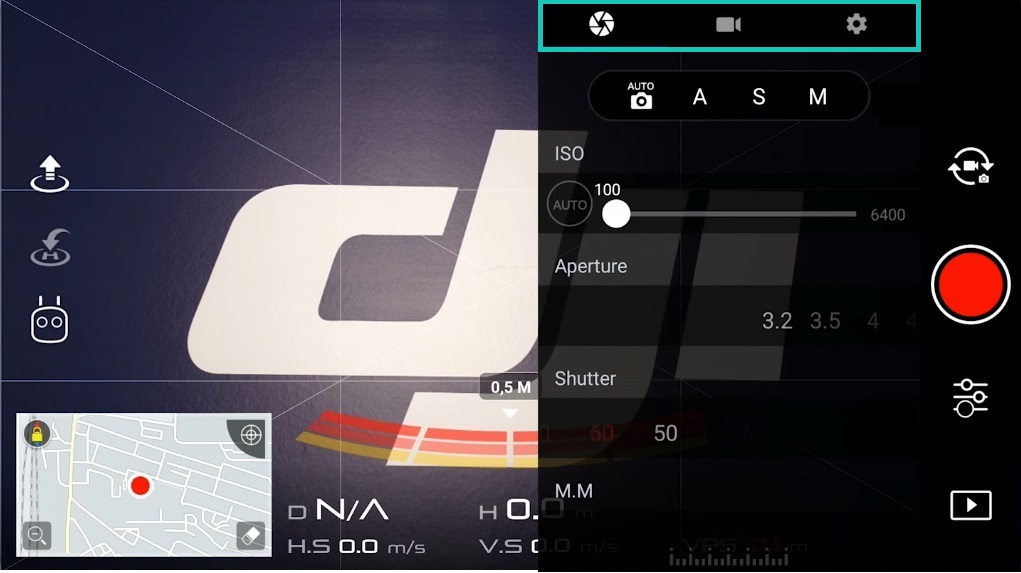
Photo
This section is composed of four setting modes:
- Auto
- A (Aperture)
- S (Shutter Speed)
- M (Manual)
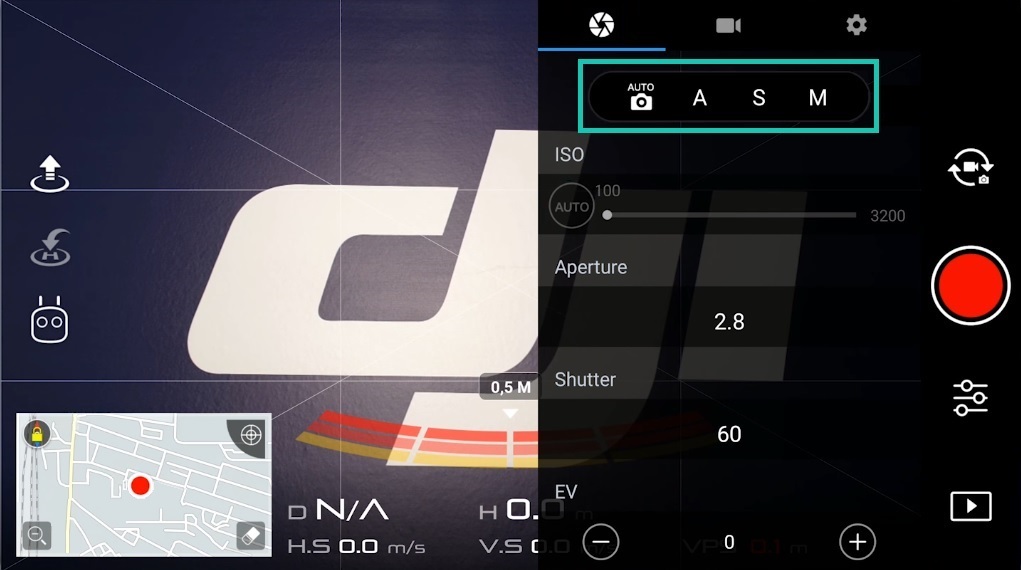
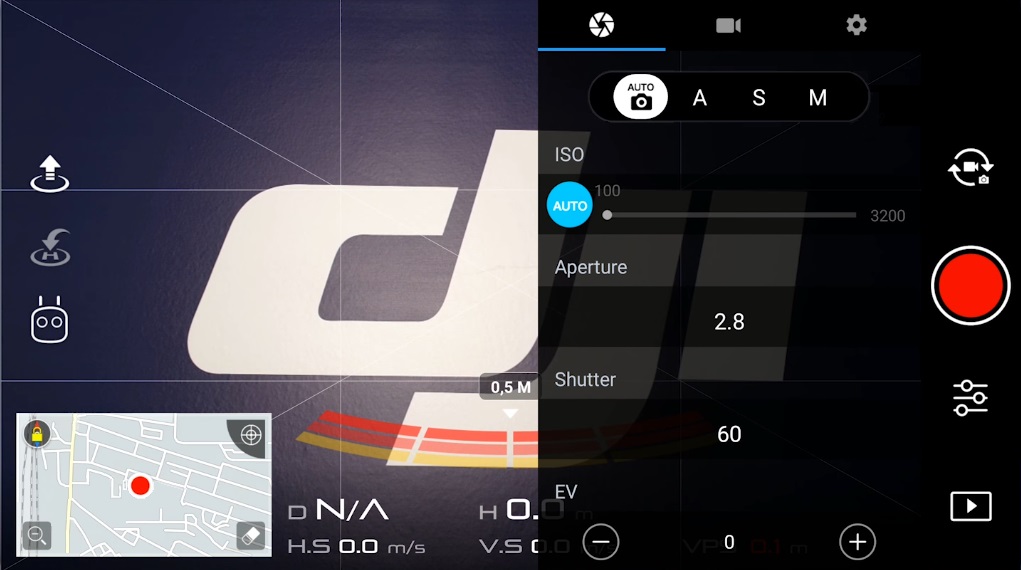
Auto mode
Auto mode is great for beginners as the camera automatically sets the ISO and Shutter Speed (and for some drones the Aperture value) except for the EV value, which is manually adjusted.
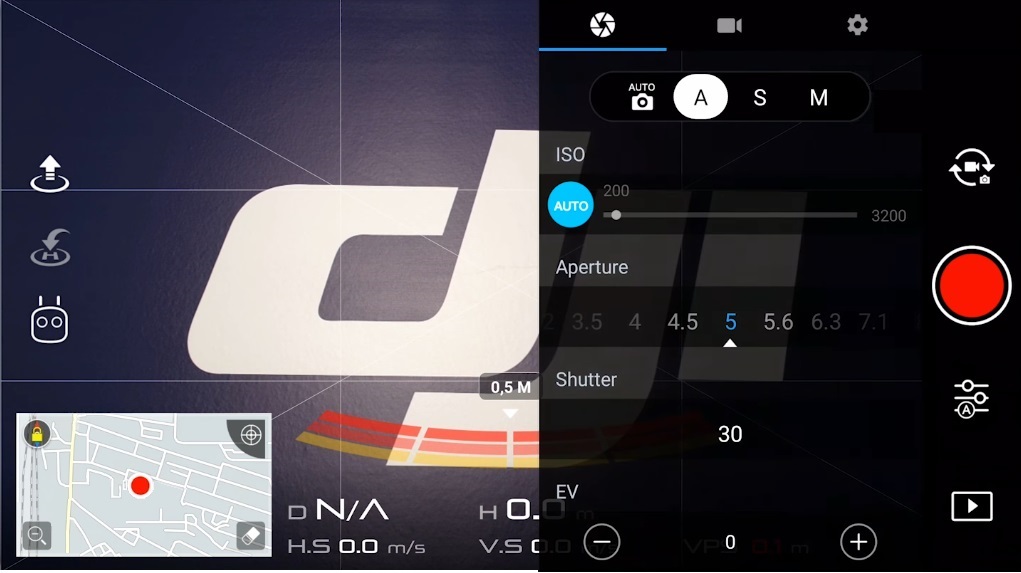
A mode
A mode - automatic mode with priority over the Aperture value. This means that in this mode, by adjusting the Aperture value, the system automatically adjusts the rest of the parameters.
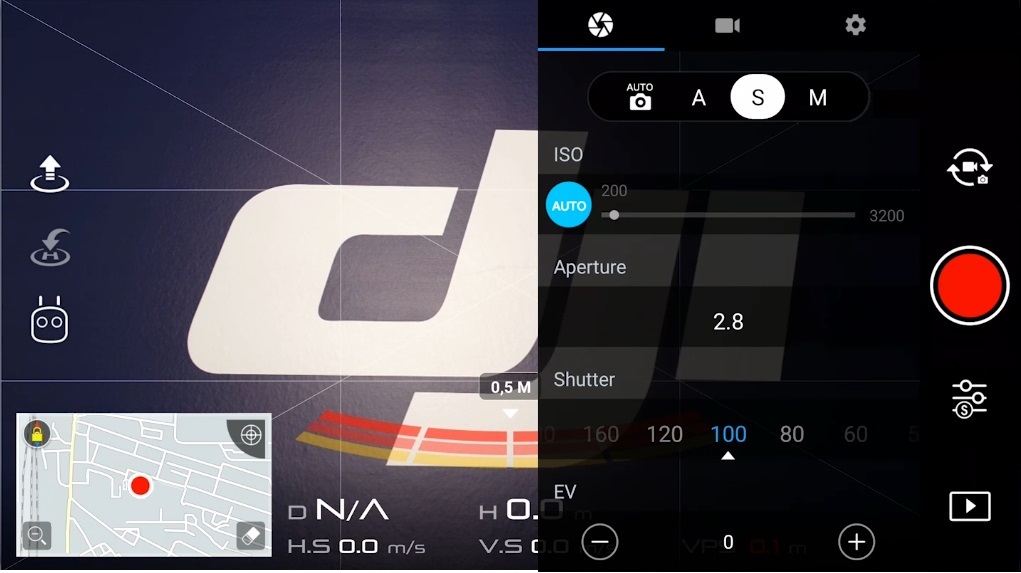
S mode
S mode - Auto mode with Shutter Speed priority. This means that in this mode, by adjusting the Shutter Speed value, the system will automatically adjust the rest of the parameters.
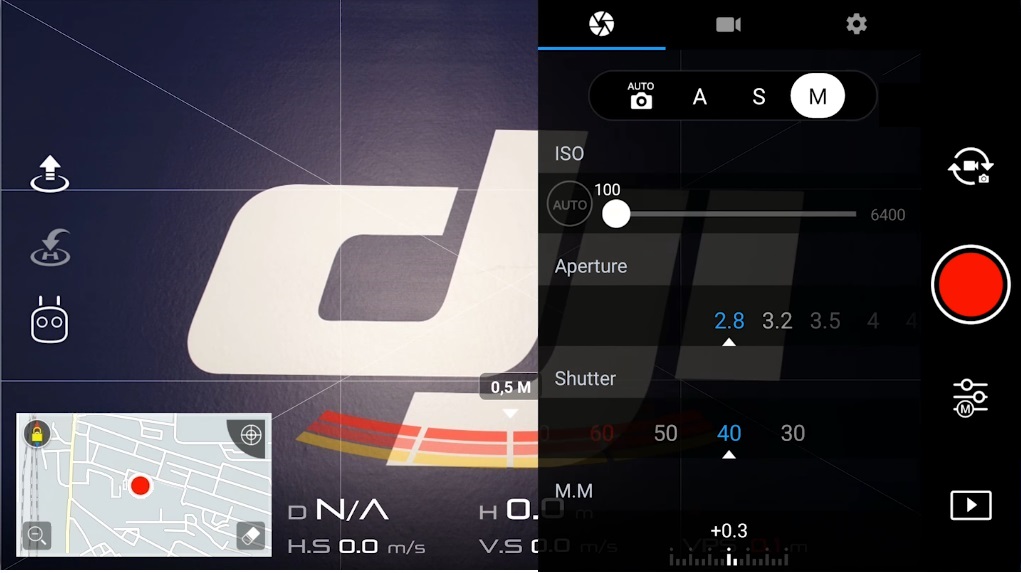
M mode
Manual mode - a more advanced mode that allows you to manually set ISO settings, Shutter Speed (and for some drones also the value of Aperture).
ISO
This option adjusts the camera's sensitivity to light. The higher the ISO value, the more sensitive the camera is to light. But this also means there will be more noise / grain in your image.
Aperture
Aperture - This setting controls the amount of light passing through the lens, which determines how blurred the foreground and background are. This option is usually only found on drones with more powerful cameras.
Shutter Speed
Shutter Speed - This setting allows you to control the length of time the camera's shutter is open, allowing you to capture sharp subjects in motion.
EV
EV (Exposure Value) - this setting is relevant for advanced users. If you have no idea about its purpose, then it would be correct to learn more about EV.
Information
- When you are in manual mode, you can see how far your settings are from those recommended by the system. Thus, the user will always be aware of what his settings should be in manual mode.
- To find out which of the photo modes is selected, just turn your attention to the icon to enter the camera settings, where you can see the letter designation of the current mode (
).
Video
Section for setting the video quality. Further details on each section and setting.
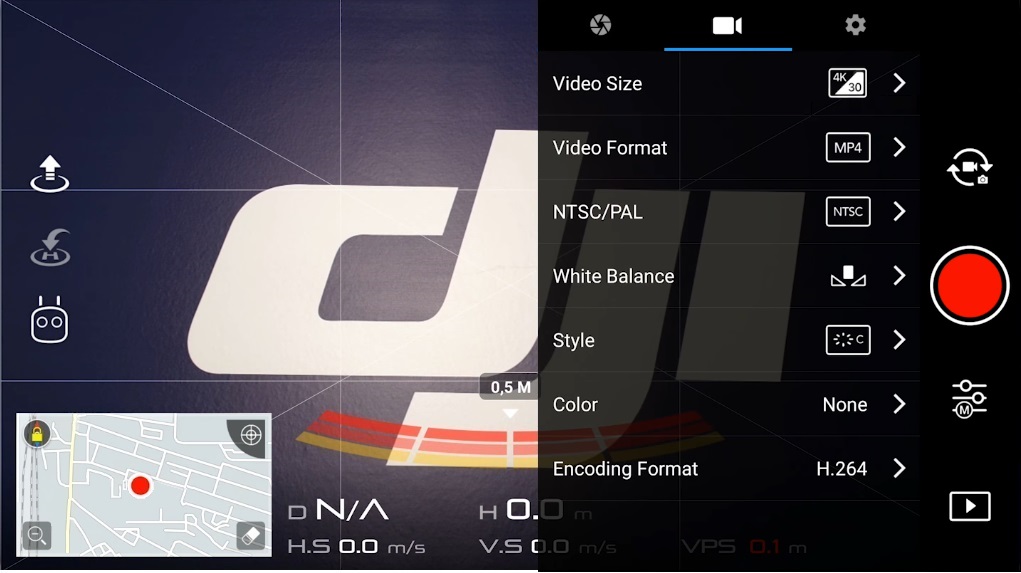
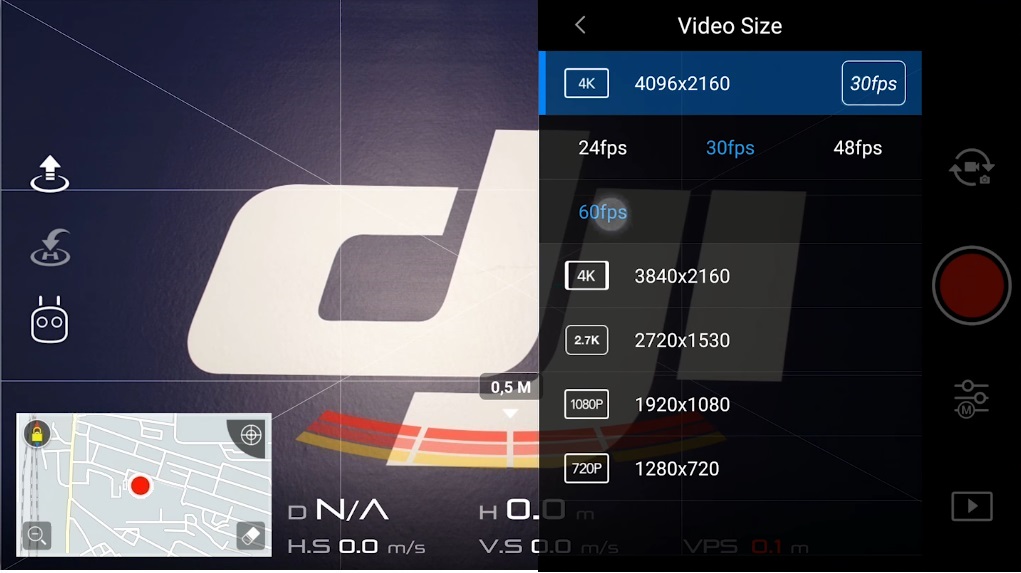
Video Size
Here you can set the image size and frame rate.
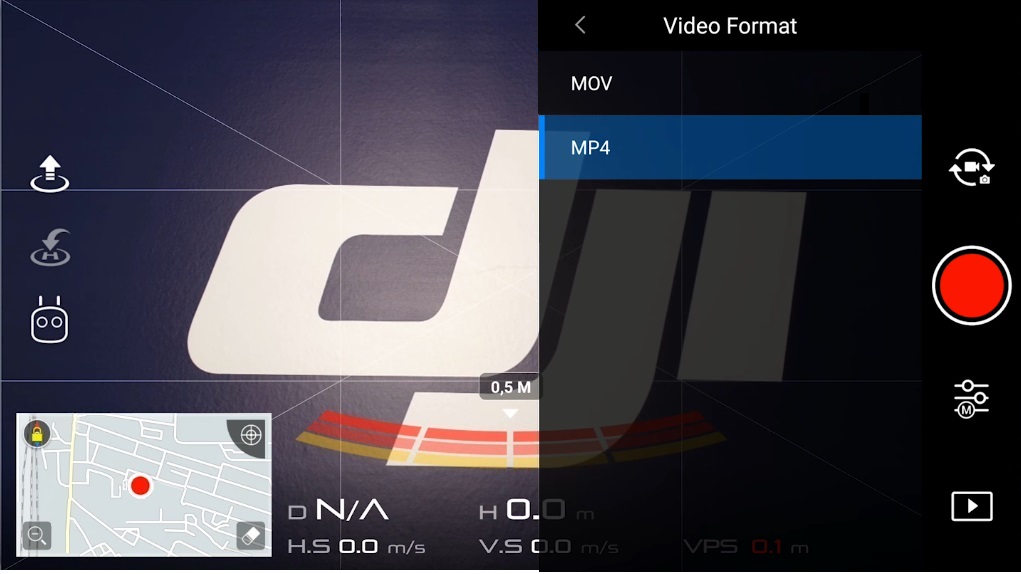
Video Format
Here you can set the format of the recorded video file. Typically it is either MOV or MP4 format.
- MOV: is relevant for Apple users.
- MP4: Relevant for Windows PC / Laptop users.
NTSC / PAL
PAL / NTSC display system is selected here.
- PAL: is the most common format used in Europe and parts of Asia.
- NTSC: is the most common format used in most of the Americas and Canada.

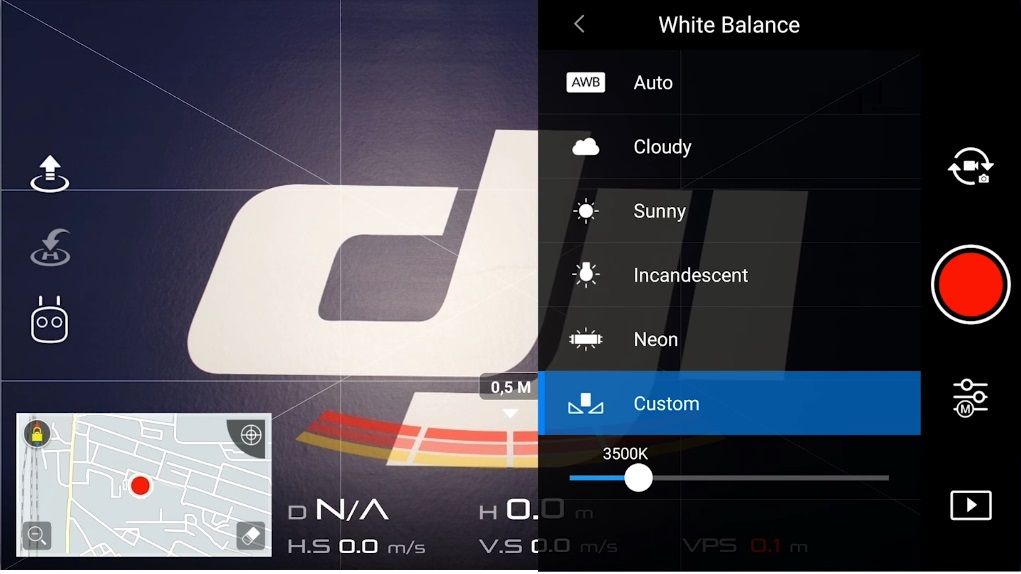
White Balance
White Balance - this setting affects the color gamut of images and allows you to correct yellow tones, red and blue.
In the White Balance menu, the following are available:
- AWB (Auto White Balance) - automatic white balance adjustment.
- Cloudy is a preset white balance setting for shooting in cloudy conditions.
- Sunny is a preset white balance setting for shooting in sunny conditions.
- Incandescent is a preset white balance setting for shooting under artificial lighting with incandescent lamps.
- Neon - preset white balance setting for shooting under artificial lighting with fluorescent lamps.
- Custom - Manual setting to adjust according to your preferences.
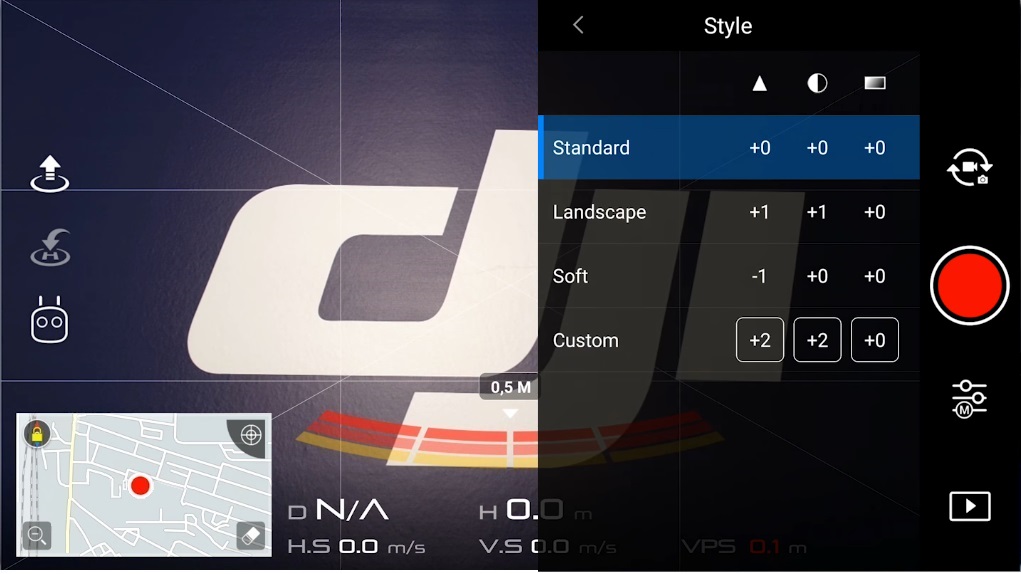
Style
Style - here the user can set / adjust the sharpness, contrast and saturation of the captured images.
The following setting options are available in the Style menu:
- Standard - preset style with standard / zero values for sharpness, contrast and saturation.
- Landscape - preset landscape style for sharpness, contrast and saturation.
- Soft - preset soft style for sharpness, contrast and saturation.
- Custom - Manually adjust the sharpness, contrast and saturation.
Tips
- If the user plans to edit the footage after shooting, then it is highly recommended to shoot in the standard style.
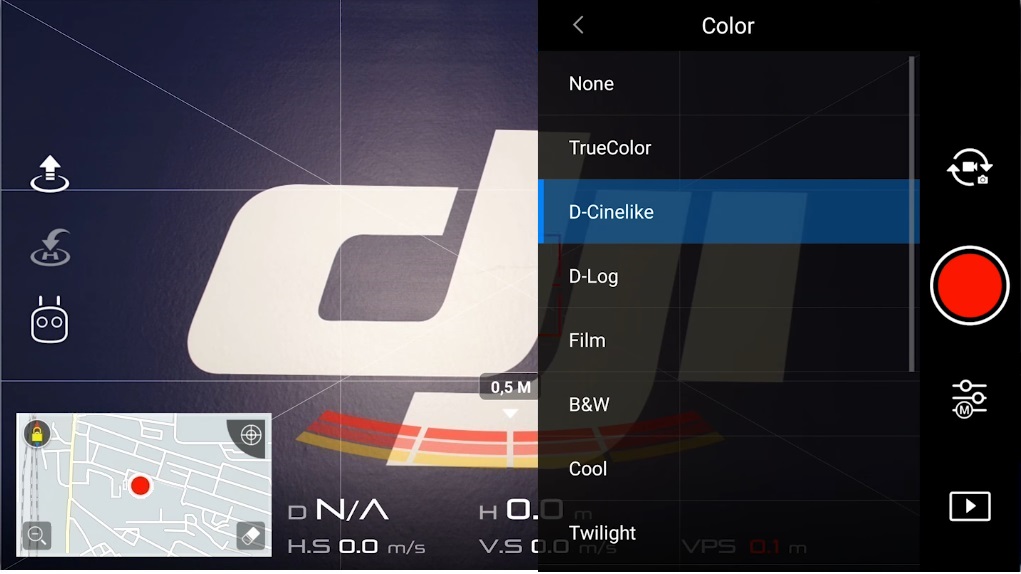
Color
Color - a kind of set of preset color filters that allow you to set different tones of the recorded video. If after recording a video post-processing is not planned, then the user can use one of the available preset filters. If, after shooting, the video will be edited, then it is recommended to select such presets as D-Cinelike and D-Log (M).
Encoding Format
Encoding Format - this setting allows you to select one of the two available compression formats, H codec.264 or H.265.
- H.264 codec - recorded video takes up more space than H.265 encoding, but at the same time allows recording 4K video at 60 fps.
- H.265 Codec - Recorded video takes up less space than H.264 encoding, but 4K video can be recorded at no more than 30 fps.
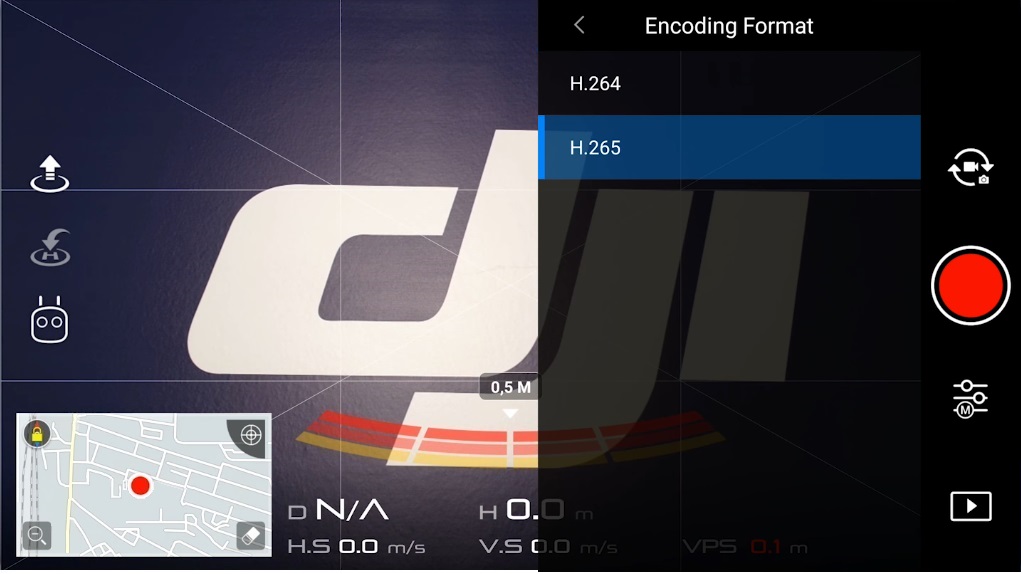
Photo quality setting
If in the video quality settings section, tap on the Photo / Video mode switch icon (
), the settings will become available. photo quality. Further details on each setting.
Photo
Provides access to photo shooting modes.
- Single Shot - allows you to take one shot.
- HDR Shot - allows you to take an HDR photo (High Dynamic Range). In this case, the camera will take 3 or more photos with different exposure settings, and then combine them together. An HDR image will give you a photo with more information in the highlights and shadows, which can result in a sharper and more dynamic JPEG image. Note: If you have post-processing software, it is recommended to use the AEB mode described below to create HDR images instead of HDR Shot, as the result is much better.
- Burst Mode - allows you to take a burst of 3/5/7/10/14 pictures.
- AEB - take a series of pictures with different exposures 3/5
- Interval - time-lapse photography 5 sec / 7 sec / 10 sec / 15 sec / 30 sec / 60 sec. This mode allows you to shoot with a time delay, which can be useful if you are trying to take a selfie and need time to get into the desired position / position.
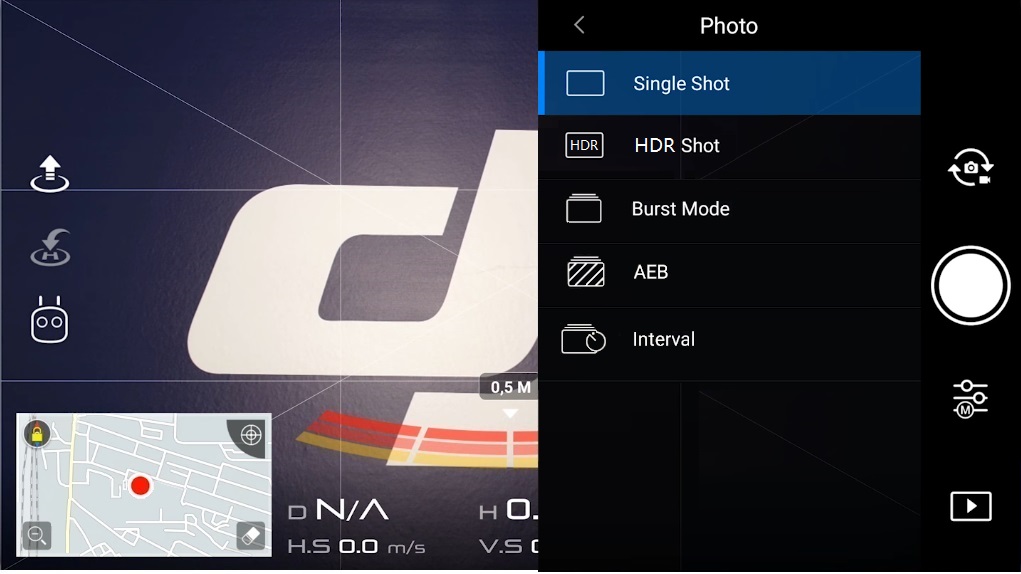
Image Ratio
Image Ratio - allows you to set the aspect ratio of the photo.
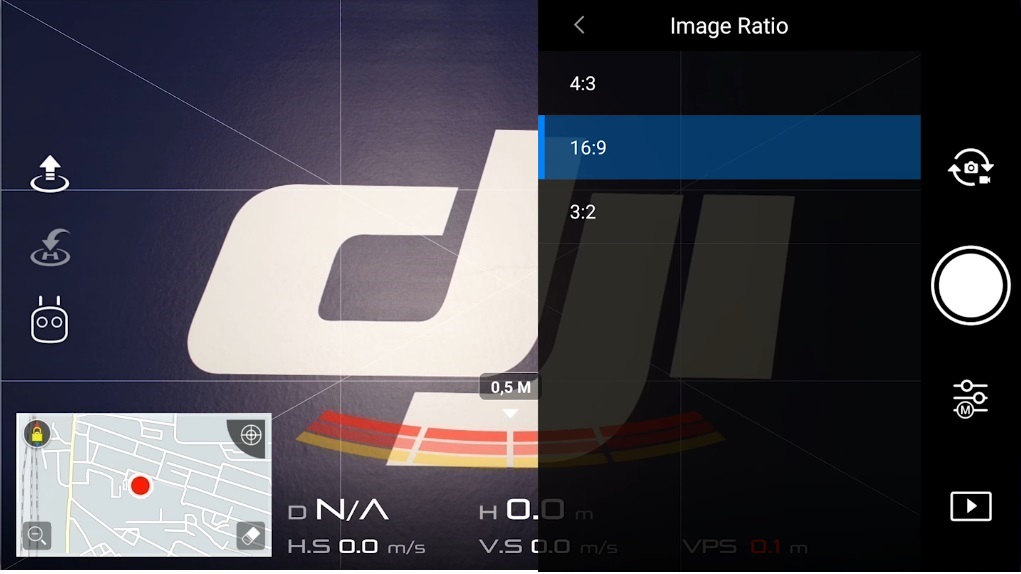
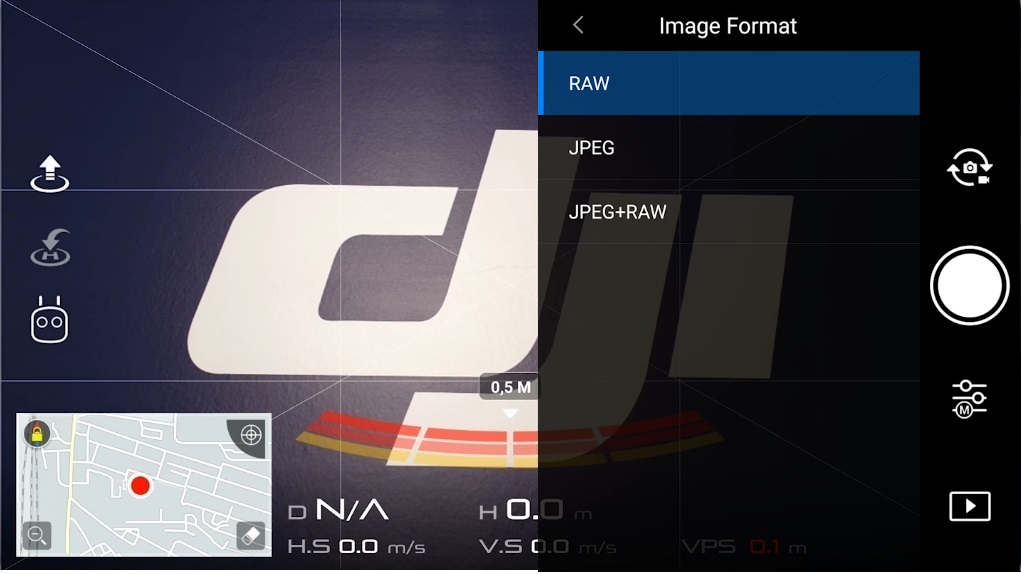
Image Format
Image Format - allows you to select the format of the photo.
- RAW - considered a lossless format because the files are not compressed. This means you get every bit of raw photo data almost directly from your camera sensor. This gives you more freedom in post-processing, for example, when you want to save or restore detail in light and dark places. It is important to note that RAW files are much larger than JPEG files and may take slightly longer to write to the memory card. In this regard, it is strongly recommended not to use cheap memory cards, but only cards with a high read / write speed.
- JPEG - Considered a complete format because the files are much smaller and compressed. This means that they have already lost data related to the image, so you will have fewer options for editing or restoring details.
- JPEG RAW - This mode allows you to take pictures in RAW and JPEG format. The advantage of this approach is that you end up with both large original RAW files and smaller JPEGs. Note that when shooting in this mode, you will need more space on the memory card and it will take longer to write the image to the card as it writes 2 different files at the same time.
White Balance
White Balance - this option provides the same functions as for video quality settings.
Style
Style - This option provides the same functions as for video quality settings.
Color
Color - this option provides the same functions as for video quality settings.
Additional settings (gear icon)
This section provides access to a number of additional settings that affect both photo and video shooting. Further details on each setting.
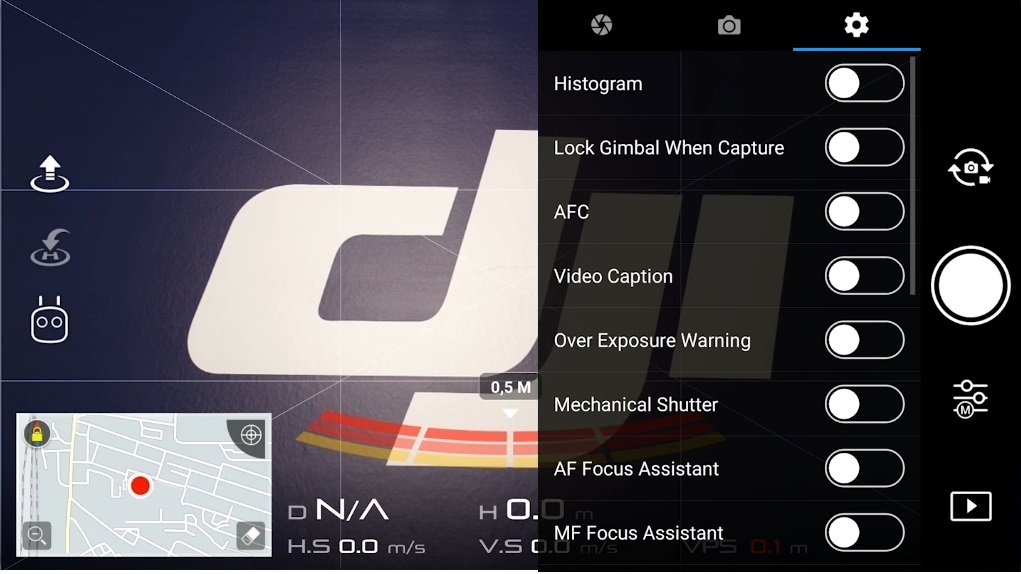
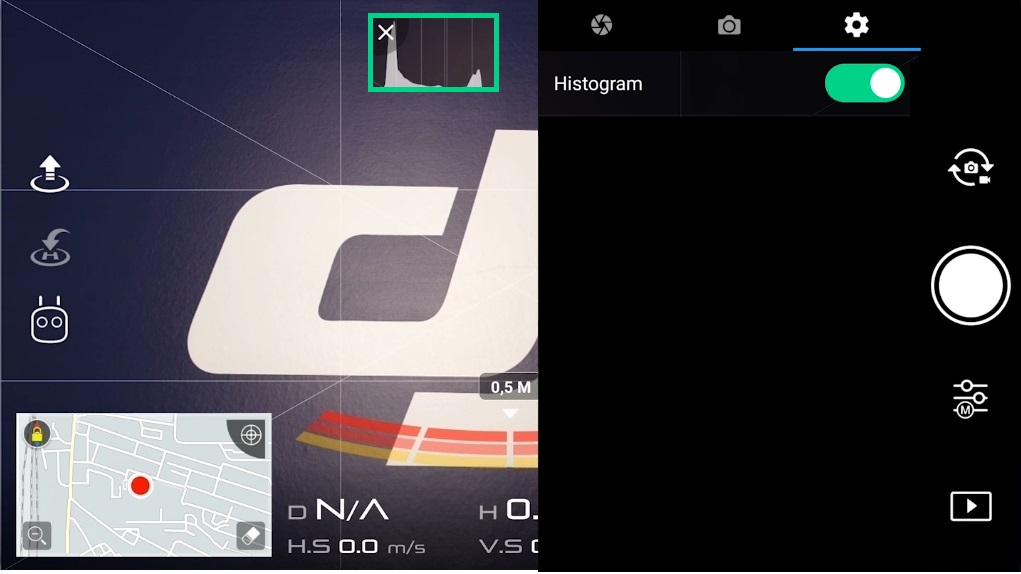
Histogram
Histogram - this option enables the display of a graph showing the overall brightness of the scene. This option is relevant for advanced users. If you do not know what it is, we recommend that you familiarize yourself in more detail with the purpose of the histogram in shooting.
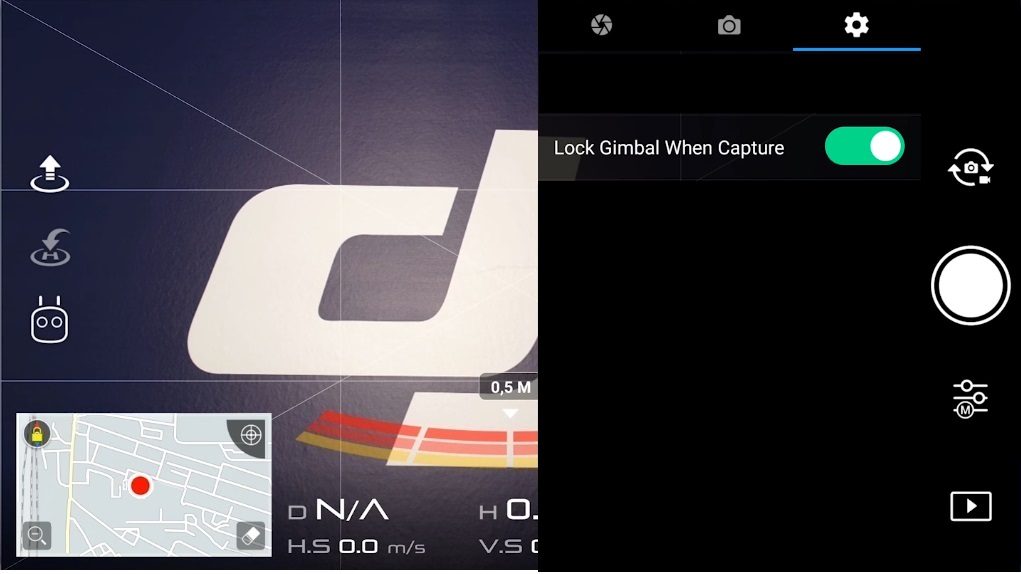
Lock Gimbal When Capture
Lock Gimbal When Capture - this option allows you to prevent blur during long exposures by locking the gimbal.
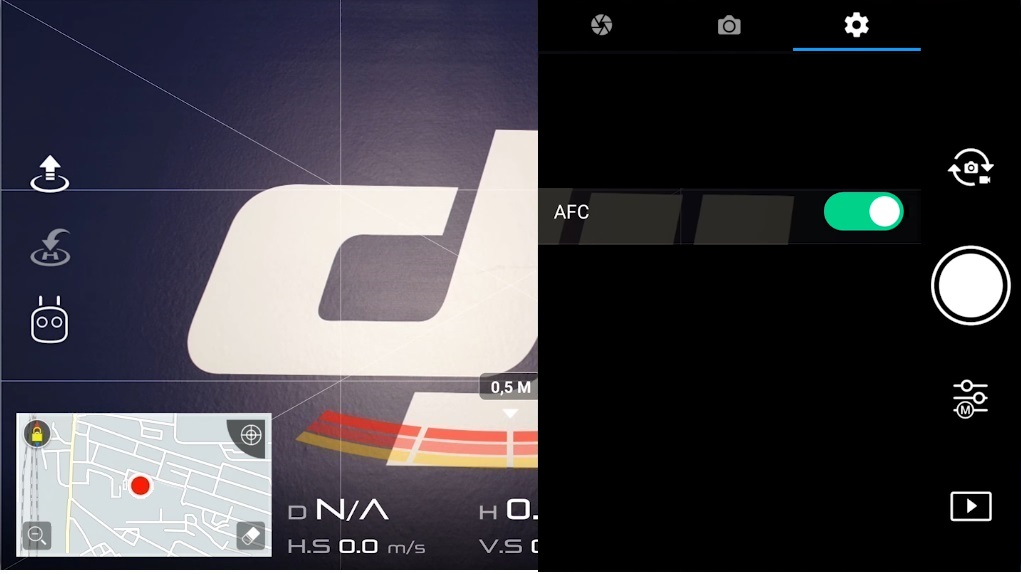
AFC
AFC - this option activates long autofocus, thereby allowing autofocus to adapt to changes during shooting. When the option is not active, after selecting the focus area, the focus will not change during shooting.
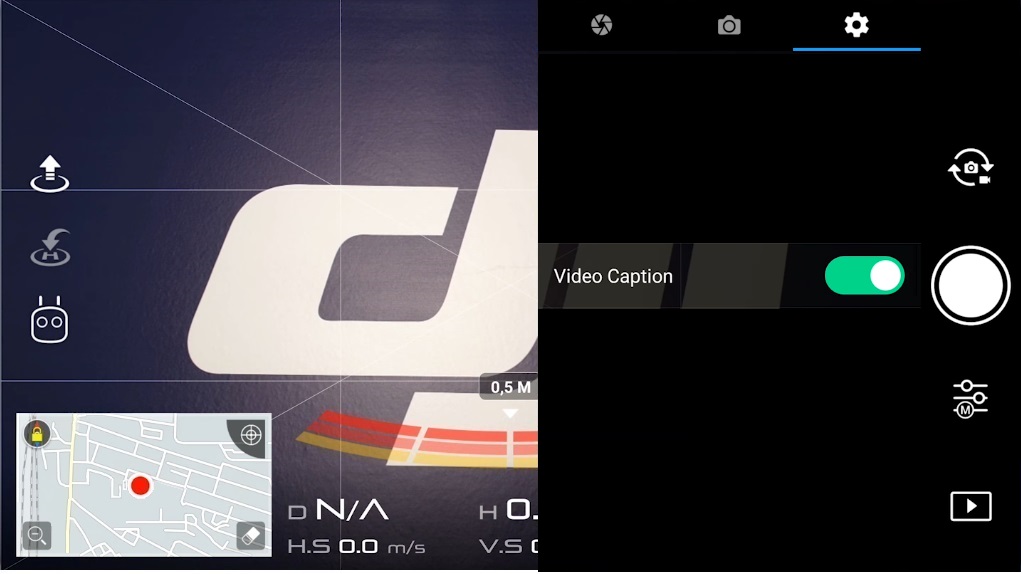
Video Caption
Video Caption - if this option is active, then along with the video recording will be recorded as subtitle files, such data, such as the location of the drone at the time of the survey, the date and time of the survey, the readings of the sensors and the survey parameters. Thus, if you play this video using a player that supports this function, you can automatically display your flight data on the image.
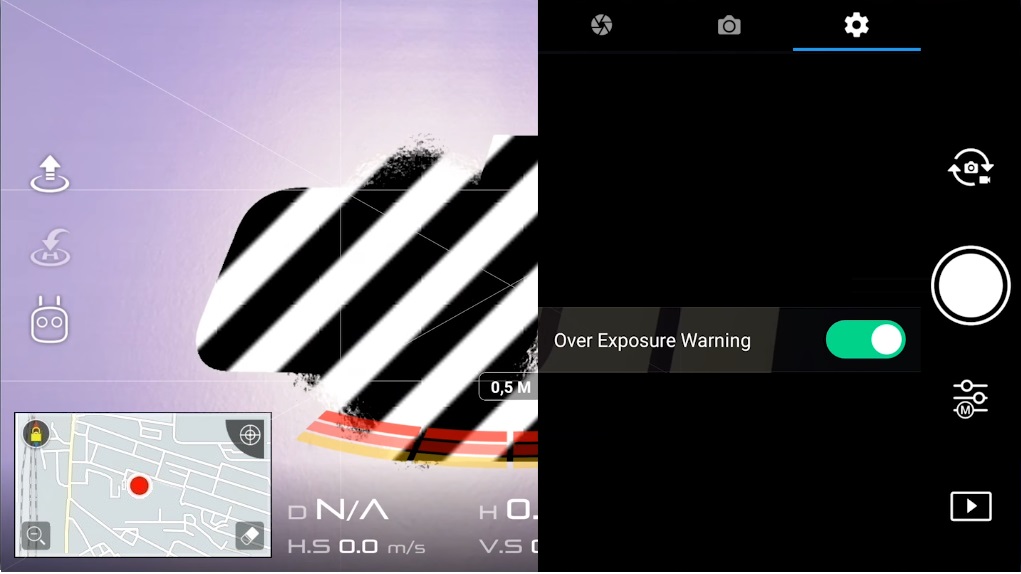
Over Exposure Warnings
Over Exposure Warnings - this option activates the display of the indication in the form of black and white stripes highlighting overexposed areas and where the pixel data is completely lost. These stripes can help the user achieve a properly exposed image by simply adjusting the camera until many of these stripes appear. This option is relevant when, for example, the main display glares in the bright sun and does not allow the user to see a clear picture. Note: These lines are displayed only on the display, and accordingly they will not appear on the finished images.
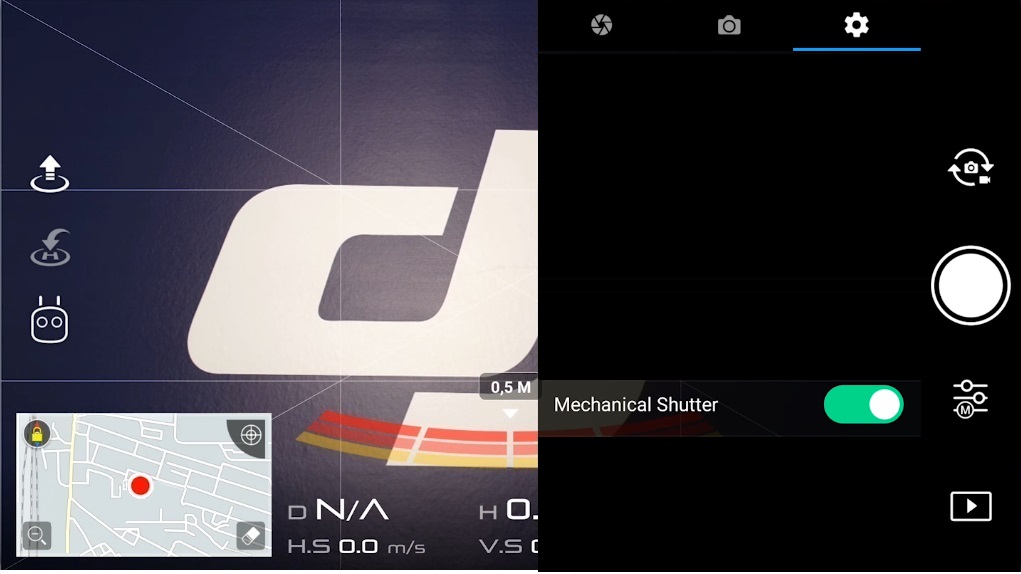
Mechanical Shutter
Mechanical Shutter - this option activates the mechanical shutter for shooting. Available for drones such as the Phantom 4 Pro (V2.0) and Inspire 2. The difference between a mechanical shutter and an electronic shutter is that the mechanical shutter controls exposure by opening and closing the shutters in front of the sensor, the electronic shutter turns the sensor itself on and off. As a result, when shooting fast-moving objects with a camera with a mechanical shutter, distortion is excluded, which cannot be said about a camera with an electronic one.
AF / MF Focus Assistant
AF Focus Assistant / MF Focus Assistant - option activates auto / manual focus assist. In this case, when focusing in the photo mode, the image will be enlarged ten times for convenience.
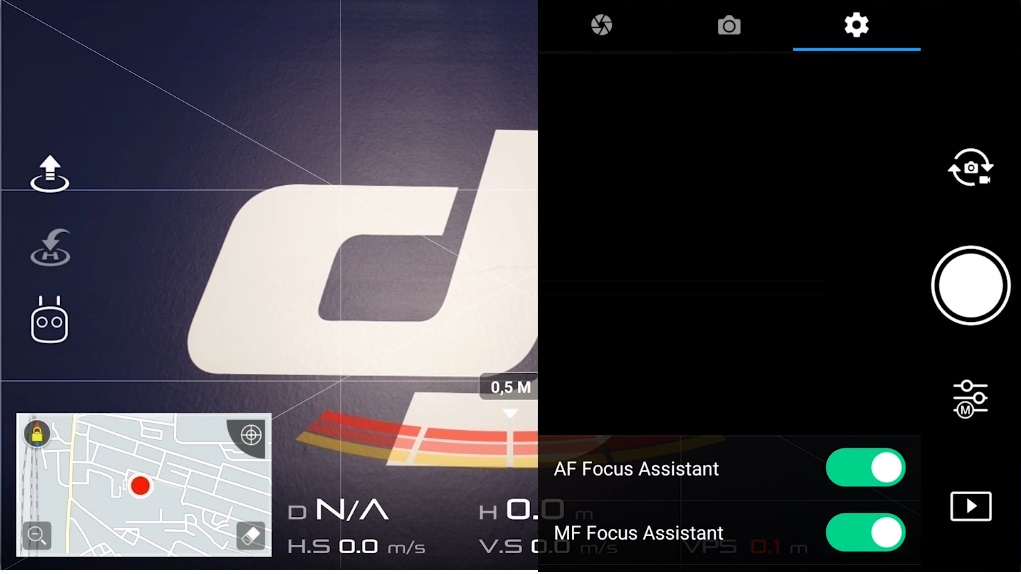
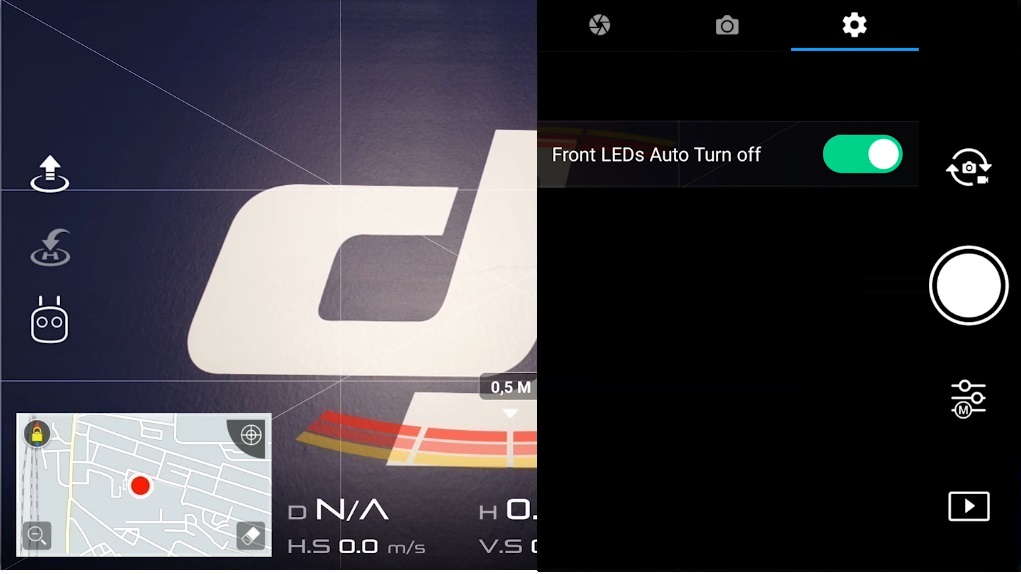
Front LEDs Auto Turn off
Front LEDs Auto Turn off - when this option is enabled, the aircraft LED will automatically turn off when shooting...
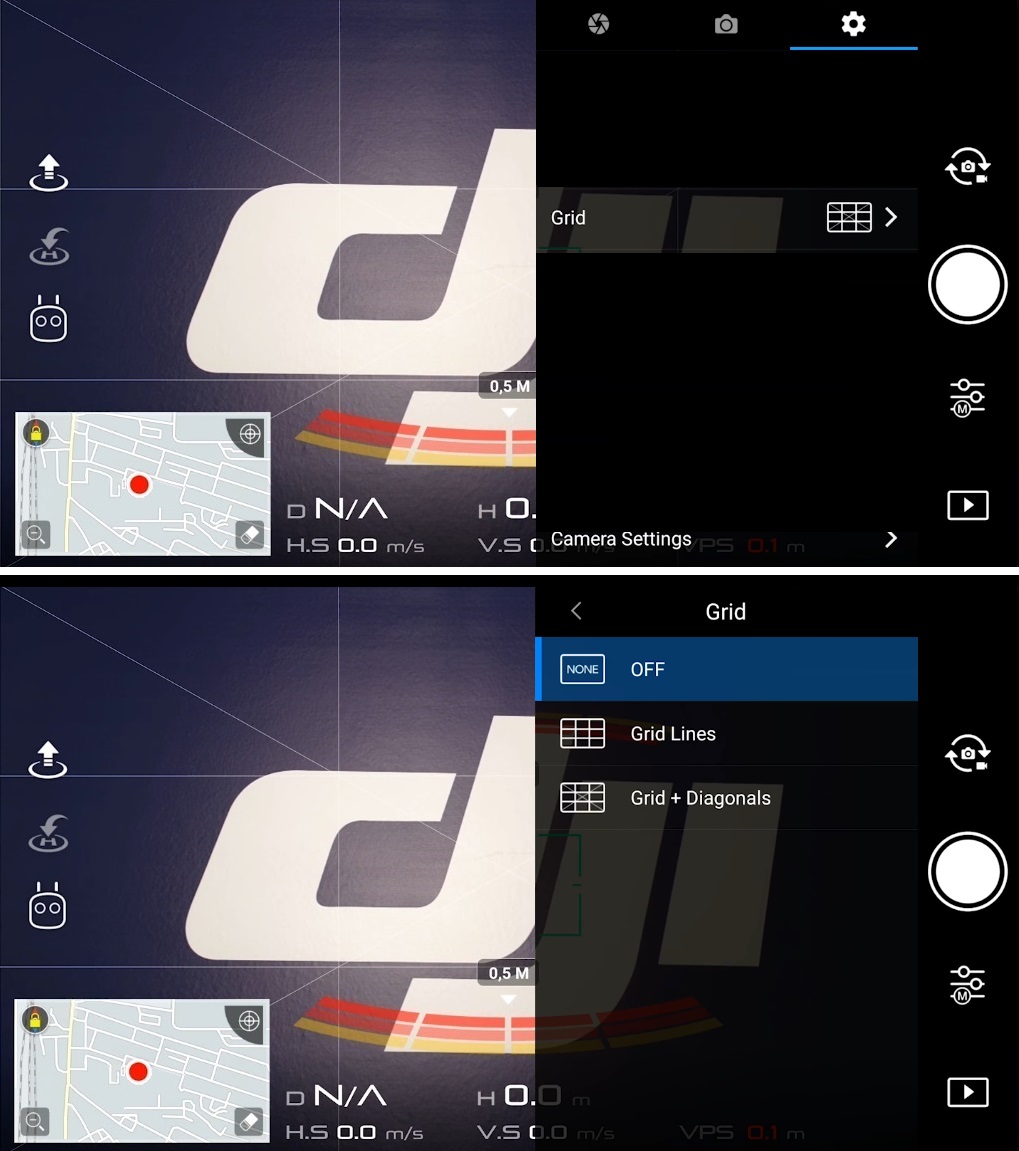
Grid
Grid - this option allows you to display a grid, add diagonal lines to this grid, or disable it altogether. They will not appear on finished photos.
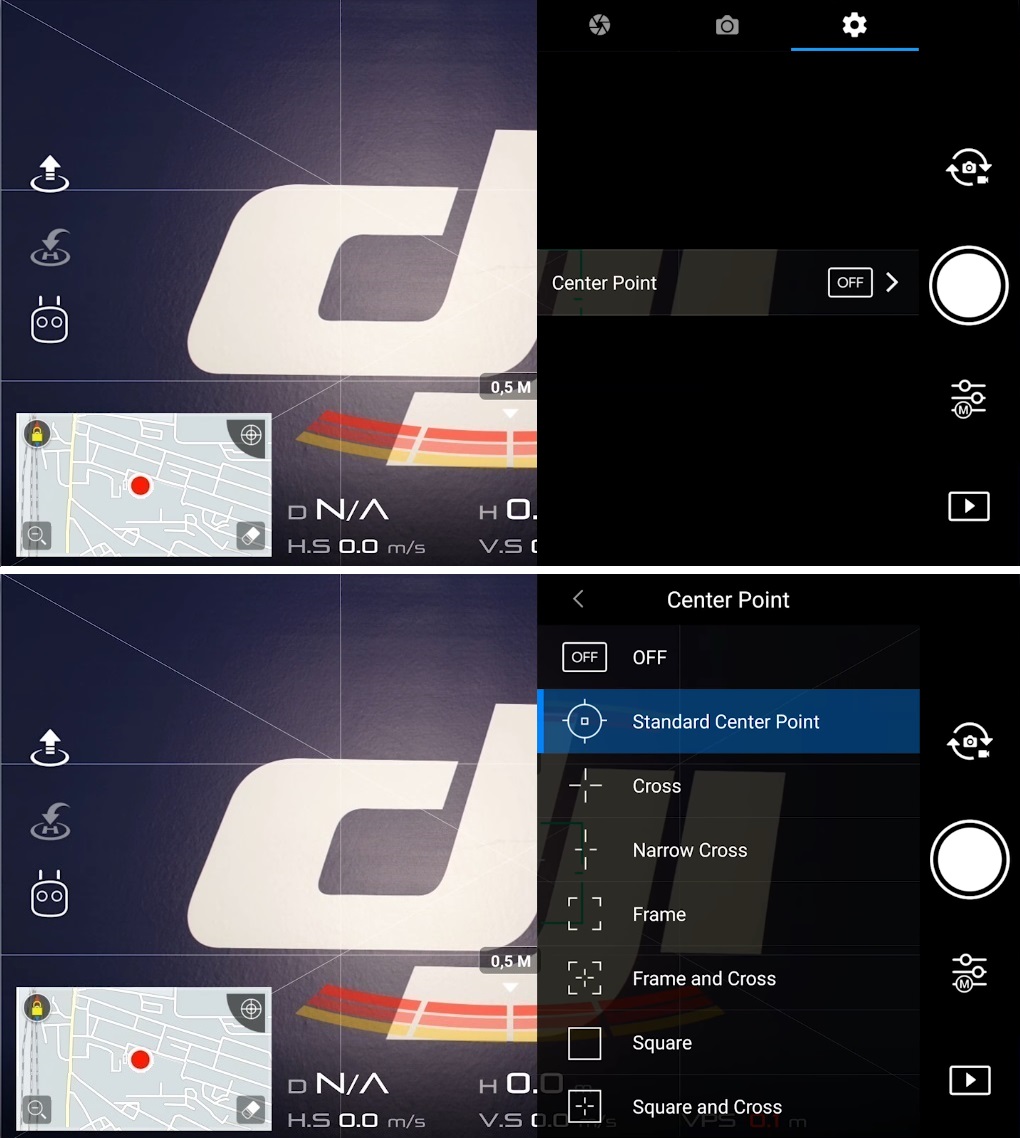
Center Point
Center Point - allows you to change the appearance of the center point that defines the center of the screen, as well as change its color, or turn it off altogether.
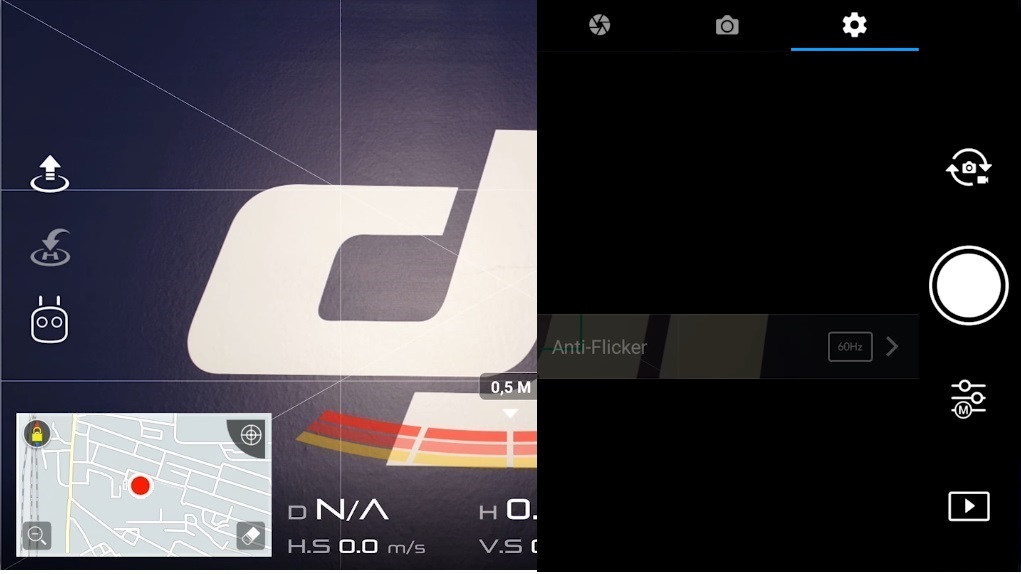
Anti-Flicker
Anti-Flicker - this parameter eliminates flicker when shooting under artificial lighting and must match the broadcasting frequency of the country in which you will show the recorded video (NSTC = 60Hz or PAL = 50Hz). It may not be active, as this function is performed by the setting where PAL / NTSC display system is selected
Peak Focus Threshold
Peak Focus Threshold - this option activates the focus peaks (displayed as a red border) that will highlight the subject in focus, and also allows you to select their sensitivity.
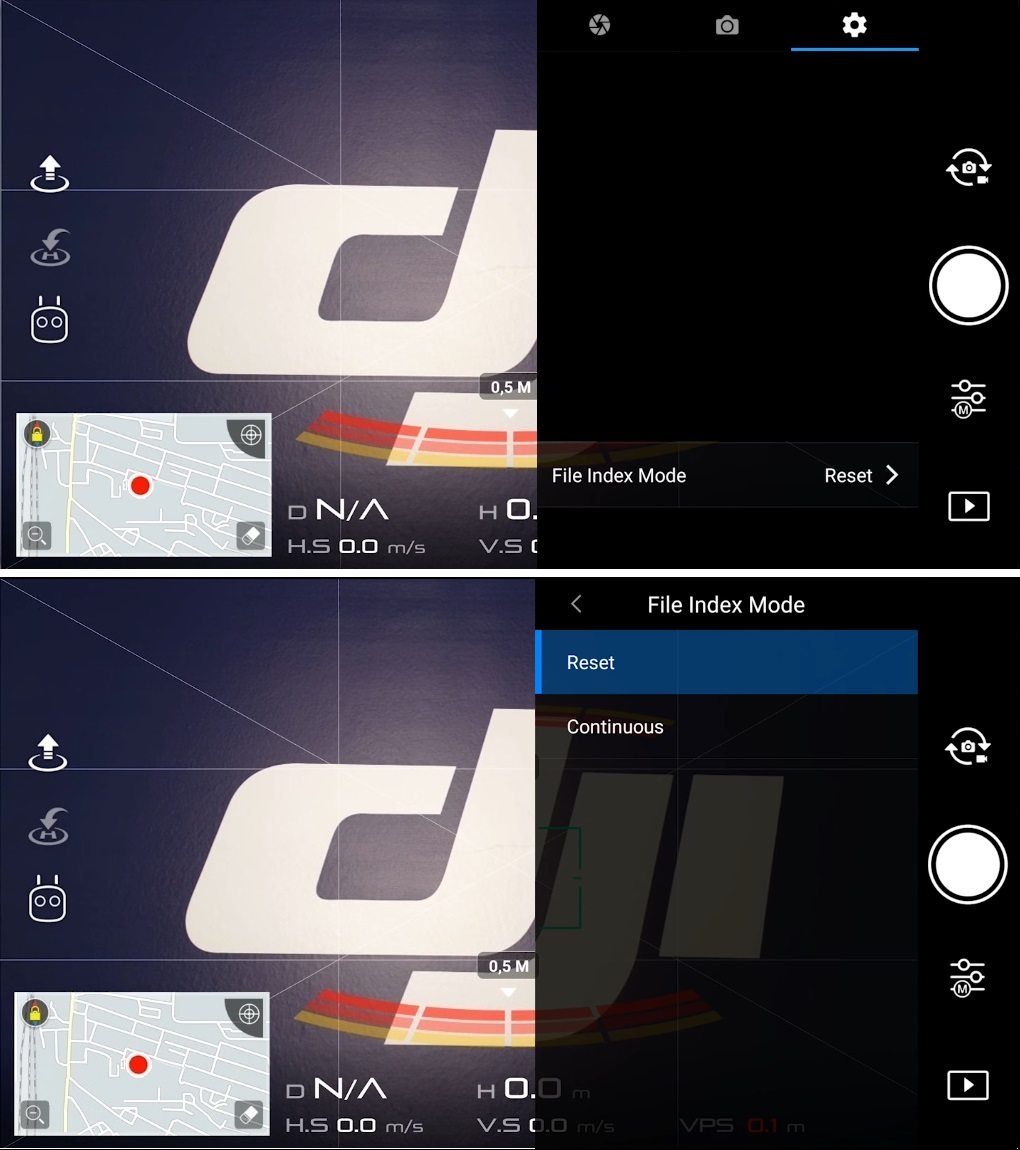
File Index mode
File Index mode - this option determines how files will be numbered on the used memory card. There are two modes available:
- Reset - relevant if you want the memory card to start reading images from 1 after formatting / replacing it.
- Continuous - relevant if you want the number to continue indefinitely, even if you inserted a new memory card. This can be useful if you are trying to track images for a specific project.
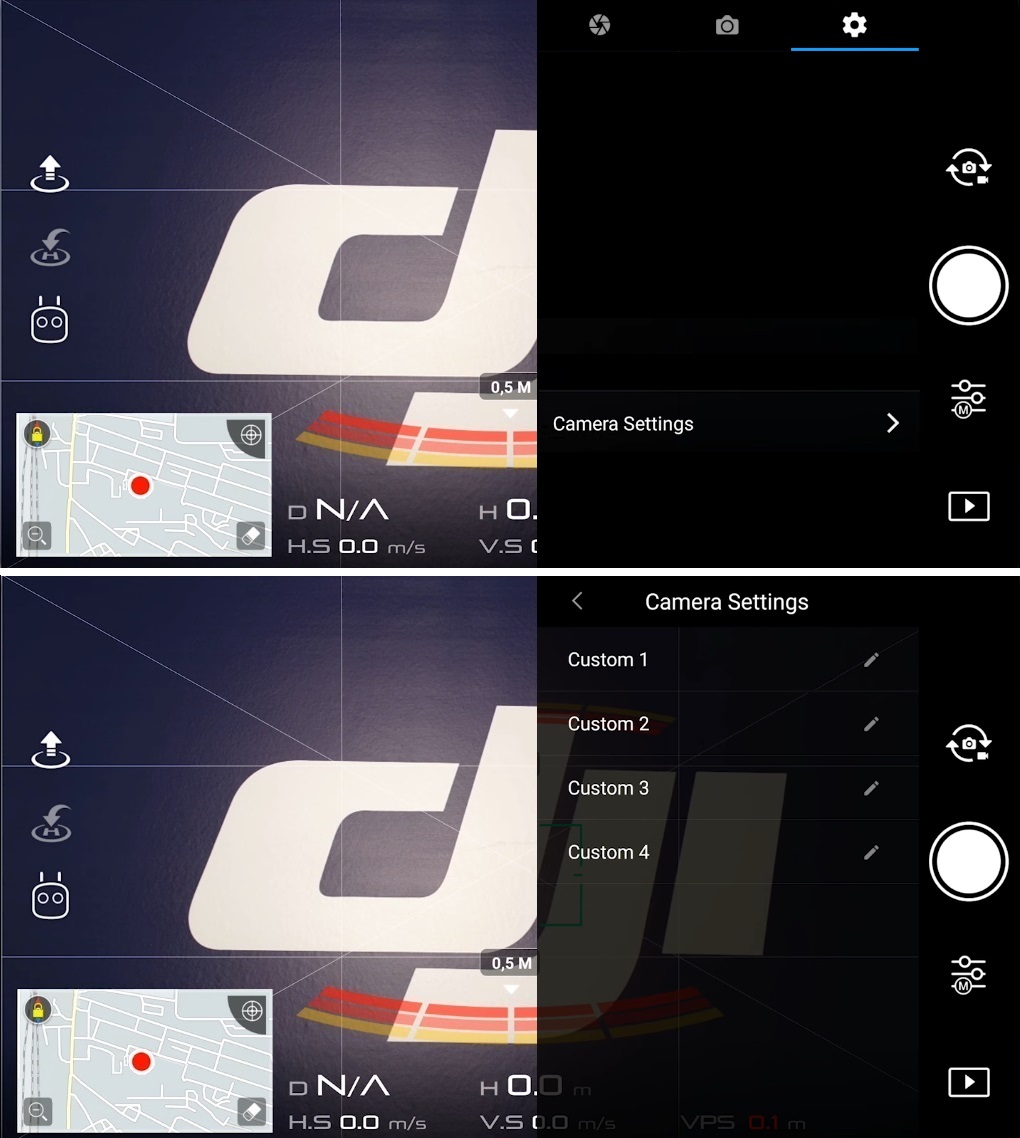
Camera Settings
Camera Settings - this option allows you to create separate presets with different camera settings and switch between them as needed... Up to 4 presets can be created.
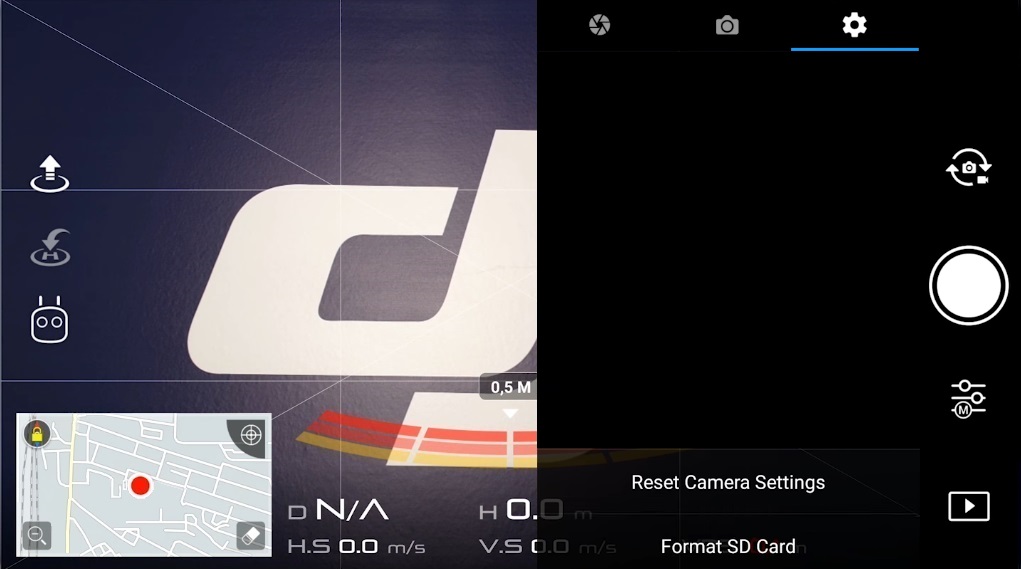
Reset Camera Settings
Reset Camera Settings - this option allows you to reset the current camera settings to the factory defaults.
Format SD Card
Format SD Card - this option allows you to format the SD card.
Left side of the main flight screen
Left side of the main screen - here are the virtual buttons responsible for auto takeoff / landing and auto return, as well as button providing access to the menu of intelligent flight and shooting modes. Further details on each button and menu.
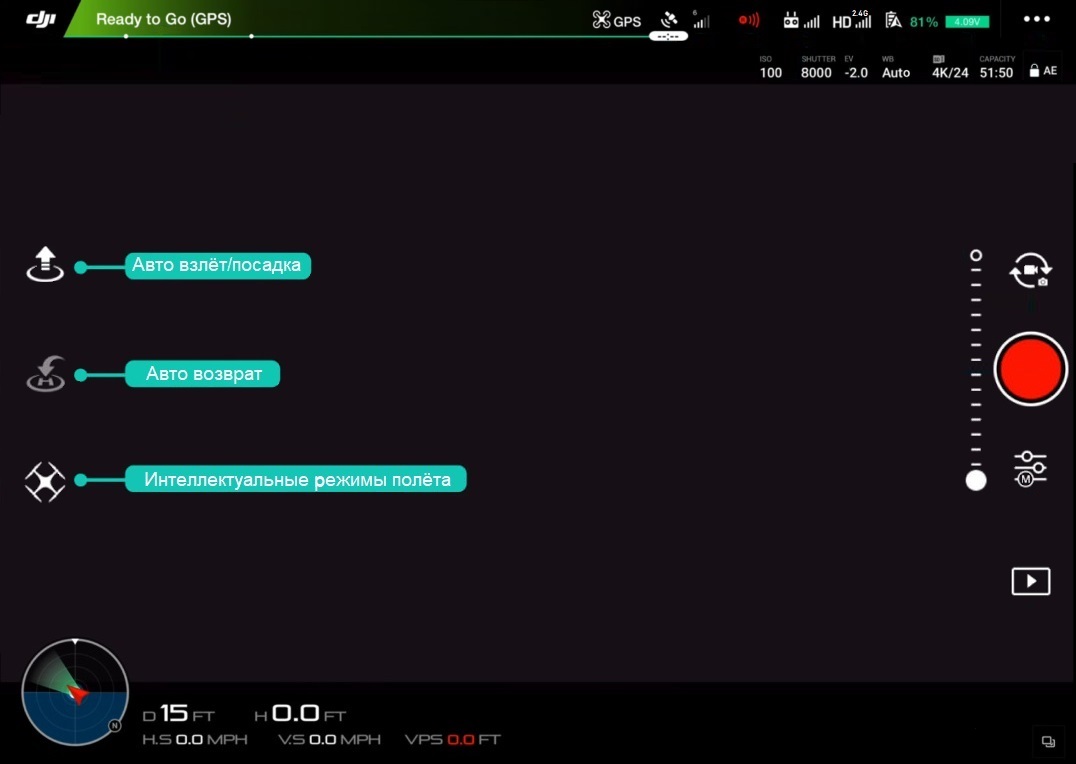
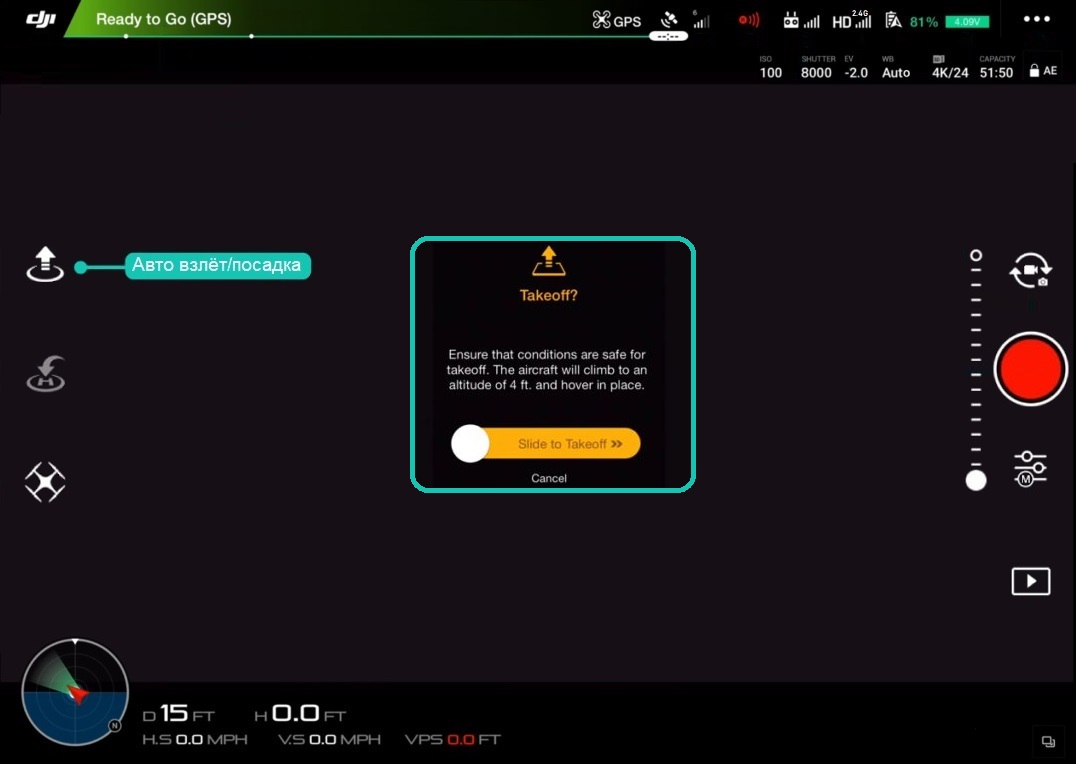
Auto Takeoff
Auto Takeoff - This virtual button will automatically start your the drone is 1.2 meters up, where it hovers. By tapping on the "Auto Takeoff" icon, a yellow slider will appear in the center of the screen, which acts as a kind of safeguard against accidental launch.
The information above the slider warns the user to ensure that conditions at the launch site allow the drone to take off to an altitude of 1.2 meters before takeoff. To take off, move the slider from the left side to the right. If takeoff is not required, tap on the "Cancel" icon below the slider. For automatic landing, tap on the same icon.
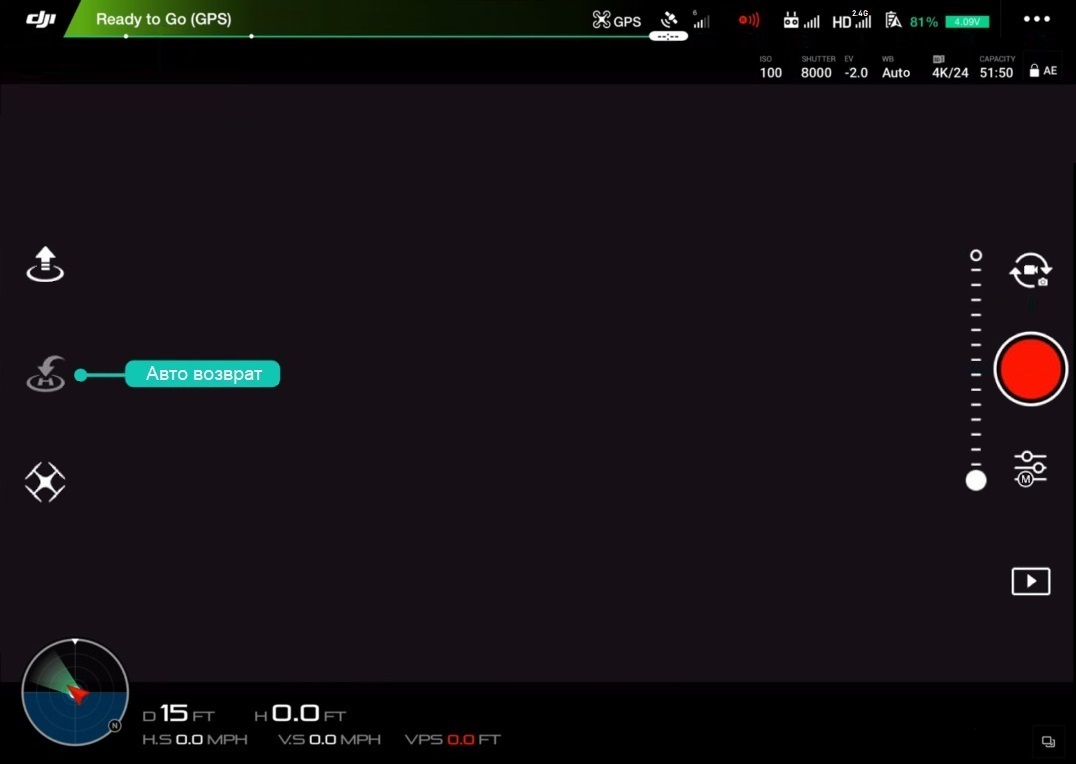
Go Home
Go Home - activation of automatic return to the take-off site with subsequent landing.
Intelligent Flight Modes
Intelligent Flight Modes - This menu provides access to Intelligent Flight and Shooting Modes that offer a variety of intelligent functions using impressive artificial intelligence technologies. The list of these modes will be constantly updated, so only a few of them will be described below.
And also here you can enable / disable the Beginner mode, which for safety reasons limits the altitude, distance, flight speed and disables many advanced functions of the drone. Further details on each mode.

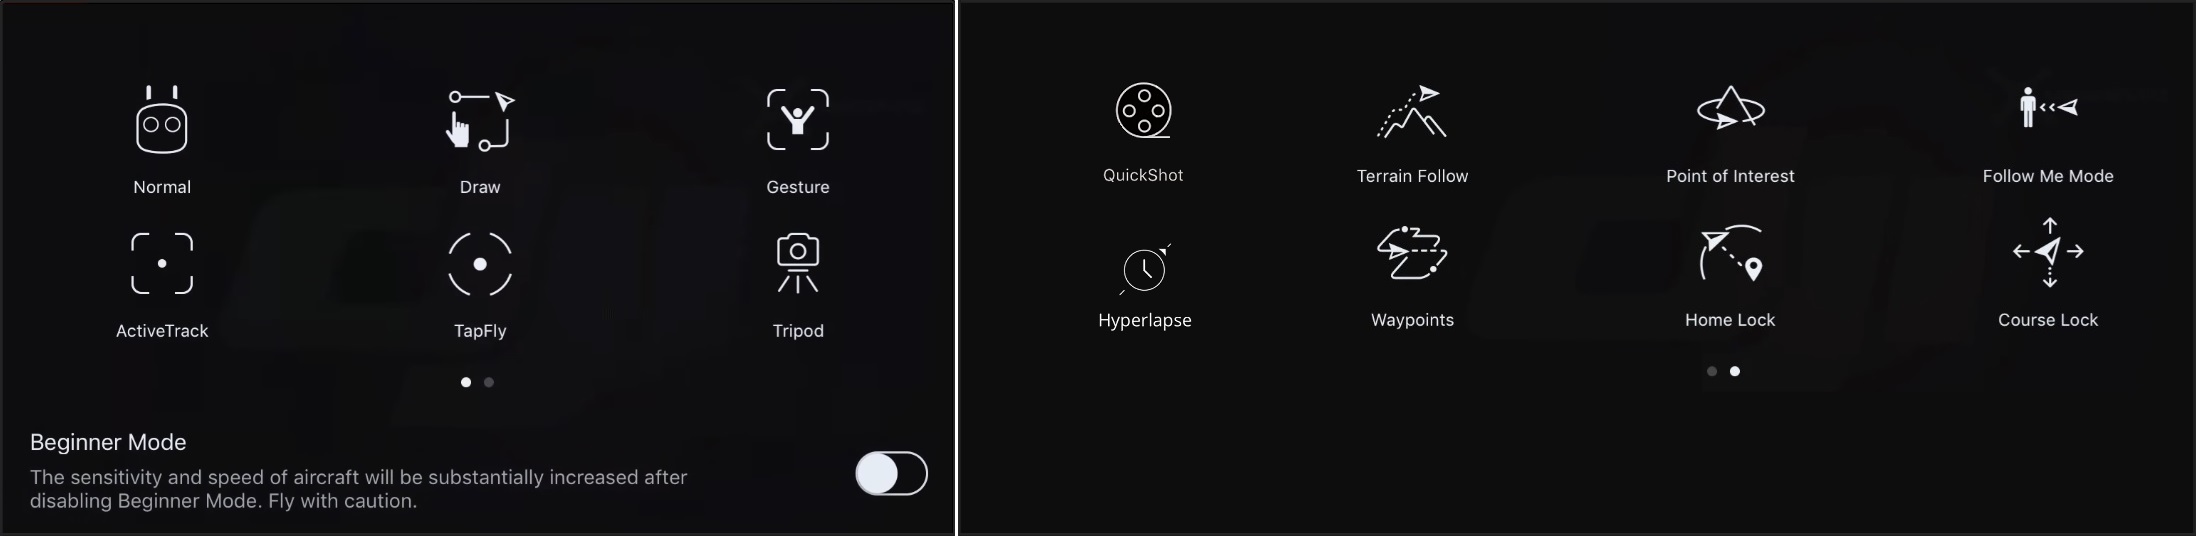
Normal
Normal - serves to switch from intelligent flight modes to normal manual mode by means of the control panel.
Active Track
Active Track - In this smart mode, the drone will automatically recognize objects such as people, bicycles, cars or boats and then follows them. It can be useful, for example, when you need to focus only on controlling the camera and not piloting the drone.
- As a rule, it has several options (not available for all models): Trace (following an object) / Profile (following an object) / Spotlight (controlled following with a camera fixed on the object).
- Care should be taken when using the mode, as the obstacle detection and avoidance system may not be available or work in all directions.

Draw
Draw - in this mode, the drone will follow the trajectory drawn on the screen of the paired smartphone / tablet, thereby allowing the pilot to concentrate on shooting.
- As a rule, it has two options: Forward (the camera is limited by short turns to the left and right) / Free (no restrictions on the movement of the camera).
- Caution should be exercised when using the mode as the obstacle detection and avoidance system is not active.
Tap Fly
Tap Fly - in this mode, all you need to do is set a point on the screen of the paired smartphone / tablet, and the drone will automatically will fly to her, which will allow the user to focus only on controlling the camera.
- As a rule, it has several options (not available for all models): Forward (flight to a point in a strictly forward direction with the ability to change altitude and speed) / Backward (flight to a point strictly in the forward direction backwards with the ability to change altitude and speed) / Free (flight to a point with the ability to turn the drone left and right and adjust the altitude and speed) / Coordinate (flight to a point strictly at the occupied altitude with the ability to change the speed)...
- Caution should be exercised when using the mode, as in some versions the obstacle detection and avoidance system is not active.

Gesture
Gesture - control the drone using hand gestures. If your drone supports it, then refer to the user manual (or our reviews
Tripod
Tripod - this mode significantly reduces the sensitivity of the control system, the movements of the drone will be very slow.
Will be relevant for use when piloting in confined / hard-to-reach places, thereby allowing you to achieve more accurate / safe piloting and at the same time shoot smooth professional-level footage. For this mode, the maximum modes of photo and video shooting become available.

QuickShot
QuickShot - preset automatic flight and shooting modes that allow you to realize short cinematic clips in one tap. As a rule, 7 possible scenarios of automatic flight and shooting in the selfie format are available (each model has its own set of modes): Dronie / Circle / Helix / Rocket / Boomerang / Asteroid / Dolly Zoom
Hyperlapse
Hyperlapse - Preset automatic flight and capture modes that allow you to create stunning video with hyperlips. As a rule, 4 possible scenarios of automatic flight and shooting in Hyperlapse mode are available (not available for all models): Free / Circle / CourseLock / Waypoint.
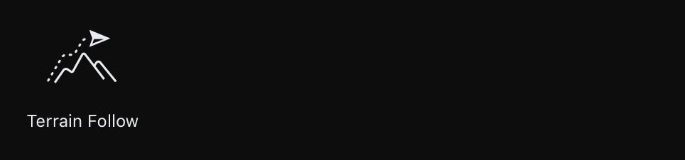
Terrain Follow
Terrain Follow - when active, the drone will follow the object and automatically adjust its height on ascents and descents terrain. It will be relevant when, for example, you want to capture yourself climbing a mountain or to the top of some structure.
Point of Interest
Point of Interest - here you can mark a specific building, object or location on the screen of a paired smartphone / tablet as a point of interest and the drone will constantly circle / revolve around it.

Way Points
Way Points - in this mode you can set several GPS points on the screen of a paired smartphone / tablet.) and the drone will automatically fly over them, allowing you to focus on controlling the camera.

Follow Me Mode
Follow Me Mode - in this mode the aircraft will automatically follow you.

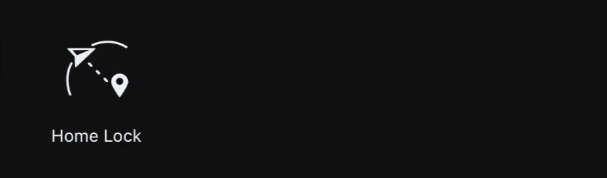
Home Lock
Home Lock - this mode binds the drone control stick (responsible for moving the drone forward / backward / left / right) to the take-off point. In this case, if you pull the stick towards you, the drone will fly back, strictly to the take-off point, and if from yourself, then forward from the take-off point, regardless of which direction it is directed. For example, this is very convenient if you have lost sight of your drone and want to bring it closer to you.
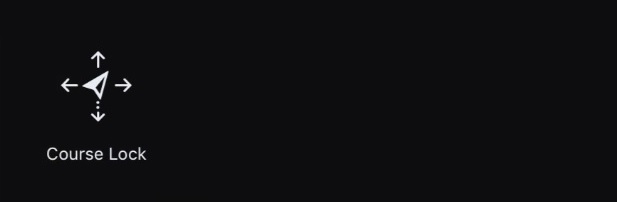
Course Lock
Course Lock - in this mode, the drone will only fly in a straight line (or on a course), even if the orientation of the nose (the front of the drone) is directed in the other direction. By activating the Course Lock mode, the controls will be set relative to the current path of your drone. This simple navigation will allow you to control the drone in straight lines while you control the camera.
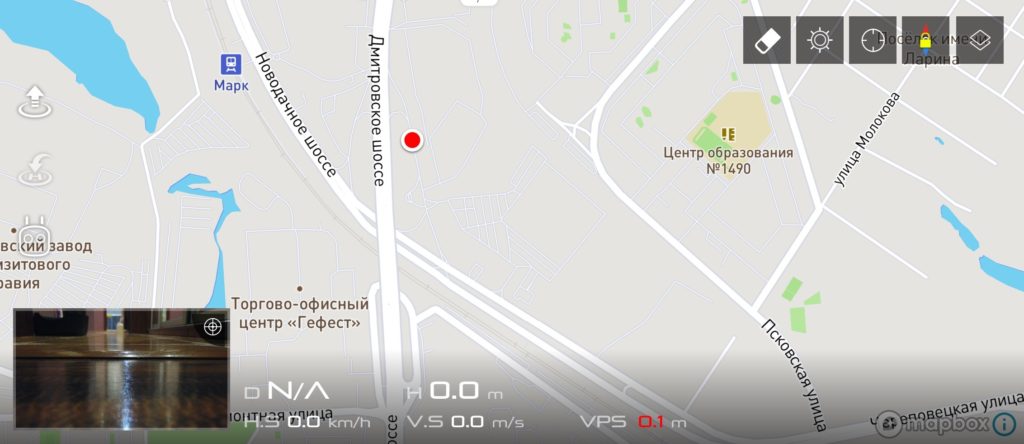
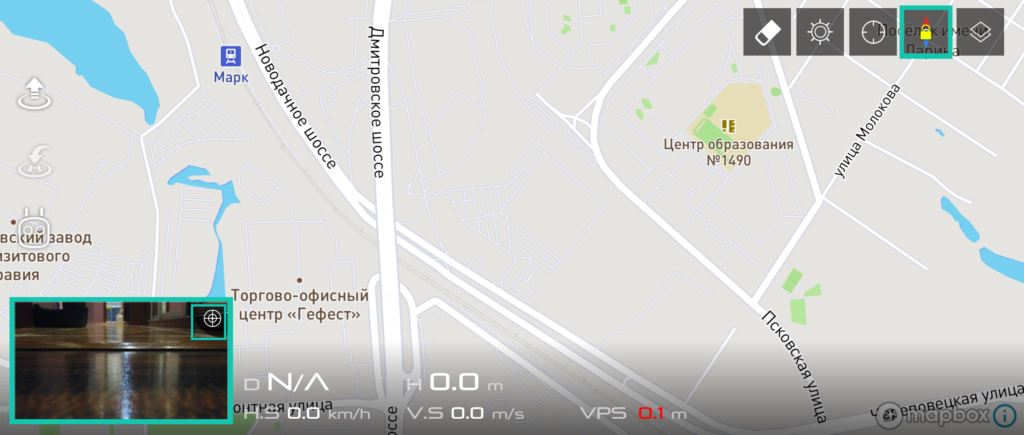
Map
Tap the square window at the bottom left of the main flight screen to switch the map to full screen mode. In this case, the image from the drone camera will move to a square window and take place in the lower left corner of the main screen. To switch to first person mode, tap on the window in the lower left corner of the main screen. In the full-size map mode, the following settings become available in the upper right corner:
Map display modes
Available three map display options:
- Standard = displays an illustrative map with names of streets, highways, etc.
- Hybrid = displays a combination of two maps - illustrative with the names of streets and highways, on top of which a satellite image will be overlaid.
- Satellite = Displays the map as satellite images without names of streets, highways, etc.

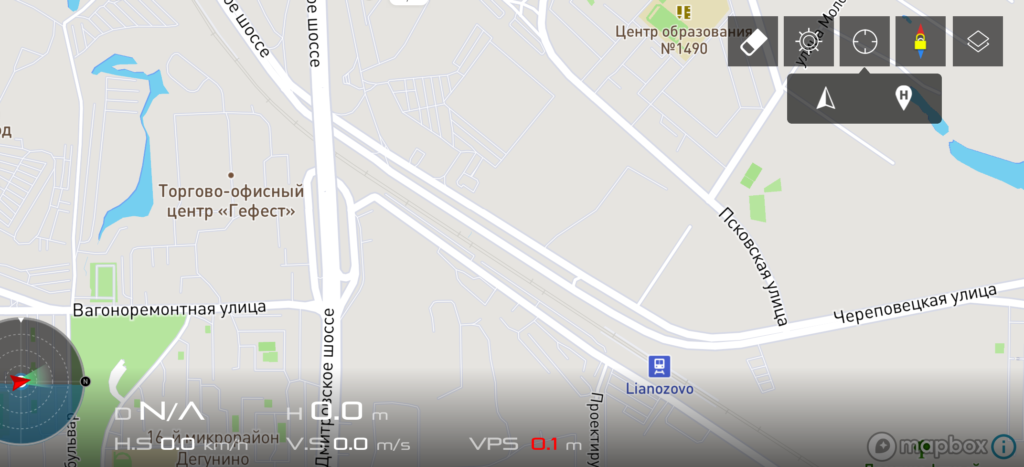
Compass
Compass - tapping on it will orient the map so that the North ”Was directed upwards. Also notice the upper right corner of the window in the lower left that displays the first person view. By tapping the crosshair icon, you can switch this window to compass mode and back to FPV mode. This mode shows where the drone is directed relative to the north, and thus can help you navigate in control.
Center Map
Center Map - by tapping on it, you can center the map both relative to the takeoff location (
) and relative to the current location of your drone (
).
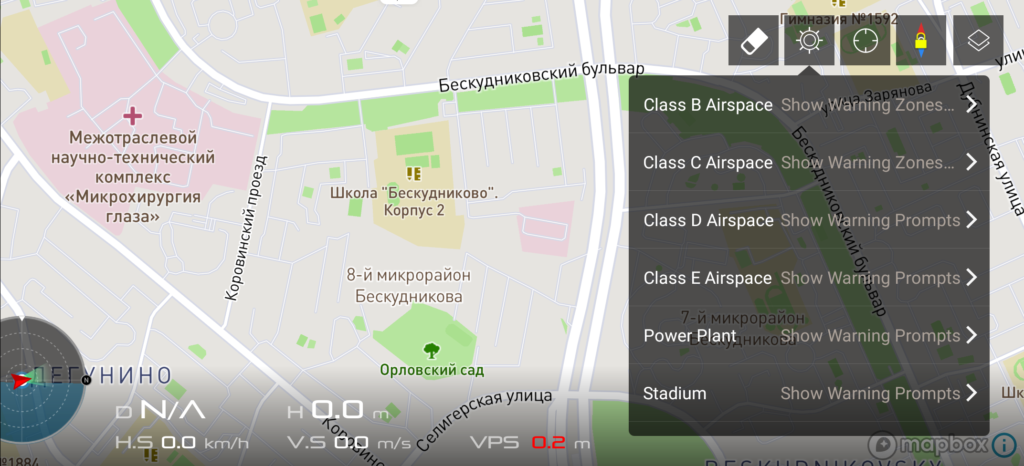
NFZ
No Fly Zone - the menu allows you to display on the map the zones in which the flight is limited or completely prohibited.
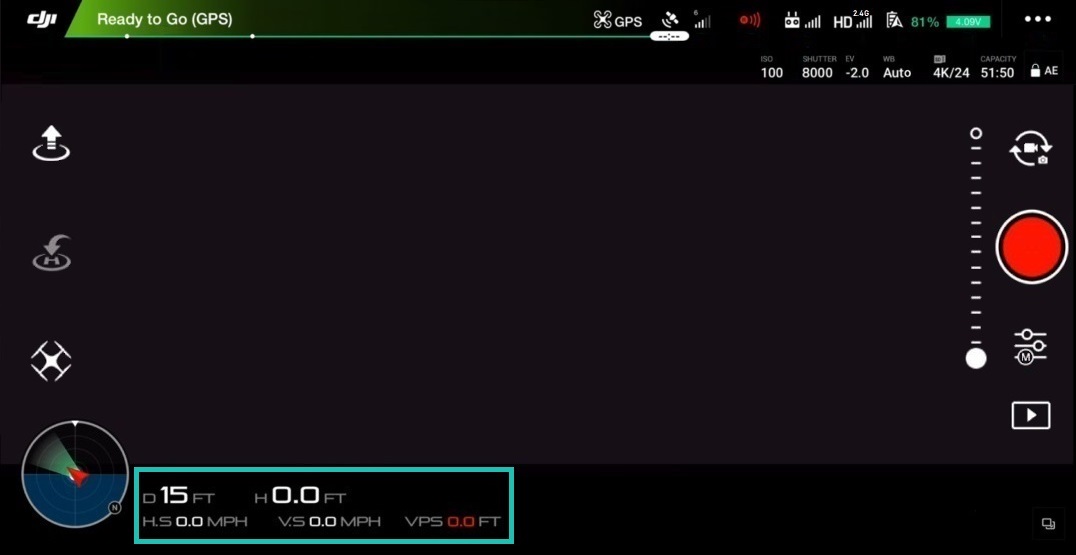
Telemetry
Telemetry is a two-way broadcast of flight data that is reflected on the display of a paired smartphone / remote control...
- D = The current distance from the aircraft to the controller.
- H = current altitude relative to take-off point.
- H. S. = horizontal flight speed of the drone.
- V. S. = The vertical speed of the drone, which informs the pilot of how fast or slow he is climbing or descending.
- VPS = Distance to the ground as determined by the aircraft's lower sensor system. This information is especially relevant when there is no satellite positioning.
Conclusion
We think this was our longest review. We hope that this information was clear and useful for you, after reading which you will confidently and fully use the full potential of DJI drones. If we missed something or need to explain something in more detail, please leave your comment below and we will try to help you. Thank you for your attention.
.